Easy Chocoflan Cupcakes [Recipe]
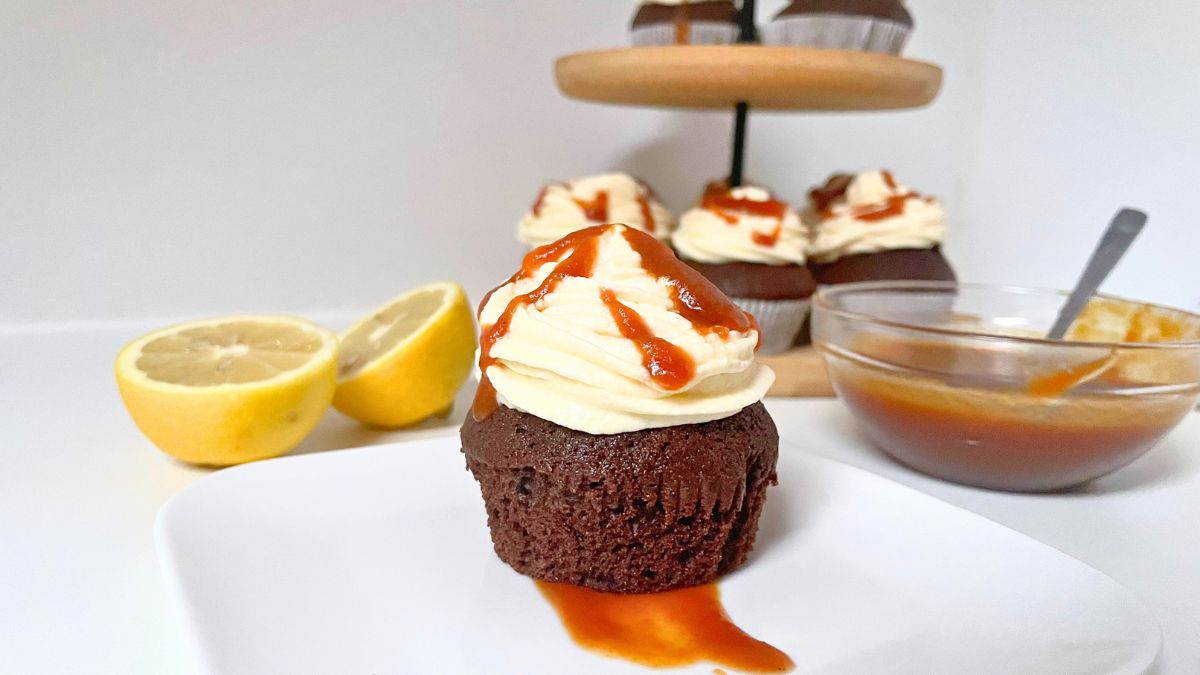
I have never tried or made chocoflan cake and didn’t really know what it is. I did see it a few times on the shelves among the other cakes, but it didn’t capture my attention at all. That was before I knew the background story! Chocoflan is known as ‘impossible cake’ and I bet you want to read more about it! I didn’t make it the traditional way, but I took an easier road and made simpler chocoflan cupcakes.
The original chocoflan has three layers that switch places during baking! Yes, you read it right! It all comes down to physics – the top chocolate layer drops in the middle during baking because the ingredients produce the gas. It makes the cake light and airy, so it rises while the other, denser condensed milk-based layer sinks. So cool, right?
Now you get the idea why I opted for a shortcut. The taste didn’t disappoint, as well, as it’s so luxurious and special!
What Makes These Chocoflan Cupcakes Special?
For the chocolate cake layer, I used the exact same recipe as you would for the real chocoflan. It is light and full of air bubbles, but slightly crispy on top. The chemical reaction between baking soda, baking powder, and buttermilk makes it extra lightweight. The taste is super rich because it’s loaded with cocoa, and I added a bit of lemon zest to kick things up.
Instead of a traditional milky layer, I made Russian frosting out of condensed milk and butter. I must say, the taste is not 100% as the original, but it resembles. This buttercream is perfectly silky, flavorful, and abundant in vanilla. This was my first time making it and it turned out amazing! Also, I made the caramel from scratch and saved some for the next recipes!
How to Make Chocoflan Cupcakes?
The trickiest thing to make here is most definitely caramel. I had a few unsuccessful attempts to make it and find this one the best yet. It is undoubtedly the simplest one! Here are all the ingredients for this treat!
- Flour – All-purpose flour is a must here if you want those signature bubbles in the batter.
- Cocoa – Cocoa gives a rich chocolaty flavor.
- Baking powder – Baking powder adds up to the lightweight texture.
- Baking soda – The reaction between baking soda and buttermilk is responsible for the fluffiness.
- Sugar – Granulated sugar is a number-one option when it comes to choosing the right kind. You will need it for the batter, but most importantly, for the caramel. Any other kind won’t caramelize correctly.
- Heavy cream – I like to add heavy cream to the caramel and make it silky and easy to pour. It makes it particularly easy to handle!
- Buttermilk – Buttermilk is the chief ingredient, and I wouldn’t substitute it for anything else.
- Eggs – Eggs are there to keep the structure of the cupcakes.
- Oil – The original recipe calls for neutral-flavored oil, but I fancy olive oil with cocoa more, so I used that.
- Lemon zest – Lemon zest gives nice, distinct, citrusy flavors, smashing the rich tastes of chocolate and vanilla. You can switch it with orange, lime, or even tangerine.
- Vanilla – I used vanilla paste for both, the caramel, and the buttercream. Extract or bean will do the magic, as well.
- Butter – Quality butter is an important ingredient to make delicate and rich Russian buttercream.
- Condensed milk – Condensed milk and butter are the only two ingredients you need to make one of the best frostings you’ve ever tasted. Also, condensed milk is a staple in traditional chocoflan, so this one really resembles it!
Get ready for the mixing!
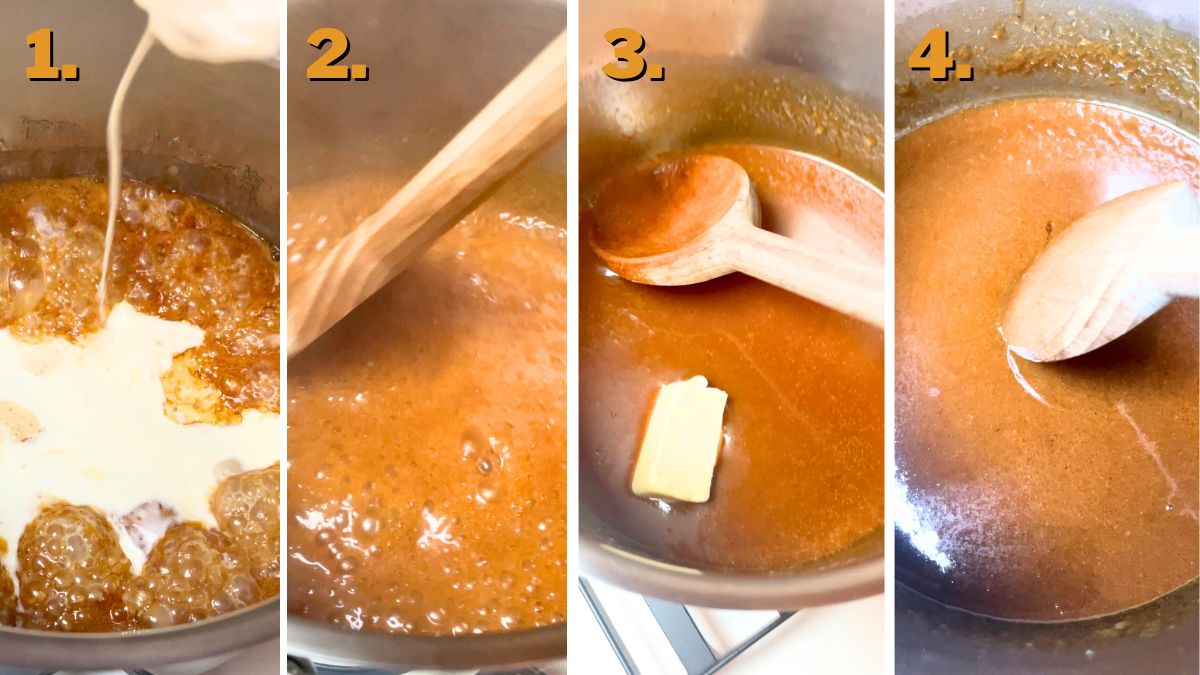
Step 1: Making the Caramel
The first step is making the caramel, so it can cool to room temperature while you’re preparing everything else. I recommend you – get a heavy-bottomed and light-colored pot, so it’s easier to determine how caramelized the sugar is. There are a few ways to make it, but this one works the best for me!
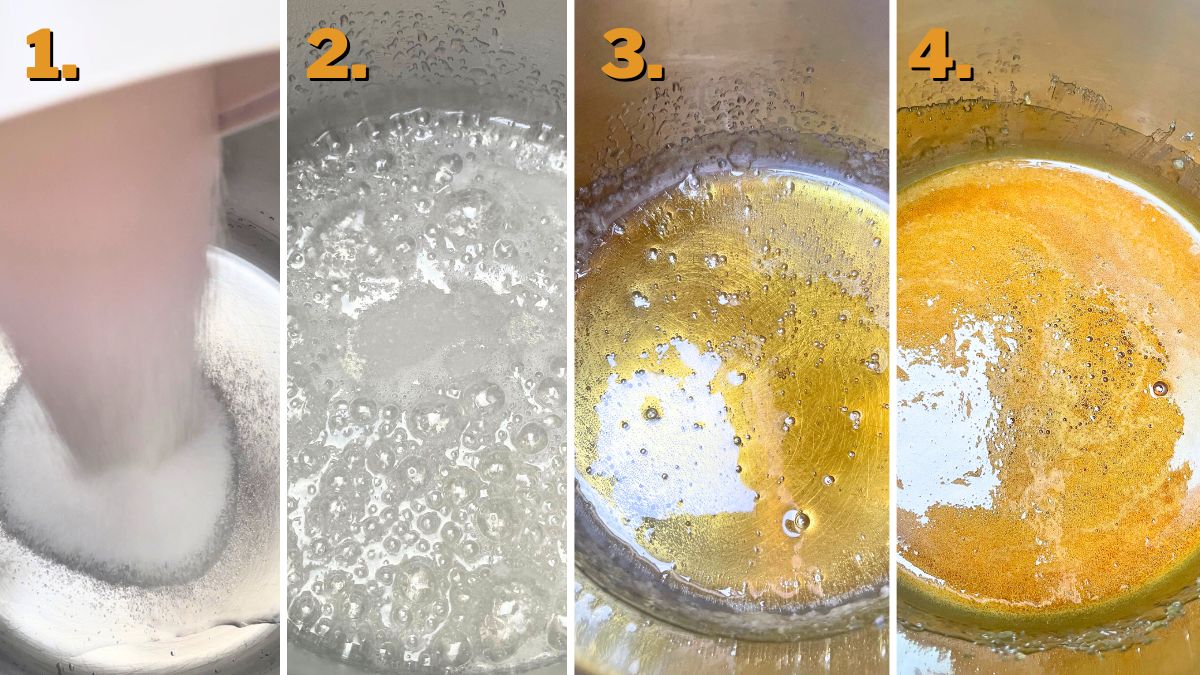
Heat the empty pot over medium temperature, and add just enough water to cover the bottom, that depends on how big your pot is. I used about a ¼ of a cup. The water will start to boil immediately, so pour the sugar straight in.
Don’t use any utensils to mix the sugar, but pot handles. Swirl the pot around to even the sugar and fuse it with water. Let the mixture simmer, and in a few short minutes, you will see bubbles appear which means sugar is starting to melt. From now on, it will become golden but not equally, so you need to swirl the pot often.
It is super prone to burning, so stay near the stove and you’ll be fine. If there are sugar crystals on the sides, scrape them carefully to melt. I like my caramel a bit darker, so I always go for a deep golden color of the sugar. You can remove it from the stovetop earlier, as soon as you’re satisfied with the shade.
Place the pot on the rack and cautiously pour in room-temperature heavy creamy. It will start to boil and foam, but that’s okay, the sugar is burning hot at that moment. Use a wooden spatula to whisk it in. Just for the heads up, the sugar will be dense in some places again, but that’s expected due to temperature differences.
Just keep mixing it and it will melt again, there is no need to get it back on the stove at all. When everything is smooth, add some butter and vanilla paste. Combine once more, and transfer to another dish so that it can cool faster.
Step 2: Making Choco Layer
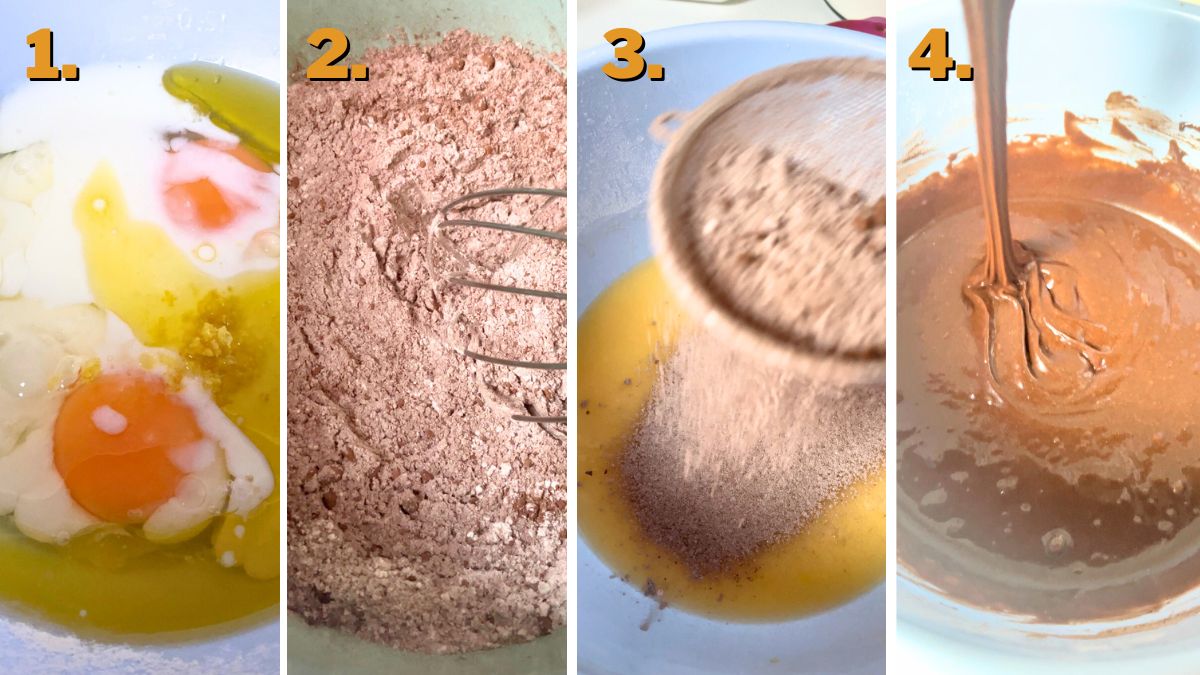
These are simple to make, but I would encourage you to use metric system measurements this time, as precision creates the needed chemical reaction.
So, as for any other cupcakes, separating dry and wet ingredients is essential.
In one bowl combine dry ingredients: flour, cocoa, baking soda, and baking powder. Set it aside and let’s get another bowl. There, combine all the wet ingredients: buttermilk, oil, eggs, and lemon zest. Whisk it to merry everything and add the sugar.
Whisk it a tad, until the sugar dissolves and sift in the dry mix in two portions. Incorporate dry ingredients so there are no lumps left, but don’t mix it vigorously as you want the batter to stay fluffy. The batter will be pretty dense, though.
Step 3: Baking the Cupcakes
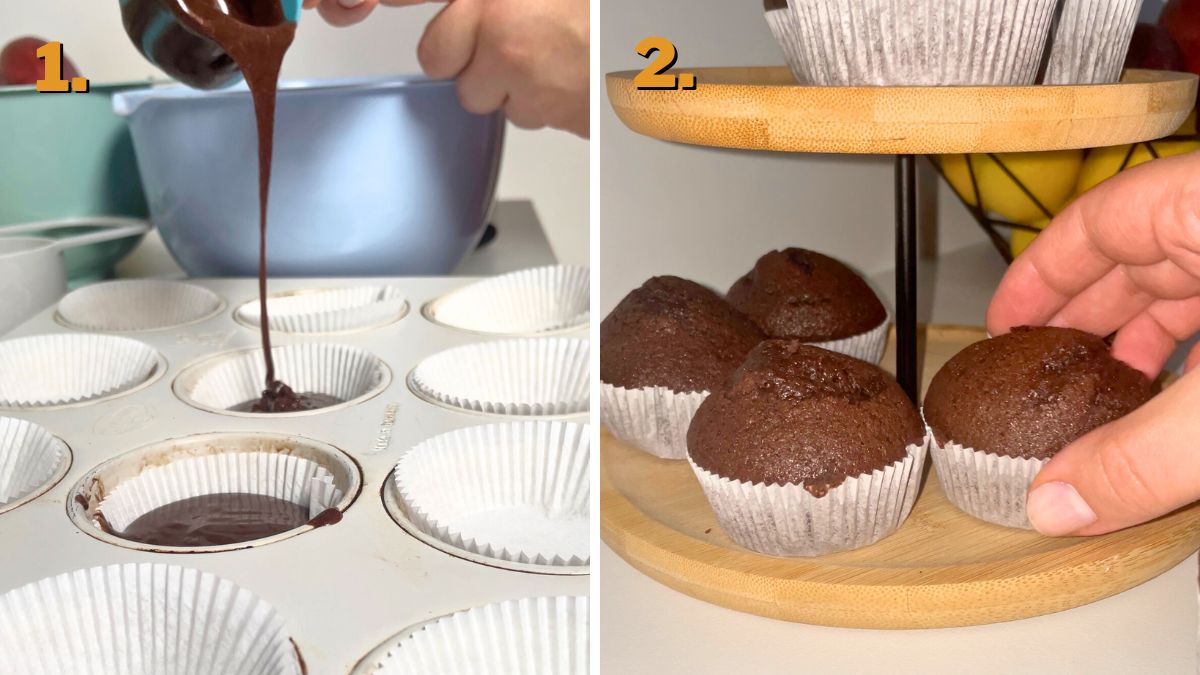
Turn your oven up, to 350 °F (180 °C), line the tin, and bake cupcakes for about 18 minutes. They will rise nicely, but still, check them with a toothpick. Remove them from the oven, transfer to the rack, and leave them to chill.
Step 4: Making the Flan Frosting
Get ready to mix! If you have a stand mixer, put it to use, if not, get someone to do it for you. 😀 Cube butter and place it in the mixing dish. Make sure it’s room temperature, but preferably slightly colder, that works the best!
Mixt the butter for about 10 to 15 minutes, until it’s pale and doubled in size. Now, dump in a can of condensed milk and mix again. It will quickly become silky and creamy. I like to taste it, so I can add a bit of confectioner’s sugar and vanilla if needed. I didn’t add either, as it was just enough sweet, and condensed milk already had vanilla in it.
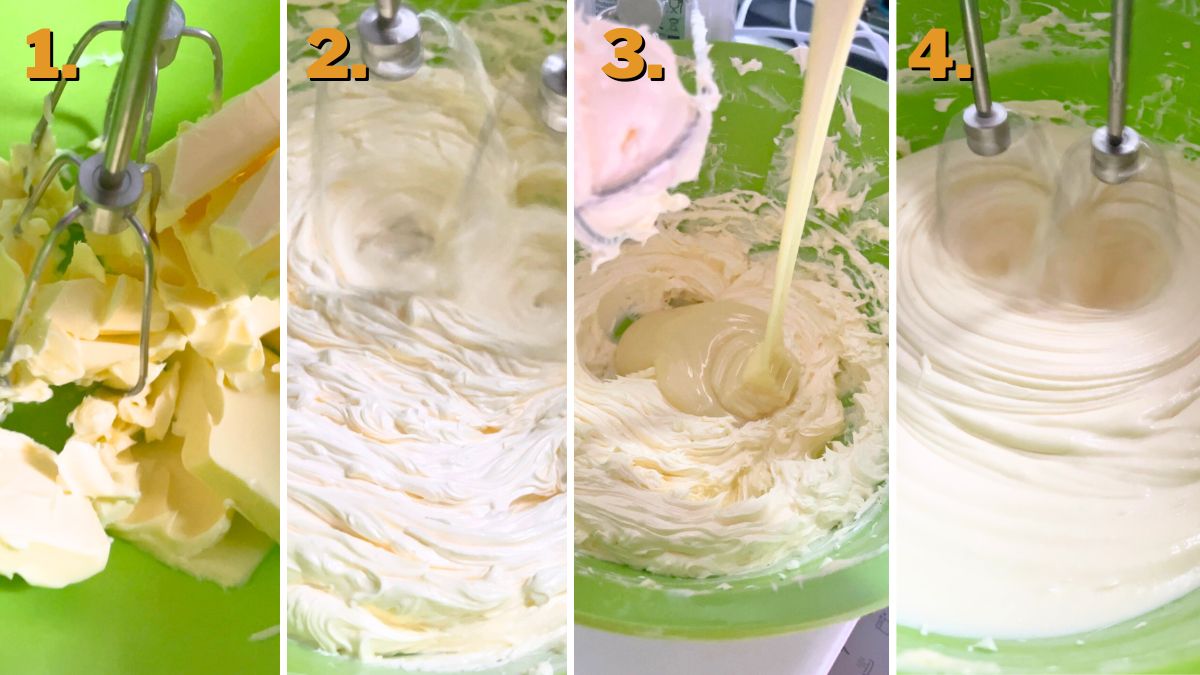
Tip: If your buttercream curdles, get it back in the fridge for about 15 minutes and mix again. It should be all set!
Step 5: Assembling the Cupcakes
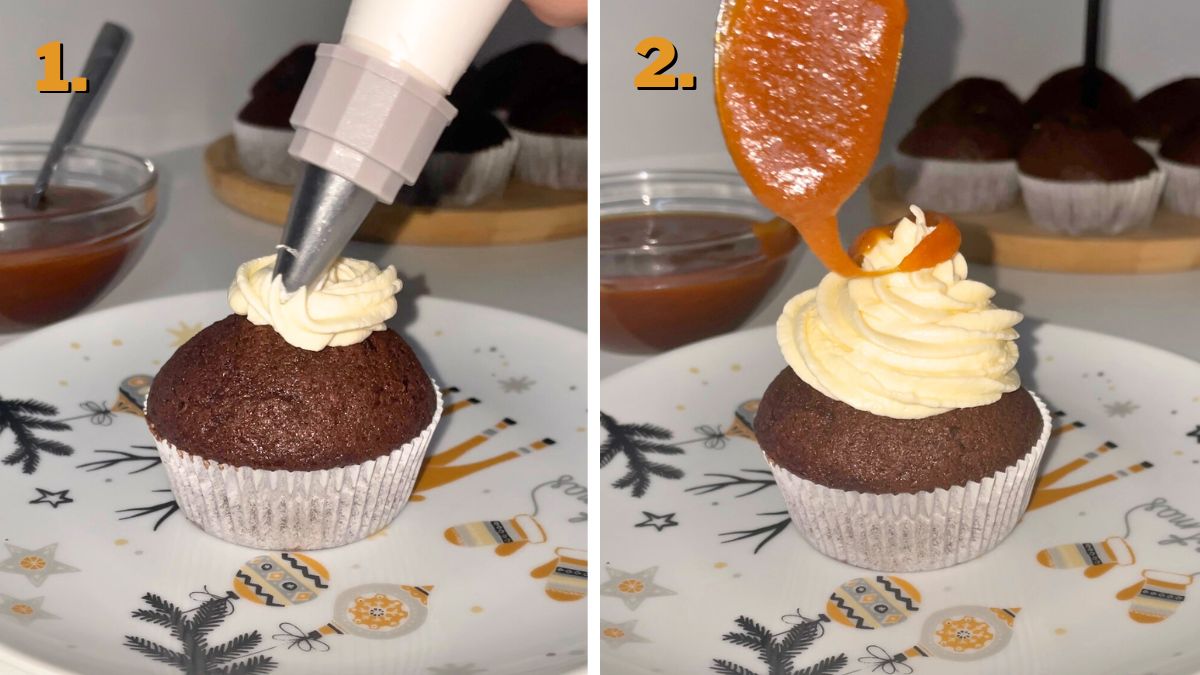
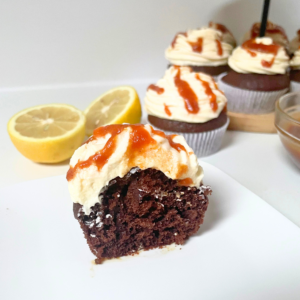
This is the easiest part, especially when you know the next step is eating. 😀 Frost the cupcakes, drizzle with caramel on top, and serve. The Russian cream will be perfect to pipe if you store it in the fridge for about 15 minutes before frosting. The cupcake is fluffy and lightweight, and the buttercream is rich and velvety! Enjoy!
How to Store Chocoflan Cupcakes?
Cupcakes will be fresh in the fridge for 4 days, or a day at room temperature. The best option to keep them is airtight containers. When it comes to caramel, you will undoubtedly have leftovers, so store it in a mason jar in the fridge. You can use it in some other recipes, or in coffee drinks! Also, caramel is freezer-friendly.
Chocoflan Cupcakes Recipe
Equipment
- 1 Mixer
Ingredients
Choco Cupcake Layer
- 4.2 oz all-purpose flour
- 1.4 oz cocoa
- ½ tsp baking soda
- ½ tsp baking powder
- ¼ tsp salt
- 2 eggs (at room temperature)
- 4.2 oz buttermilk (at room temperature)
- 1.4 oz olive oil
- 1 tsp lemon zest
- 6.4 oz granulated sugar
Flan Frosting
- 1 cup butter (at room temperature)
- 14 oz condensed milk (That's one can.)
Caramel
- 3.2 oz granulated sugar
- ¼ cup water
- 3.4 oz heavy cream
- 2 tsp butter
- 1 tsp vanilla paste
Instructions
Making the Caramel
- Heat the empty pot over medium temperature, and add just enough water to cover the bottom, about ¼ of a cup. The water will start to boil immediately, so pour the sugar straight in.
- Swirl the pot around to even the sugar and fuse it with water. Let the mixture simmer, and in a few short minutes, you will see bubbles appear which means sugar is starting to melt. It will become golden but not equally, so you need to swirl the pot often.
- When the sugar is golden, remove the pot from the stove. Cautiously pour in room-temperature heavy creamy. It will start to boil and foam. Use a wooden spatula to whisk it in.
- The sugar will be dense in some places again. Just keep mixing it and it will melt again. When everything is smooth, add some butter and vanilla paste. Combine once more, and transfer to another dish so that it can cool faster.
Making Choco Layer
- In one bowl combine dry ingredients: flour, cocoa, baking soda, and baking powder. Set it aside.
- Combine all the wet ingredients: buttermilk, oil, eggs, and lemon zest. Whisk it to merry everything and add the sugar. Whisk it a tad, until the sugar dissolves.
- Sift in the dry mix in two portions. Incorporate dry ingredients so there are no lumps left, but don’t mix it vigorously as you want the batter to stay fluffy.
Baking the Cupcakes
- Line the muffin tin. Bake the cupcakes at 350 °F (180 °C) for 18 minutes. Remove them from the oven, transfer to the rack, and leave them to chill.
Making the Flan Frosting
- Cube butter and place it in the mixing dish. Mix the butter for about 10 to 15 minutes, until it’s pale and doubled in size.
- Dump in a can of condensed milk and mix again. It will quickly become silky and creamy.
- Taste it and add powdered sugar and vanilla, if needed.
Assembling the Cupcakes
- Chill the Russian buttercream for about 15 minutes before frosting.
- Frost the cupcakes, drizzle with caramel on top, and serve.
Notes
Nutrition
Before diving into the nutritional details, please review our Nutritional Disclaimer page for important context and clarifications.
