Taylor Swift Inspired Dessert: Blank Space Cake [Recipe]

If you grew up Swiftie, this one is for you! If I’d been told as a kid, I’d be writing a REAL Taylor Swift-inspired article, I’d never believe them. I hope you can feel how thrilled I am for combining my two favorite things: desserts and music! In the name of celebrating release day for 1989 (Taylor’s Version), it’s only logical to make THE iconic Blank Space Cake!
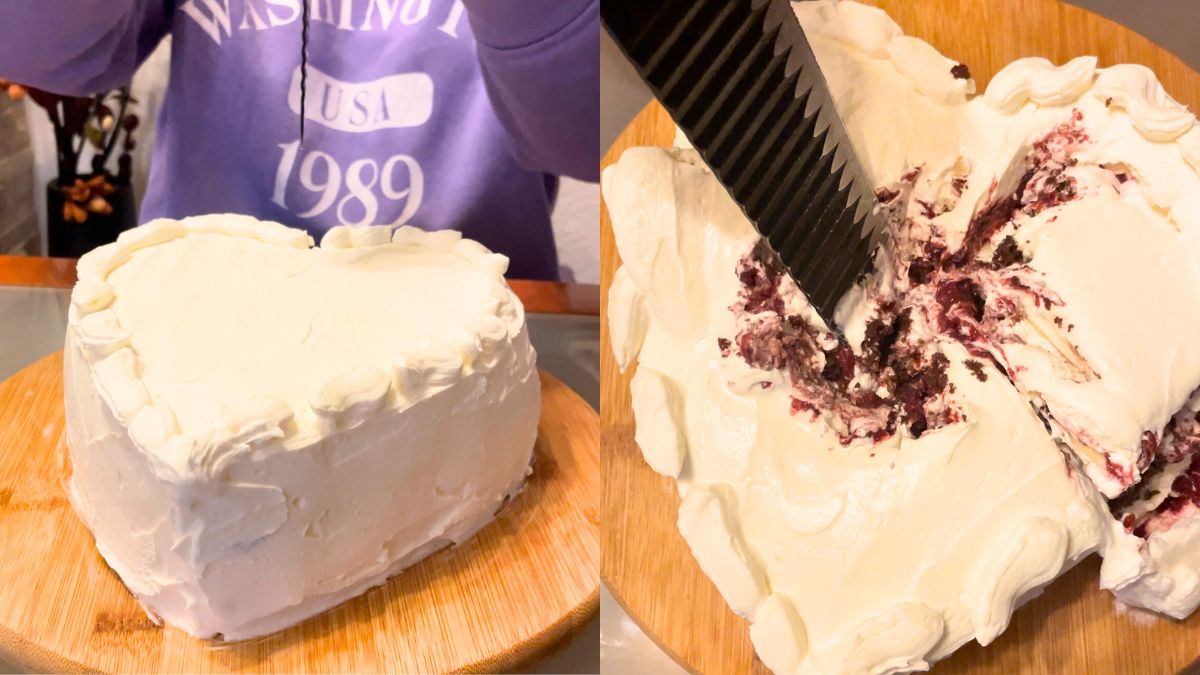
The cake looks super simple, heart-shaped with crisp white buttercream, but there is a fun catch to it, so if you didn’t see the video for the song, now is the right time. Thus, the point is to stab the cake (literally) and it will ‘bleed’ out like a broken heart. For the flavor, you can choose anything you fancy and I made it out of my favorite combo – cherries and dark chocolate.
What Makes Blank Space Cake Special?
I made a two-layer, heavenly chocolate cake with sour cherries and a splash of rum. I love rich cakes like this, where every layer is delicious separately, but together – a DELIGHT! I kept the sponge simple yogurt for the moistness and high-quality cocoa for the chocolaty feel. In the middle, I made dark chocolate ganache with two ingredients only and it’s the best ever.
Buttercream turned out amazing, silky, and easy to pipe, plus I added a splash of rum for the occasion. Now comes a special part, I shaped the cake as a heart and made cherry filling to act like blood. Of course, it has to be runny, so I needed something to hold it – buttercream on the edges and white chocolate on the top! When you stab a knife in the middle of the cake cherry filling will pour over. Amazing, right?!
How to Make Blank Space Cake?
I’m not going to lie; The Blank Space Cake requires an effort but it is so worth it! If you’re not the biggest Swiftie, you probably won’t celebrate the album release day or have it for a birthday, but it is a top-tier for all the singles on Valentine’s Day! Not all the cakes have to be romantic!
- Flour – I use all-purpose flour here, but you can go with cake flour, as well.
- Cocoa – High-quality cocoa is a staple! It deepens the flavor, giving the chocolaty relish, and deep, dark color.
- Baking powder – Baking powder is the only leavening agent to use here.
- Sugar – I use granulated sugar for the batter and powdered sugar for icing.
- Yogurt – To dilute the mixture, I chose yogurt, because it keeps the moisture in and offers a bit of the tang.
- Oil – I prefer vegetable oil over butter in sponge cakes. It won’t make the cake fudgy, but airy and just a tad crumbly.
- Water – Adding a splash of boiling water will make cacao flavors bloom.
- Heavy cream – I use heavy cream for ganache and buttercream. It helps to achieve the silky texture of both.
- Chocolate – I LOVE dark chocolate, so I used that for the ganache. If you fancy any other, be free to use it. Also, I opted for white chocolate to shape a heart for topping the cherry filling, so it’s easier to decorate the cake.
- Cherries – Cherries merry impeccably with the chocolate, plus the color is right on the spot! If you see the sauce is too runny, dilute some instant cherry pudding powder to dense it a tad. But, no more than a teaspoon!
- Butter – Of course, butter is inevitable in buttercream frosting. It makes it stable and flavorful! I like to use less butter than traditional frosting, though.
- Rum – I think rum fuses with chocolate and cherries fantastically. You can go for vanilla, as well, but this one is my favorite.
Hey Siri, play Blank Space to the max, and let’s bake the cake!
Step 1: Making the Batter
First and foremost, divide dry and wet ingredients into separate bowls. Combine flour, cocoa, sugar, baking powder, and a pinch of salt in one, and eggs, yogurt, oil, and boiling water in the other.
Now, add the dry mix to the wet one 2 spoons at a time and whisk until there are no flour lumps left. The consistency is similar to pancake batter, dense enough to hold a shape on top for a moment when you raise a whisk.
The key to the perfect cake is coating the springform pan thoroughly, so it can effortlessly slide out. Butter the pan, bottom, and sides, and dust it with flour. Pour in half of the batter and bake at 350 °F (180 °C) for about 20 minutes. Do the same with the other half, as well. Check the doneness with a toothpick and let them completely chill to room temperature.
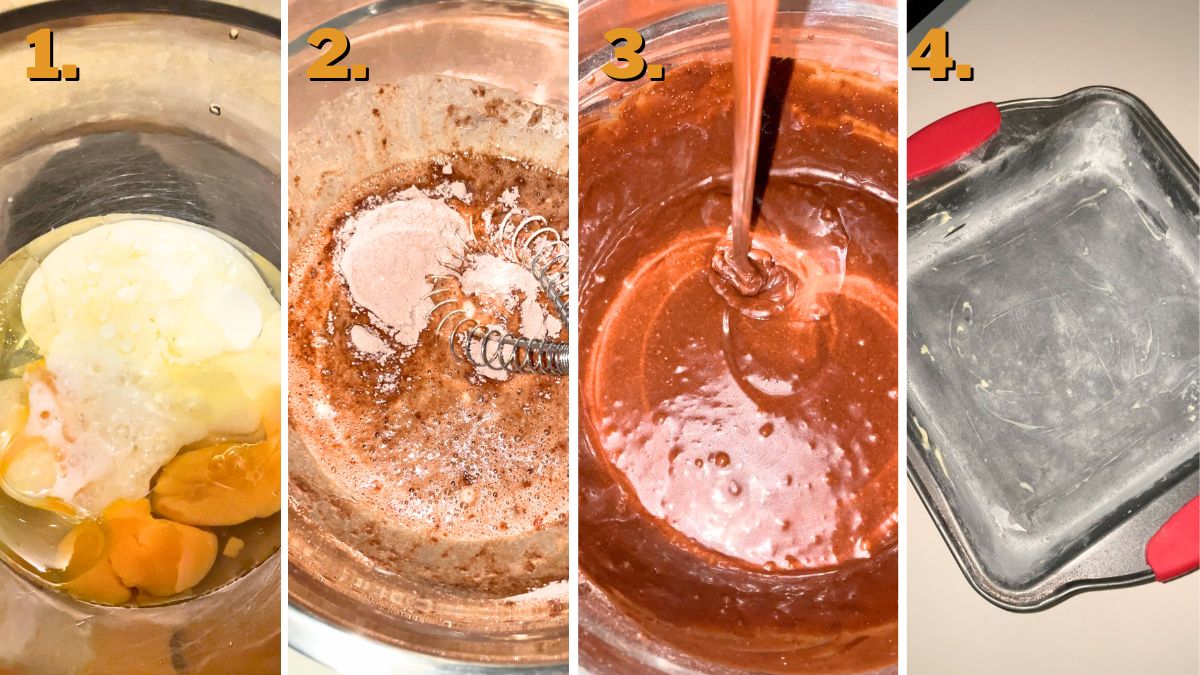
Note: I used a small square springform pan. If you want a bigger cake, double the quantity of the ingredients.
Step 2: Making the Ganache
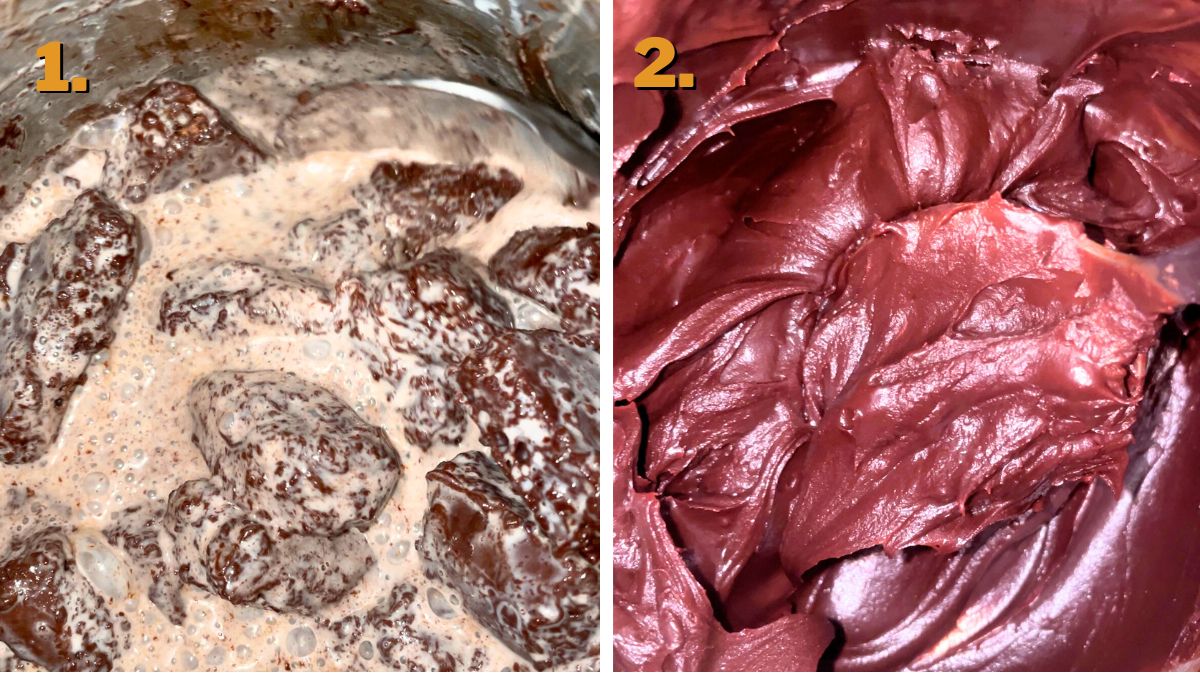
Bring the heavy cream just below boiling point and fuse with chopped dark chocolate in a 1:2 ratio. I find this consistency the best because it holds both layers of cake very well, but still, it’s not too thick. Let it cool completely before assembling the cake.
Step 3: Making the Cherry Filling
For this part, I blended the cherries because I was scared, they would be bumpy on top, and not splashing the way I wanted them. So, I just smoothed them out a bit, brought them to a simmer, and added a bit of instant cherry pudding powder to thicken them slightly.
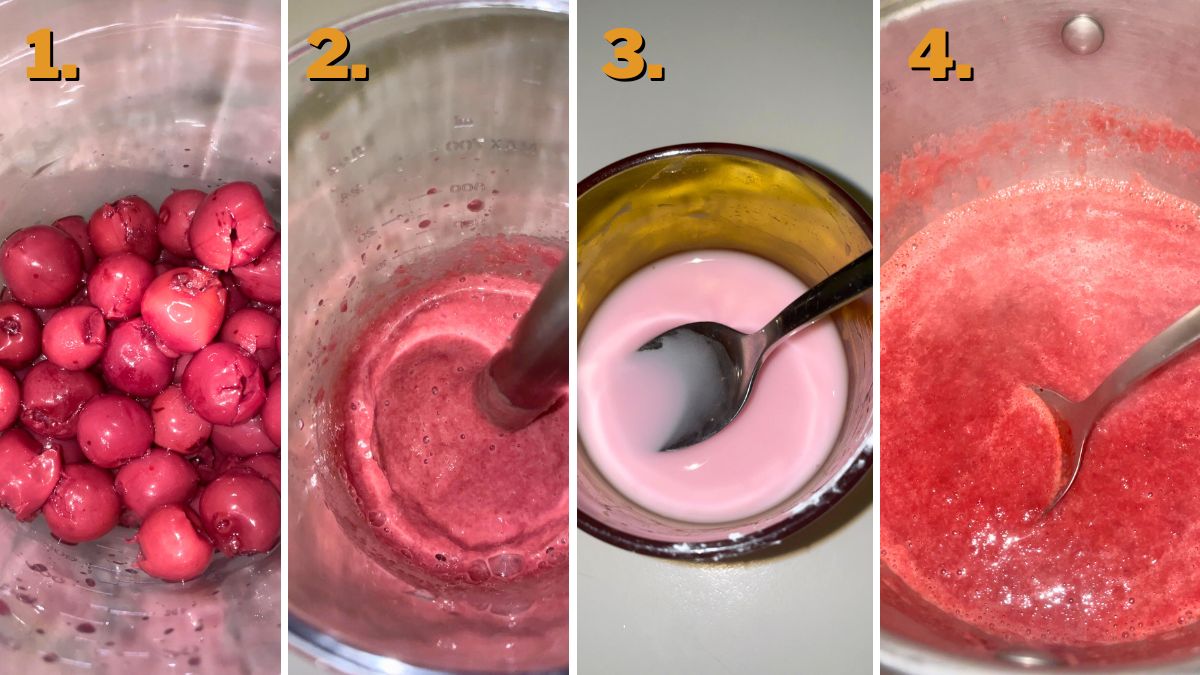
Leave it to cool completely, as well, just keep in mind that it has to stay runny.
Note: I choose to make the filling from scratch, but any store-bought red syrup will work as a charm, too.
Step 4: Making the Buttercream Frosting
Here, I didn’t stick to the traditional recipe for buttercream. It turned out superb, though. I mixed slightly softened butter at high speed for a bit, then incorporated confectioners’ sugar and a splash of rum.
Note: Don’t melt the butter or soften it too much, as the frosting will turn out too soft and you’ll have to wait for it to stiffen.
In another bowl, mix the heavy cream to stiff peaks and add it in 3 portions to the butter mixture. I use the mixer at low speed for this one. Also, taste the buttercream and add more sugar and rum, if needed. This depends on how sweet your heavy cream is.
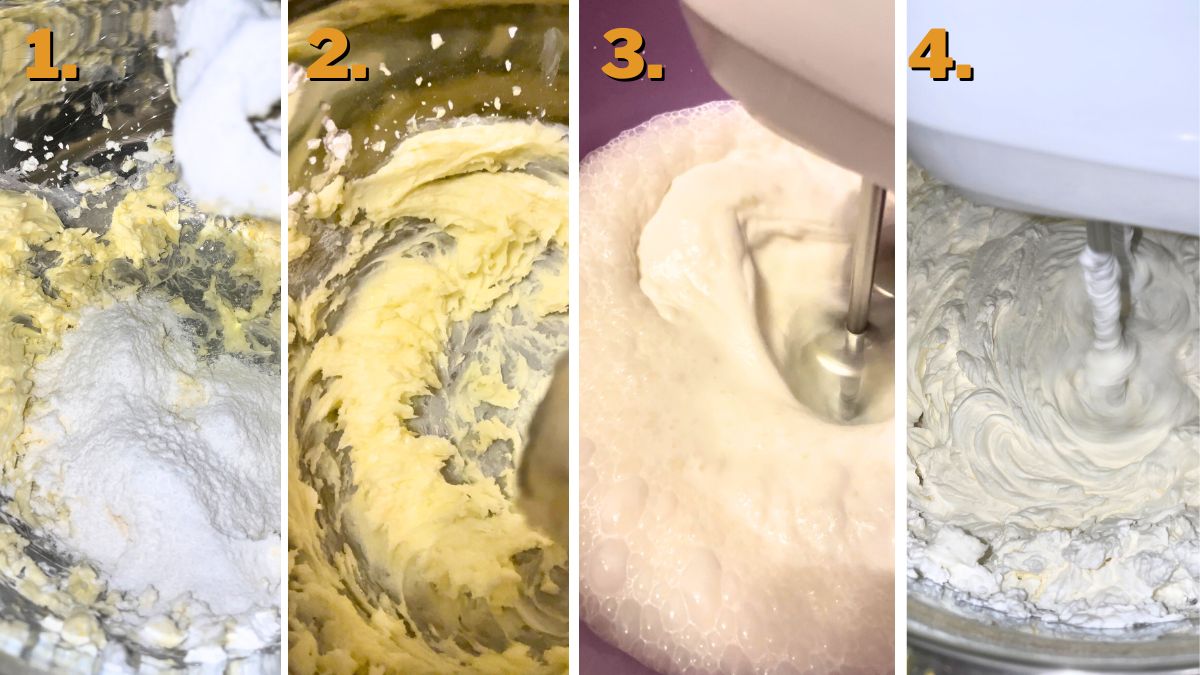
Store it in the fridge while you wait for the cake to cool off.
Step 5: Making the White Chocolate Layer
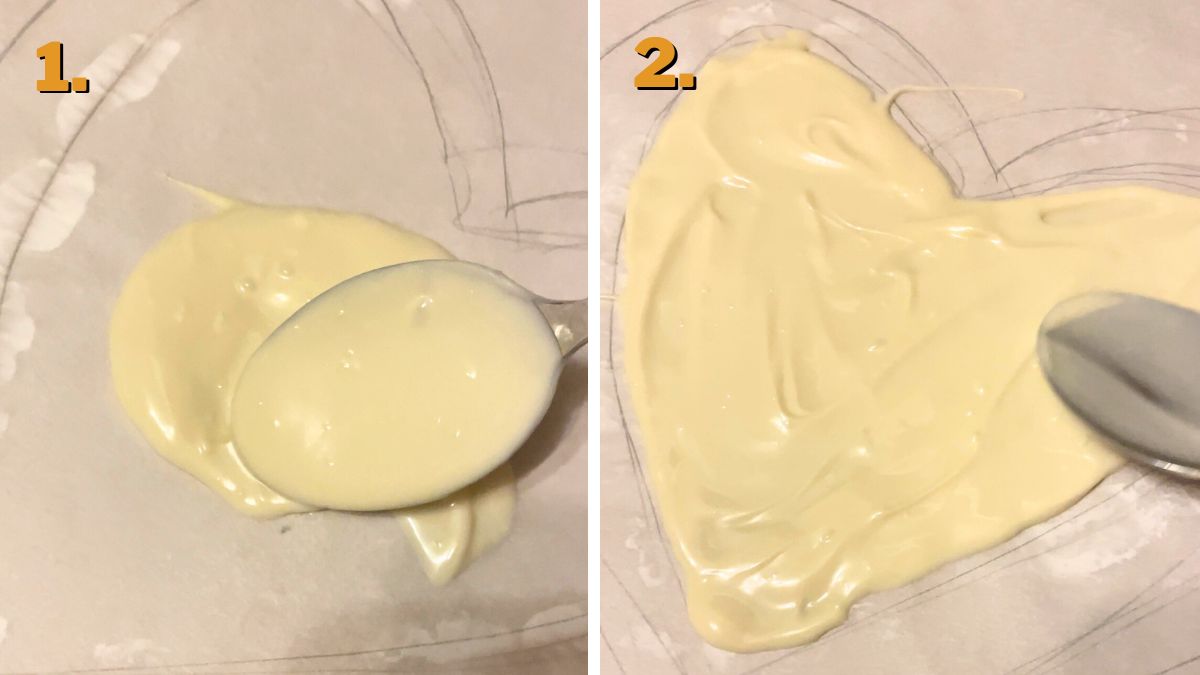
The white chocolate layer acts like a lid over the sour cherry filling so that the buttercream frosting can look neat. I draw a heart the size of the cake on the baking paper and fill it with a thin layer of melted chocolate, nothing else. Toss it in the freezer to stiffen while you work on the cake.
Step 6: Assembling the Cake
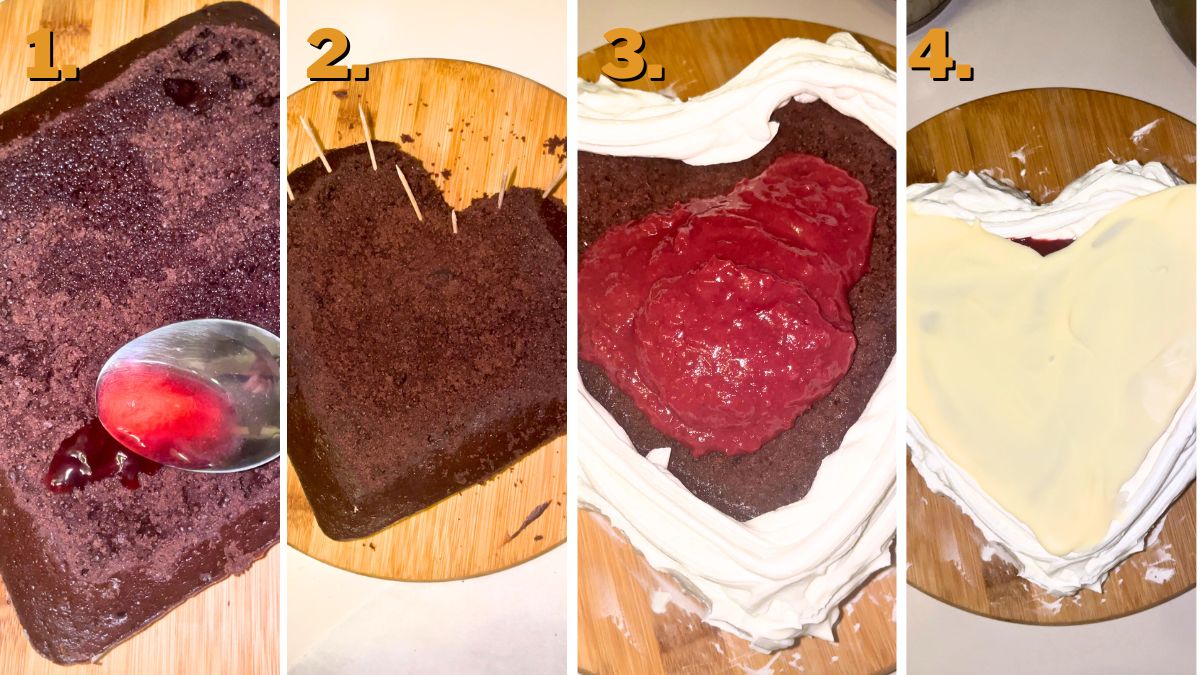
Place the first layer of the cake, level it with a knife, and pour a bit of sour cherry compote over it. I like it when it’s super moist, but it’s not necessary. Coat it well with chocolate ganache, and press the other cake layer.
Level this one, too, and let’s get on shaping the heart. I had the square-shaped springform pan in the right size, so I used that one. If you have a heart or round mold, do that instead. I bordered the heart shape with toothpicks and used a bread knife to cut it.
Clean the crumbs and coat the first layer of buttercream on the sides. On top, pipe the frosting around the edges to make a little pool for your cherry filling. Pour the filling on top and cover it with the white chocolate layer.
It will be able to slide off of the baking paper smoothly. Use the rest of the buttercream to coat the cake from all sides and top. I’m not an expert in smooth lines, so mine is a bit rustic. 🙂
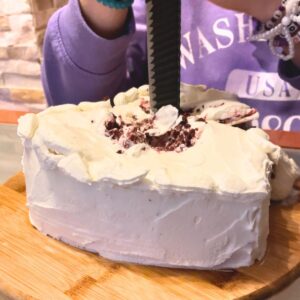
And that’s it! Leave the cake to stiffen a bit and it’s ready to eat. Just for the heads up, I cut mine straight from the fridge and it didn’t splash as much as I would want it. So, leave it at room temperature for 30 minutes before serving for more drama!
How to Store Blank Space Cake?
As with any other, keep the cake in the fridge for about 4 days. You can keep it under the cake cover or in airtight containers. Also, you can keep the slices separately, but they will be much more prone to drying than as a whole.
Taylor Swift Blank Space Cake
Equipment
- 1 Mixer
- 2 cake molds
Ingredients
Cake Batter
- 3 eggs
- ½ cup yogurt
- ⅖ cup oil
- ¼ cup boiling water
- 1 cup flour
- 1 cup sugar
- 6 tbsp cocoa
- 1 tbsp baking powder
Cherry Filling
- 7 oz cherries
- ½ cup compote
- 1 tsp instant cherry pudding
Chocolate Ganache
- 7 oz dark chocolate
- 3.5 oz heavy cream
White Chocolate Layer
- 3.5 oz white chocolate
Buttercream Frosting
- 3.5 oz butter
- 14 oz heavy cream
- 2 tsp rum
- 3.5 oz powdered sugar
Instructions
Making the Batter
- Divide dry and wet ingredients into separate bowls. Combine flour, cocoa, sugar, baking powder, and a pinch of salt in one, and eggs, yogurt, oil, and boiling water in the other. Now, add the dry mix to the wet one 2 spoons at a time and whisk until there are no flour lumps left.
- Butter the pan, bottom, and sides, and dust it with flour. Pour in half of the batter and bake at 350 °F (180 °C) for about 20 minutes. Do the same with the other half, as well. Check the doneness with a toothpick and let them completely chill to room temperature.
Making the Ganache
- Bring the heavy cream just below boiling point and fuse with chopped dark chocolate in a 1:2 ratio. Let it cool completely before assembling the cake.
Making the Cherry Filling
- Blend cherries and bring them to a simmer. Dilute instant cherry pudding powder in compote. Add it to the pot and stir. Remove from the stove after 30 seconds. Leave it to cool completely, as well, just keep in mind that it has to stay runny.
Making the Buttercream Frosting
- Mix slightly softened butter at high speed for a bit, then incorporate confectioners’ sugar and a splash of rum.
- In another bowl, mix the heavy cream to stiff peaks and add it in 3 portions to the butter mixture. Use the mixer at low speed for this one. Store it in the fridge while you wait for the cake to cool off.
Making the White Chocolate Layer
- Draw a heart the size of the cake on the baking paper and fill it with a thin layer of melted chocolate, nothing else. Toss it in the freezer to stiffen while you work on the cake.
Assembling the Cake
- Place the first layer of the cake, level it with a knife, and pour a bit of sour cherry compote over it.
- Coat it well with chocolate ganache, and press the other cake layer. Level this one, too.
- Border the heart shape with toothpicks and use a bread knife to cut it.
- Clean the crumbs and coat the first layer of buttercream on the sides.
- On top, pipe the frosting around the edges to make a little pool for your cherry filling. Pour the filling on top and cover it with the white chocolate layer. Use the rest of the buttercream to coat the cake from all sides and top.
- Leave the cake to stiffen a bit and it’s ready to eat. Leave the cake at room temperature for 30 minutes before serving for more drama and splash!
Notes
Before diving into the nutritional details, please review our Nutritional Disclaimer page for important context and clarifications.
