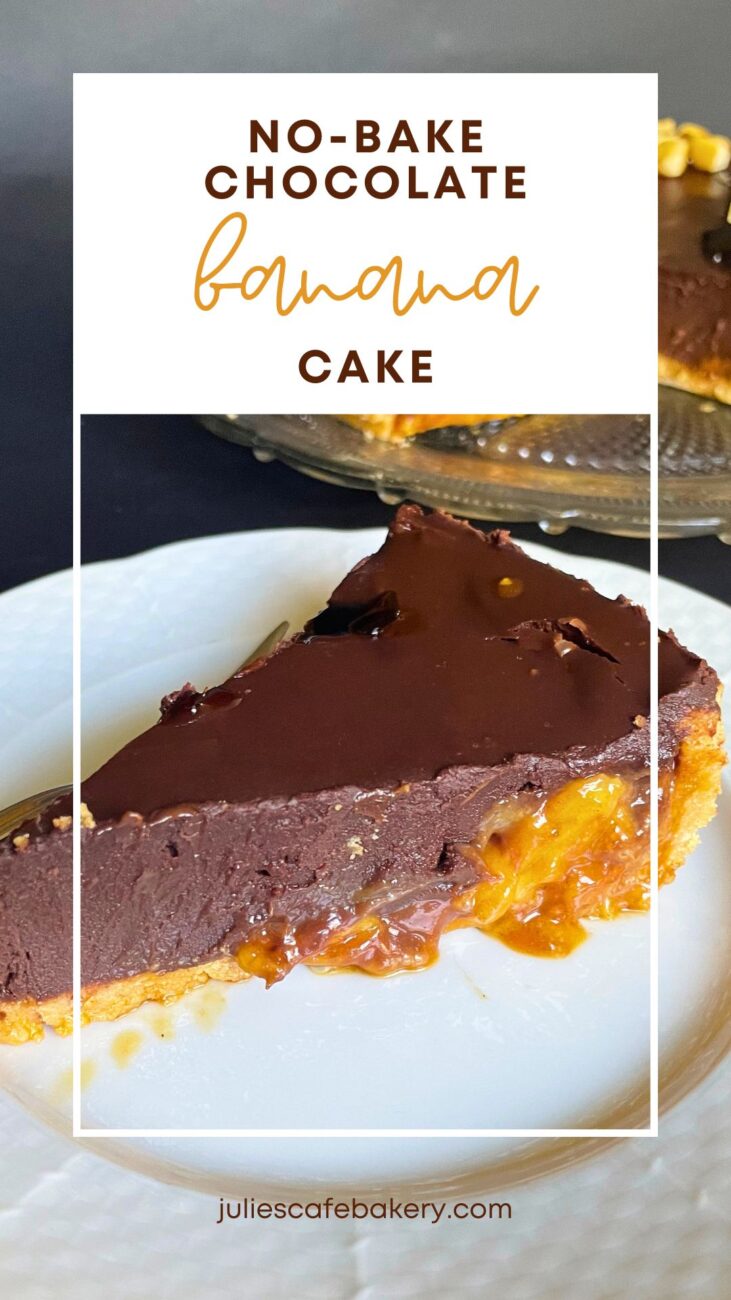
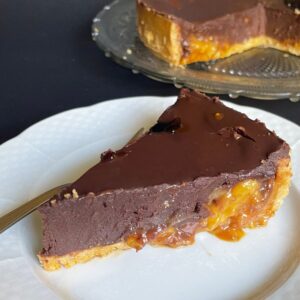
No Bake Chocolate Banana Cake [Family-Favorite Recipe]
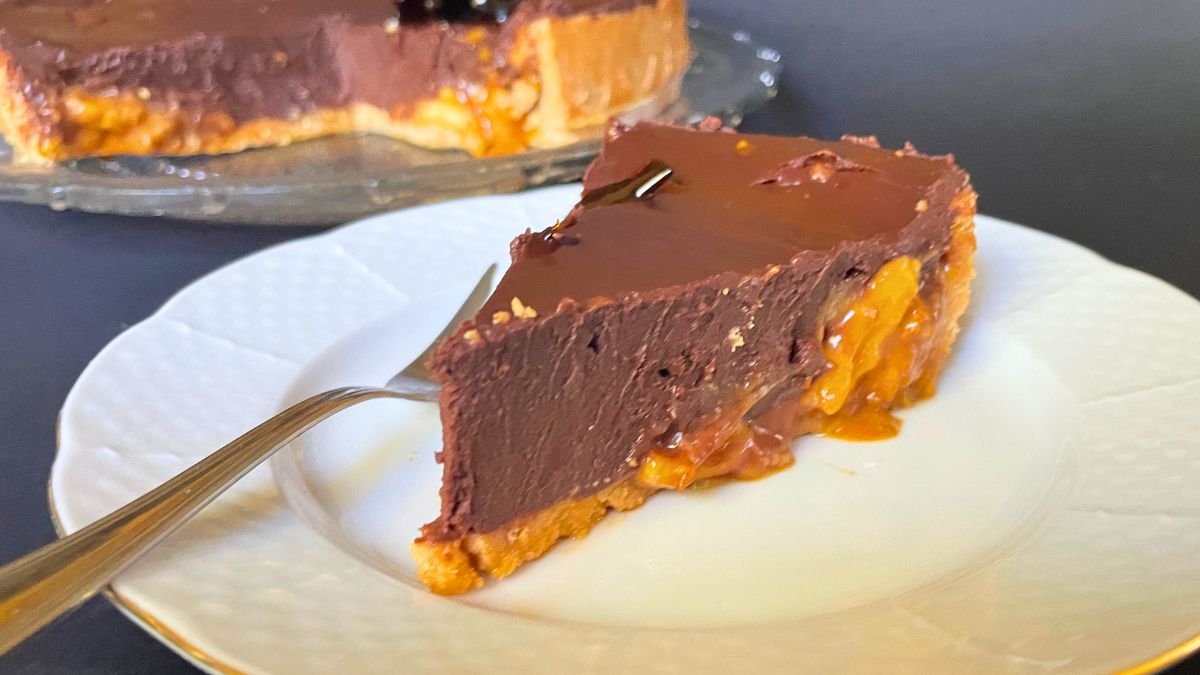
One thing is certain about me — I will always seek simple dessert recipes with minimum effort but maximum deliciousness. A lovechild of chocolate fudge and banoffee pie with graham crackers’ crust — this cake will blow your mind! I assembled it with my favorite parts of popular desserts, so this no-bake chocolate banana cake is in the top 3 I’ve ever tasted!
Baking is half science and half love — and I fancy both. Hence, it’s no wonder I adore playing with different ingredients and pairing them to draw out the best of their flavors. Different textures enhance the relish, so I made this chocolate banana cake fudgy, caramelly, grainy, and a bit crunchy — it has it all!
What Makes This No Bake Chocolate Banana Cake Special?
The rich, fudgy, and silky-smooth chocolate layer is effortless to make. Believe it or not, I’ve been making it with two ingredients only, and it never disappoints. For a fancy touch, you can sprinkle a tad of sea salt; it will enhance both caramelly and chocolaty taste.
If you like banoffee pie, this one is for you! I made creamy caramel from scratch — with only two ingredients again, and combined it with bananas. This way, I got a slightly runny, caramelly, and sticky layer that marries impeccably with the fudge part. For the crust, I kept it simple — graham crackers only, just to add a bit of grainy texture and hold the cake in one place like a basket.
How to Make No Bake Chocolate Banana Cake?
There are three layers to this cake, and you make it chronologically, as nothing needs to chill in advance. Each layer has only a few ingredients, but the taste is extremely rich as they are all effective. Here’s everything you need!
- Graham crackers – Choose any brand you like; it doesn’t really matter; they will be blended anyway.
- Butter – The butter works as a binding agent for the crust.
- Milk – I added some milk, too, because I didn’t want the crust to turn out too greasy and strong.
- Bananas – Bananas are the star of this cake. I like to use semi-ripe ones, as they have just the right consistency – not too hard or soft.
- Sugar – Use regular white sugar to make the perfect caramel. I don’t use sugar in the crust, though, as it would be a tad sweet for my taste.
- Heavy cream – This is probably the most important ingredient here. I mix it with caramelized sugar to get spreadable caramel cream and with chocolate to get smooth ganache.
- Chocolate – I use two varieties: dark and milk chocolate, in a 1:1 ratio. I find this combo ideal, rich but not too sweet. If you don’t fancy a strong taste of cocoa, maybe reduce the quantity of dark chocolate, or simply use any you love the most.
Follow the steps below, and you’ll have the best cake on your table!
Step 1: Making the Crust
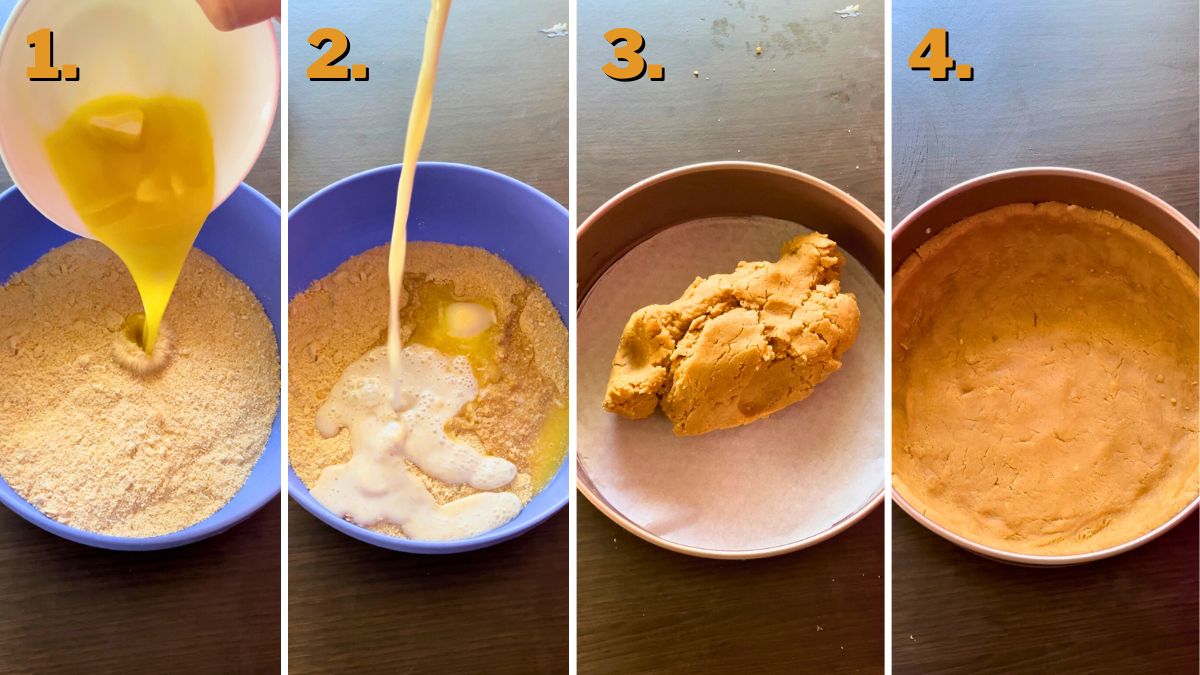
Start with blending graham crackers in a food processor. Pulsate it a few times until you get almost a powdery texture. Add melted butter and combine.
It will still be crumbly, so add some milk to achieve a texture similar to Play-Doh. It needs to be easy to shape but not stick to your fingers. I recommend you to merry everything by hand, so you can feel the texture and don’t end up adding too much liquid.
Transfer it to the springform pan and mold it on the edges, as well. I usually go about an inch up, so it can act like a little basket for filling. I always place the parchment paper on the bottom, so I can slide it off easily.
You don’t need to place the paper around the sides because the crust is greasy enough to detach trouble-free. You can always circle it in between with a thin knife, too. Place it in the fridge while working on the rest of the cake.
Step 2: Making the Banoffee
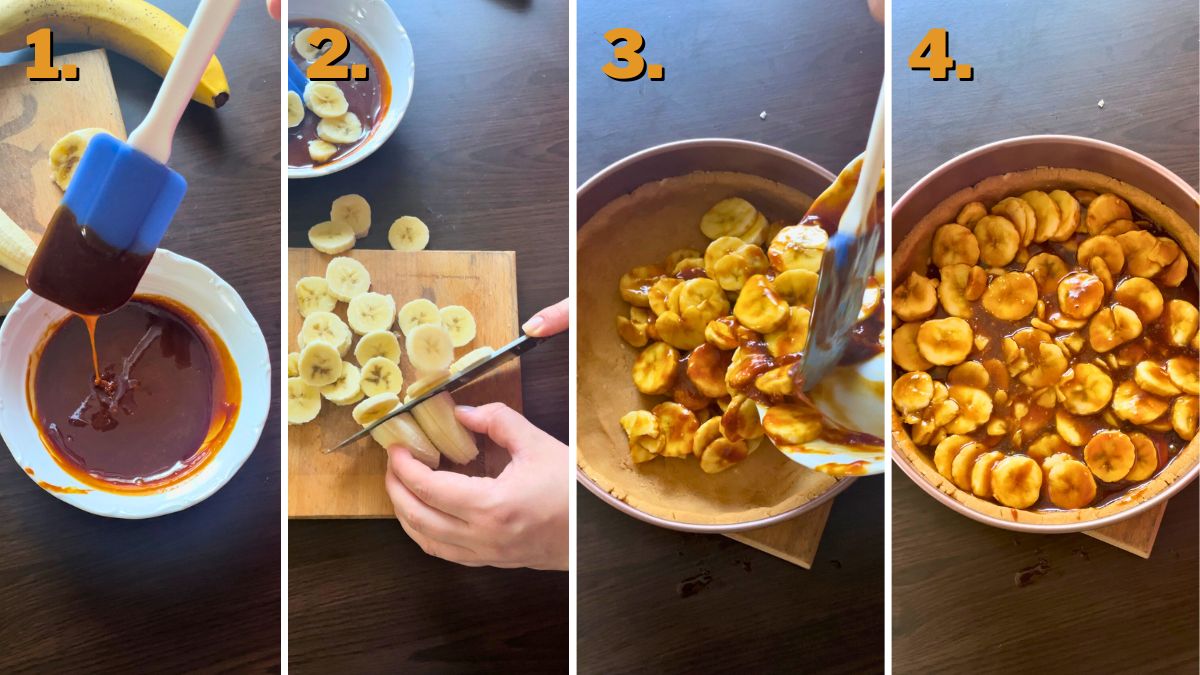
I have some good advice when it comes to making the caramel — all learned from my own mistakes. ☺ First, always choose heavy-bottomed pots that are light-colored inside. It is harder for sugar to burn if heated gradually in thick pots, and you can see the color clearly.
It’s a thin line between perfectly caramelized sugar and burned dark one. You’re going for a deep shade of gold. Let the sugar melt over medium heat — the bottom layer will turn to syrup, so just give it a stir to combine everything.
From the moment the sugar starts to melt to the finished product, it will take about 5 minutes. Now that all the sugar melted, it’s time to add heavy cream. The trick is to add room-temperature or slightly warmed cream because the caramel is burning hot, and it will definitely curdle if it’s cold.
It needs to be simmering constantly, and you can’t remove it from the stovetop when pouring heavy cream – it will curdle. At this point, the sugar will harden, like a big block of crystals, but that’s okay; just keep mixing. In a few seconds, you will notice the sugar starts to melt again.
Whisk it all the time while simmering until you’re satisfied with the consistency; it should be a bit runnier than the pancake batter. If the curdles still appear, don’t worry! Add a pinch of baking soda and mix vigorously — the chemical reaction will do the work for you.
When I first made it, I had so many curdles that soda couldn’t help. ☺ I just strained it, and it was okay but not ideal. Just follow those steps above, and you’ll get smooth, creamy caramel.
Just a little disclaimer: be very careful, as the melted sugar is hotter than any other boiling liquid. I recommend you use oven gloves on both hands if you’re a bit clumsy like I am. ☺
Leave the caramel to the side while you slice the bananas. Combine them until all the slices are coated in cream. Transfer them to the crust, even them with a spatula, and return them to the fridge.
Step 3: Making the Chocolate Ganache
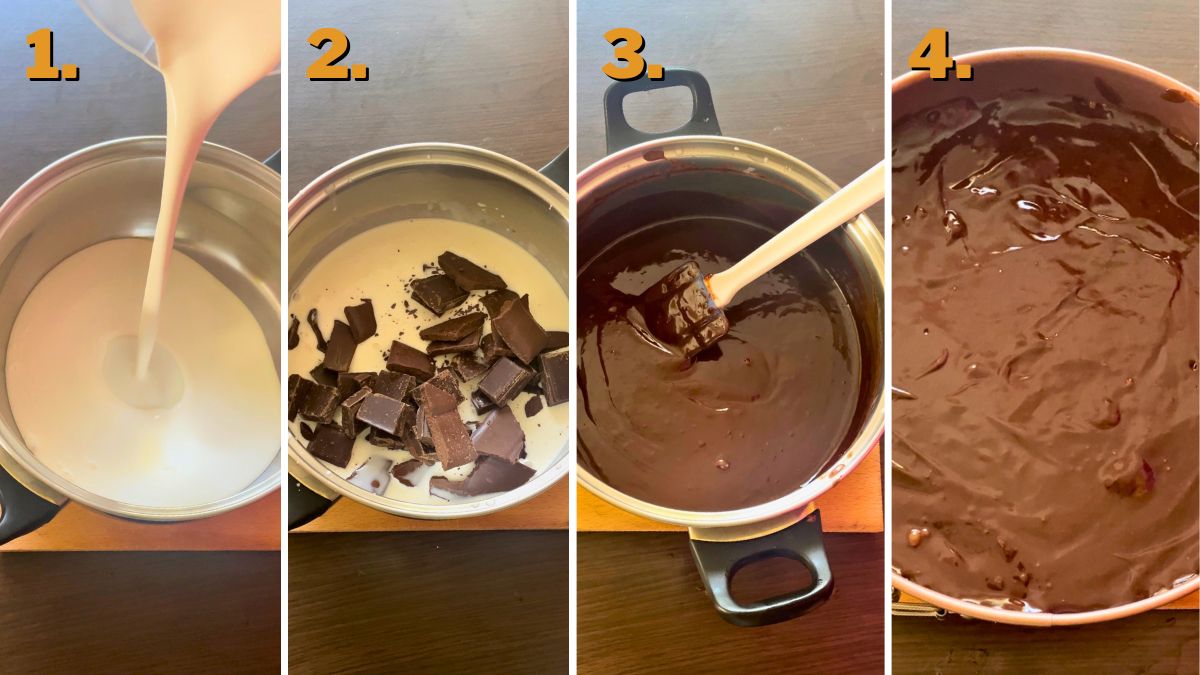
This is the simplest, yet the best, ganache, in my opinion. Bring the heavy cream just below boiling point and remove it from the stovetop. Add the fragmented chocolate and give it a whisk.
Leave it a few minutes and stir again; it should already be mostly melted. I like to mix it a bit longer to make sure everything is perfectly combined. The ganache should be silky without lumps of chocolate or white stains from heavy cream.
When it comes to an ideal ratio between chocolate and heavy cream, I usually go for 1:1. I like the spreadable, super creamy texture. This time I added more chocolate as I wanted it fudgy, but either is luscious.
You’re just left to pour the last layer over the cake. I poured it all at once because I forgot the caramel was not stiff, and the bananas slid to the sides. You work smarter and arrange the ganache with a spoon carefully.
Toss the cake back into the fridge for 4 hours minimum, and it’s ready to eat! Enjoy!
Recipe Alteration Ideas
I love experimenting, and that’s easy when you have a good base recipe – this one is it. If you don’t like the banoffee layer, try adding raspberries. Ditch the caramel and add a bit of instant pudding or starch to dense up the texture.
Also, I want to try this recipe with an orange layer instead, I think it will be perfect for winter. For white chocolate lovers – just replace it in the same ratio, and you’ll have a beautiful white cake. I would definitely pair it with coconut and almonds!
Do you have any ideas? What other combination you’re willing to try? I can’t wait to hear your ideas in the comments below!
No Bake Banana Chocolate Cake
Equipment
- 1 springform pan
- 2 heavy-bottomed pots
Ingredients
Crust
- 10.6 oz graham crackers
- 3.5 oz butter
- ¼ cup milk (or more if needed)
Banoffee Layer
- ⅚ cup heavy cream
- 1 cup sugar
- 2 bananas (large)
Chocolate Ganache
- 1¼ cups heavy cream
- 14 oz chocolate (7 oz dark chocolate + 7 oz milk chocolate)
Instructions
Making the Crust
- Blend graham crackers in a food processor. Add melted butter and combine.
- Add some milk to achieve a texture similar to Play-Doh. It needs to be easy to shape, but not stick to your fingers.
- Transfer it to the springform pan and mold it, on the edges, as well. I usually go about an inch up, so it can act like a little basket for filling. I always place the parchment paper on the bottom, so I can slide it off easily.
- Place it in the fridge while working on the rest of the cake.
Making the Banoffee
- Place sugar in a heavy-bottomed pot and let it melt over medium heat. The bottom layer will turn to syrup, so just give it a stir to combine everything.
- From the moment the sugar starts to melt to the finished product, it will take about 5 minutes. Now that all the sugar melted, it’s time to add heavy cream.
- Add room temperature or slightly warmed cream in the melted sugar. It needs to be simmering constantly and you can't remove it from the stovetop when pouring heavy cream.
- At this point, the sugar will harden, like a big block of crystals, but that’s okay, just keep mixing. In a few seconds, you will notice the sugar starts to melt again.
- Whisk it all the time while simmering until you’re satisfied with the consistency, it should be a bit runnier than the pancake batter.
- Leave the caramel to the side while you slice the bananas. Combine them until all the slices are coated in cream. Transfer them to the crust, even them with a spatula, and return back to the fridge.
Making the Chocolate Ganache
- Bring the heavy cream just below boiling point and remove it from the stovetop. Add the fragmented chocolate and give it a whisk.
- Leave it a few minutes and stir again, it should already be mostly melted. I like to mix it a bit longer to make sure everything is perfectly combined. The ganache should be silky without lumps of chocolate or white stains from heavy cream.
- Arrange the ganache with a spoon carefully and toss the cake back to the fridge for 4 hours minimum and it’s ready to eat! Enjoy!
Notes
Recipe Alteration Ideas
- Add some raspberries to freshen it up!
- Ditch the caramel and add a bit of instant pudding or starch to dense up the texture.
- Try this recipe with an orange layer instead.
- For white chocolate lovers – just replace it in the same ratio, and you’ll have a beautiful white cake. I would definitely pair it with coconut and almonds!
Before diving into the nutritional details, please review our Nutritional Disclaimer page for important context and clarifications.