Mexican Apple Pie Recipe: Here’s How To Make It
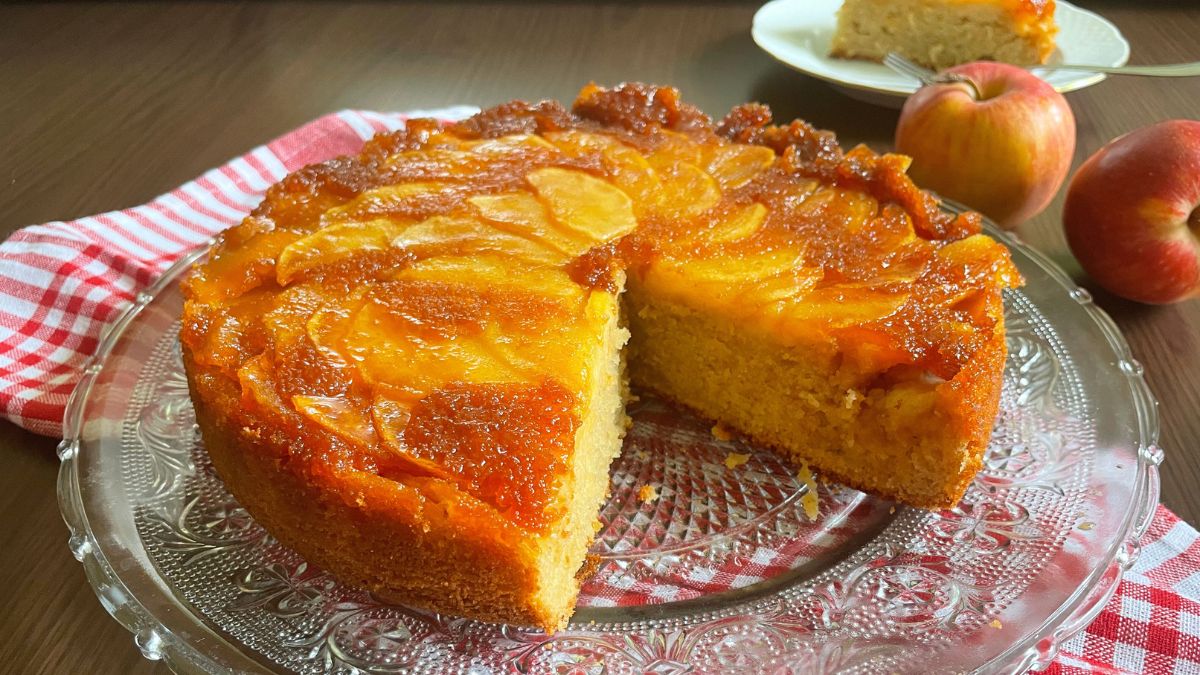

Nothing says fall more than the apple and cinnamon combo, and I love it everywhere: in pies, tarts, rolls, cakes, you name it! It is super simple to make and the taste is out-of-this-world. Mexican Apple Pie or Tarta de Manzanas will fast become one of your faves, it’s experience talking here!
I love the fact that you don’t have to knead or roll out any dough, so it’s more like a cake than a pie. To make it neat, I arranged the apples on the bottom only, so that it could have a perfect cross-section. I love to serve it with bourbon vanilla ice cream, to add a bit of freshness.
What Makes Mexican Apple Pie Special?
I have three secrets that make this pie outstanding. The first one is homemade caramel, which is simple to prepare and gives the glossy, golden finish, along with burned sugar relish (in a good way!) 😁 The second is apples in the batter, blended like apple sauce. Hence, it keeps the moisture and sponginess.
And last but not least, instant vanilla pudding for perfectly-textured pie. If you’ve ever read any of my cake recipes, you probably saw this trick, so you know how much I fancy it. Who would say that something so trivial can improve the overall taste and consistency in a moment, right?
How to Make Mexican Apple Pie?
Every ingredient on this list is probably already in your pantry. It’s an old, homey recipe that feels familiar and comforting. Here’s what to get ready!
- Flour – All-purpose or cake flour- either is great. I used cake flour this time and the difference is minor, and not worth mentioning.
- Instant pudding – Inevitably, I chose vanilla instant pudding to add some depth to the flavor. It improves the texture, making the batter spongy, airy, and moist, plus it’s super aromatic.
- Sugar – I used regular white sugar, for both pie and caramel. You can substitute it in the batter, but it’s the chief ingredient for the caramel.
- Cinnamon – Sprinkle some cinnamon to achieve warm relish.
- Butter – It’s crucial to smear butter all over the springform pan, so it can slip out perfectly.
- Oil – I usually mix oil in the batter to achieve sponginess.
- Eggs – Eggs bind ingredients together, keep the moisture, and enrich the taste.
- Milk – A splash of milk to dilute the batter and secure the silky texture.
- Vanilla extract – I always add a soupçon of vanilla for aroma only.
- Apples – I opted for Gala apples because of their sweetness. Plus, they are crisp enough to keep the shape after baking.
- Baking powder – Just a sprinkle of baking powder will make the cake spongy and not overwhelmingly moist. It will raise just a tad in the middle, but you can always press it by hand to even everything. I do that and it comes out perfect.
Let’s do some baking!
Step 1: Apple Slicing
Peel the apples and cut them in halves. Slice them thinly and submerge them in cold water. I always do this as it prevents the fruit from turning brownish. Also, cut a few apples into chunks and blend them into the sauce.
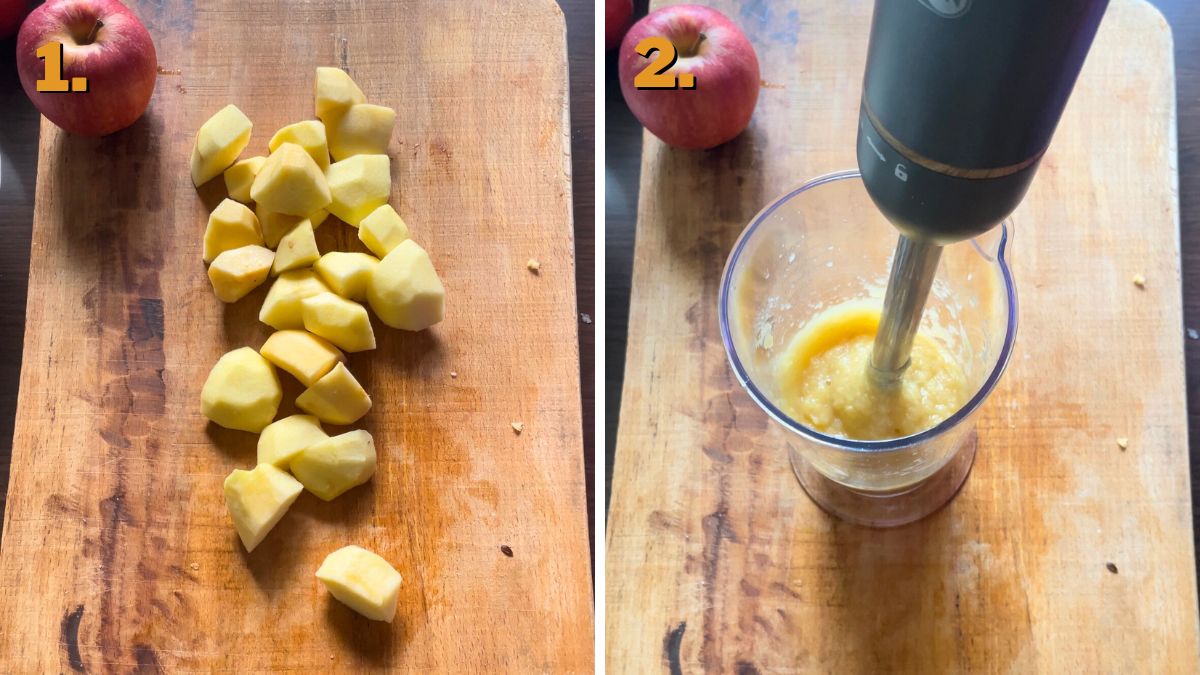
Leave all of this on the side, and let’s skip to the next step.
Step 2: Making the Batter
Start by dividing yolks from whites into two large bowls. I usually mix egg whites first into stiff peaks and leave them on the side while I prepare the rest. You can use a whisk, but I prefer a mixer to combine egg yolks and sugar, until pale yellow.
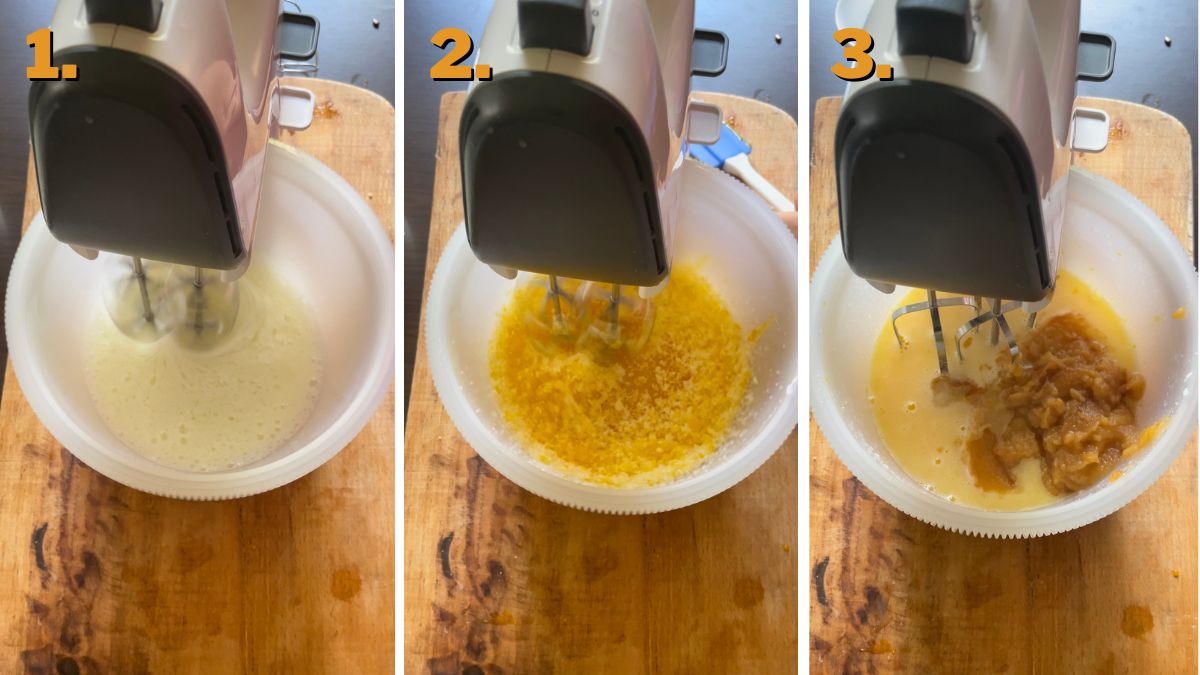
Now, pour oil, milk, apple sauce, and vanilla extract. It’s the moment to add all the dry ingredients: flour, instant vanilla pudding, and baking powder, but gradually, spoon by spoon. You can sift it, too, but it’s not mandatory, I like to do it, though.
Mix the batter until silky smooth and without clumps of flour. Also, don’t forget about egg whites – use silicone or wooden spatula to combine them, but be careful. The trick is not to overmix it, so the batter stays fluffy and airy.
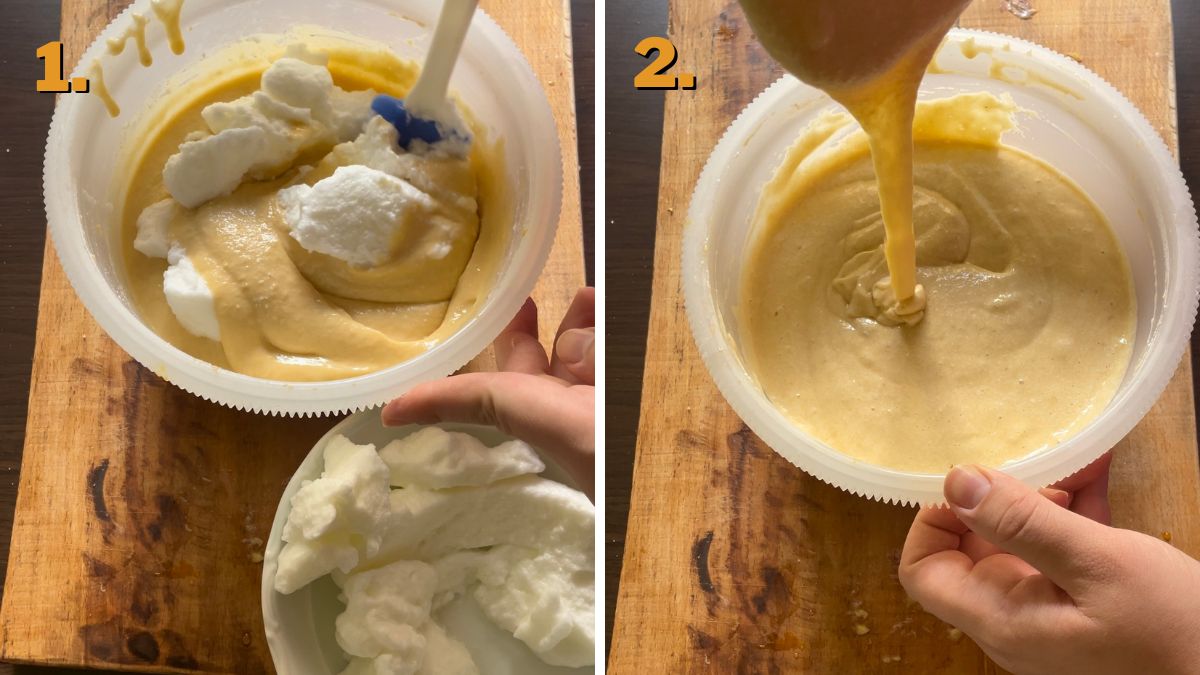
Let it rest while you prepare the caramel.
Step 3: Preparing the Caramel
You need to work with caramel really quick and that’s the only trick. I avoided making caramel on my own for so long because I thought it was time-consuming. Oh, had I been wrong! You only need about 2 minutes of active work altogether and that’s pretty much it.
So, take the heavy-bottomed pot and transfer the sugar in. It’s important for the pot to have a thicker bottom because sugar is very prone to burning and it will be easier to graduate the heat in a dish like that. Just place it over medium heat on the stovetop and forget about it for about 10 minutes.
That’s the time when the bottom layer of sugar will completely dissolve into a golden liquid. Stir it lightly with a silicone spatula, so the rest of the sugar can melt, as well. You have to be extremely careful because caramel is much hotter than boiling water, for example.
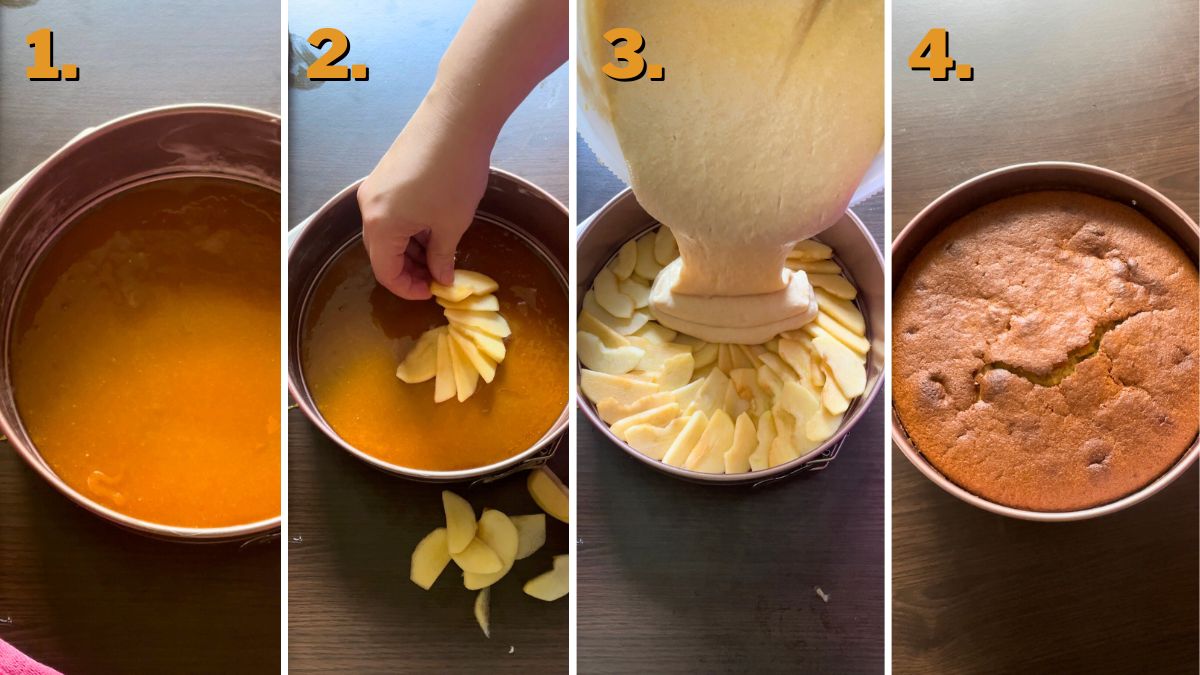
Stir in a bit of butter in the caramel and pour it directly into the springform. When you add butter, it will start to vigorously bubble, but that’s okay, just keep mixing. Also, don’t forget to cover the whole cake mold with butter, including the sides, so the cake can slide out effortlessly.
My favorite trick to spread caramel without fuss is heating the mold. Pouring hot caramel into a warm dish will secure the smooth coating.
Step 4: Arranging the Apples
Start from the middle and arrange the apples in a circle, slice by slice. Sometimes, if I’m in a rush I just drop all the apples on the bottom and even the top – it looks okay, though. Make sure to cover every inch of caramel with apples.
Sprinkle some cinnamon on top, as well. Now that you’re done with the fruit, pour all the batter over them. Shake the springform to burst airy bubbles and it’s ready to bake!
Step 5: Baking
Turn on your oven to 360 °F (180 °C) and bake the pie for about 50 minutes. Check it with a toothpick because it’s pretty thick and will need quite some time to bake properly. Take the pie out when there are just a few crumbs on a toothpick.
The pie will be moist, soft, and spongy, but still a bit fudgy because of the apple sauce in the batter.
Step 6: Serving
Here comes the fun part! Take a large plate or a cake stand place it on top of the springform pan and turn it upside down while it’s still hot. The cake will simply slide down, don’t worry. If you have concerns about that, you can use a thin knife and go between pie and pan all the way around.
Now, you only need to wait a bit to cool down. The best thing is – it’s scrumptious when warm!
How to Store Mexican Apple Pie?
This pie has some kind of coffee cake consistency, so it’s the key to keep the moisture in. I like to store it in airtight containers, but plastic wrap will do the work, too. I always store it in the fridge and it can last there without losing the quality for up to a week.
It will be good at room temperature for up to 3 days, but I avoid leaving it like that because of the eggs and milk in the batter. It can be frozen, as well, for up to 3 months swathed in plastic foil or zip-lock bags.
Mexican Apple Pie
Equipment
- 1 springform pan
- 1 heavy-bottomed pot
- 1 Mixer
Ingredients
- 1 ¾ cups flour (300 grams) (cake or all-purpose flour)
- 1 ¼ cups sugar
- 3 eggs
- 2 tsp baking powder
- 1 tbsp instant pudding (vanilla-flavored)
- ¾ cup oil
- ⅓ cup milk (+ 2 tbsp)
- 2 apples (Blended in apple sauce.)
- 1 tsp cinnamon
- 3 apples (Peeled and sliced – for topping.)
Caramel
- 1 cup sugar
- 1 tbsp butter
Instructions
Apple Slicing
- Peel the apples and cut them in halves. Slice them thinly and submerge them in cold water.
- Cut additional two apples into chunks and blend them into the sauce.
Making the Batter
- Divide yolks from whites into two large bowls.
- Mix egg whites first into stiff peaks and leave them on the side.
- Mix egg yolks with sugar until pale yellow. Pour oil, milk, apple sauce, and vanilla extract. Combine and sift all the dry ingredients: flour, instant vanilla pudding, and baking powder, but gradually, spoon by spoon.
- Mix the batter until silky smooth and without clumps of flour.
- Combine egg whites using a silicone or wooden spatula. The trick is not to overmix it, so the batter stays fluffy and airy.
Preparing the Caramel
- Take the heavy-bottomed pot and transfer the sugar in. Place it over medium heat on the stovetop and forget about it for about 10 minutes. The bottom layer of sugar will completely dissolve into a golden liquid. Stir it lightly with a silicone spatula, so the rest of the sugar can melt, as well.
- Stir in a bit of butter in the caramel and pour it directly into the springform. When you add butter, it will start to vigorously bubble, but that’s okay, just keep mixing. Also, don’t forget to cover the whole cake mold with butter, including the sides, so the cake can slide out effortlessly.
Arranging the Apples
- Start from the middle and arrange the apples in a circle, slice by slice. Make sure to cover every inch of caramel with apples.
- Sprinkle some cinnamon on top.
- Now that you’re done with the fruit, pour all the batter over them. Shake the springform to burst airy bubbles and it’s ready to bake!
Baking
- Turn on your oven to 360 °F (180 °C) and bake the pie for about 50 minutes. Check it with a toothpick because it’s pretty thick and will need quite a time to bake properly. Take the pie out when there are just a few crumbs on a toothpick.
Serving
- Take a large plate or a cake stand place it on top of the springform pan and turn it upside down while it’s still hot. The cake will simply slide down, don’t worry. If you have concerns about that, you can use a thin knife and go between pie and pan all the way around.
- Now, you only need to wait a bit to cool down. The best thing is – it’s scrumptious when warm!
Notes
How to Store Mexican Apple Pie?
This pie has some kind of coffee cake consistency, so it’s the key to keep the moisture in. I like to store it in airtight containers, but plastic wrap will do the work, too. I always store it in the fridge and it can last there without losing the quality for up to a week. It will be good at room temperature for up to 3 days, but I avoid leaving it like that because of the eggs and milk in the batter. It can be frozen, as well, for up to 3 months swathed in plastic foil or zip-lock bags.Before diving into the nutritional details, please review our Nutritional Disclaimer page for important context and clarifications.
