How to Cook Costco Ribs Low and Slow? [Step-by-step Guide]

Costco ribs are the very definition of self-indulgence. Crispy on the outside and soft on the inside, juicy and flavorful, I fell in love with their deliciousness the first time I made them. Still, if you want them tastier than usual, then there is a catch; you have to cook them just right. So, how to cook Costco ribs low and slow?
Preheat the oven, prepare the ribs, pop them in, and reduce the temperature to 225 °F. After three hours, wrap them in foil or cover them and cook for 2 more hours. When slow-cooking, Costco ribs take about five hours to be fully cooked. Cooking your ribs slowly makes for the best results!
It is an absolute shame to have your Costco ribs go to waste, i.e., to not enjoy them with every fiber of your being. I know how it feels because I’ve had my fair share of disappointments. So, to save you the trouble and help you get it right the first time, in this article, I will share my knowledge about cooking Costco ribs.

Costco Ribs Slow Cooking Instructions
Although cooking Costco ribs isn’t exactly finding the Holy Grail, it is still somewhat of a tricky business, especially if you are a beginner in the culinary department. The most important thing is to divide the process into stages and follow the steps correctly. Below are the steps I take when I cook Costco ribs; you can, of course, change or add whatever you want. If you feel confident, you can do it.
Step 1: Preparing the Ribs
The first step is to prepare the ribs for cooking. So, remove your ribs from the packaging.
The next thing to do is to take a moment to inspect the ribs. If you see any bone fragments or unwanted connective tissue, remove them. I find that trimming off any excess fat from the ribs can also help enhance the final texture and flavor and makes them easier to chew.
Step 2: Seasoning and Preheating
Even though Costco ribs are already seasoned with a mixture of salt, pepper, garlic, onion, chili pepper, and paprika, you might find this seasoning less than flavorful. The thing is, Costco ribs are intended for a wide consumer body, and it is better for them to be seasoned to a certain degree that won’t be overwhelming. Not everybody likes intense flavors.
Depending on my mood, I sometimes don’t additionally season the ribs, but I often add more spices. I added smoked paprika, more salt, and rosemary. The trick to successful seasoning is to rub the spices into the ribs and allow them to sink in.
So, once you rub the seasoning into the ribs, let them sit for about 30 minutes to absorb as much flavor as possible. You can also make a marinade and rub the ribs with it. Just mix the spices with oil, honey, and BBQ sauce and spread the mixture onto the ribs.
When I have spare time, I prep the ribs the day before, rub them with marinate, and let them overnight in the fridge. Still, you can season and bake if you are in a rush.
This step is crucial not only because it adds flavor but also because it tenderizes the meat during the cooking process.
Step 3: Slow-Cooking the Ribs

Once your Costco ribs are prepped and seasoned, it is time to bake them. Preheating the oven or grill is essential for crispy rib texture. Preheat your grill or oven to 300-325 °F or 150-165 °C before you pop the ribs inside.
If you put them on a cold grill or in a cold oven, they won’t get the delightful crust they are so famous for, and the cooking process will be thrown off balance.
Once you place the ribs on the grill or inside the oven, reduce the temperature to about 225 °F, i.e., around 110 °C. Bake for at least three hours, depending on the strength of your cooking appliance.
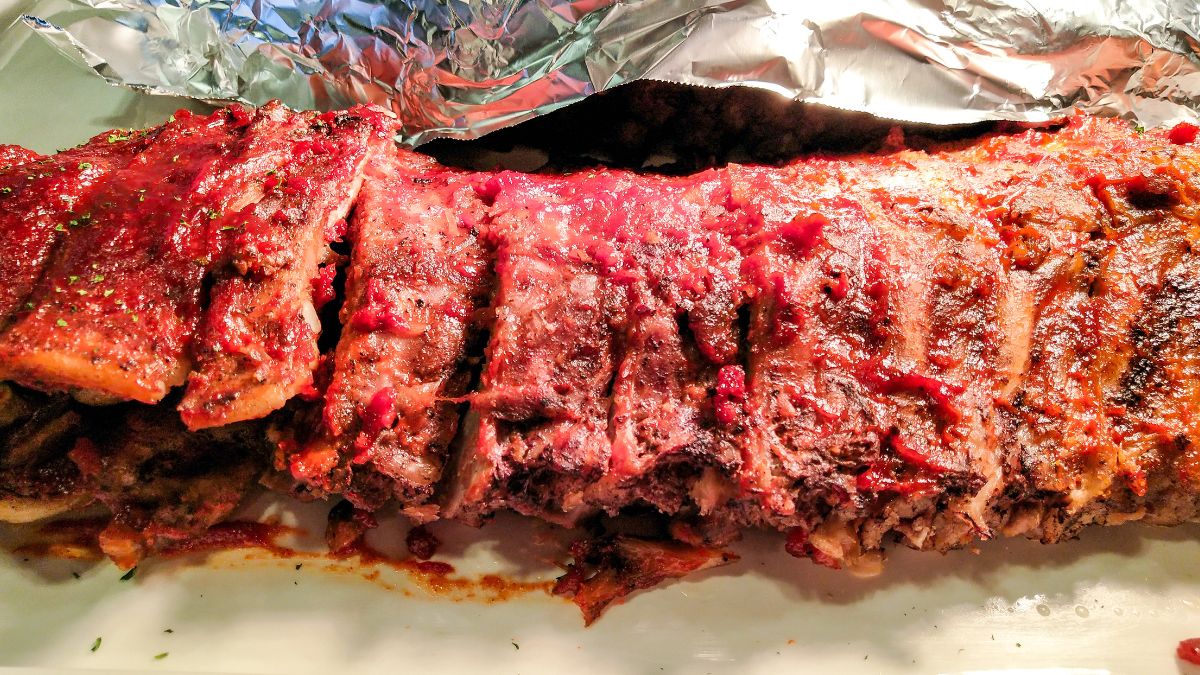
After the three hours are up, you need to add some liquid to your Costco ribs, wrap them in aluminum foil, and let them cook for at least two more hours at the same temperature.
I prefer to spray the ribs with apple juice as they cook. The apple juice gives them a certain sweet acidity that balances the flavors making the ribs stickier and juicier. Still, you can add water or some veggie stock if you’re not a fan of acidity.
Costco Ribs Cooking Variations
The best thing about Costco ribs is that you can cook them in several different ways and still get finger-licking results. Grilling and baking are the most obvious ways to cook Costco ribs, slow cooking makes for delicious results, but you can also make them sous vide.
But definitely don’t shallow or deep-fry them. Air-frying them could work, but I haven’t tried it, though I’ve read that it could produce a nice result. I prefer sticking to the golden classics, i.e., baking, grilling, and slow cooking, but feel free to experiment with different styles of cooking your Costco ribs.
What to Serve With Costco Slow-Cooked Ribs?
Everything goes with Costco low-cooked ribs, from salads to starchy sides to grilled or roasted veggies to different kinds of bread.
You can make a nice coleslaw, a green salad, or a summer salad to accompany this juicy and meaty delicacy. The cream salad also goes great with Costco ribs.
Grilled, roasted, or sautéed veggies would also be a nice addition to your meal. Maybe try some potatoes and carrots, onion rings, and mushrooms.
You can have them Texas-style, served with BBQ sauce and fries, or make a wholesome family meal with delicious bread and soup.

Slow-Cooked Costco Ribs
Equipment
Ingredients
- 1 pack Kirkland Signature Seasoned Pork Back Ribs
- ½ cup Apple Juice
Instructions
- Preheat the oven to 275 °F.
Preparing the Ribs
- Remove the packaging, and pat the ribs dry using paper towels.
- Inspect the ribs. If you see any bone fragments or unwanted connective tissue, remove them.
Slow-Cooking the Ribs
- Once you place the ribs inside the oven, reduce the temperature to about 275 °F, i.e., 110 °C. and bake for three hours.
- After the three-hour mark is up, take them out of the oven, add the apple juice, and wrap them in aluminum foil. Let them cook for 2 more hours.
- After two hours, take your ribs out of the oven, let them cool, sprinkle with some sesame seeds, serve, and enjoy!
Nutrition
Before diving into the nutritional details, please review our Nutritional Disclaimer page for important context and clarifications.
