Halloween Empanadas [Spooky Recipe]
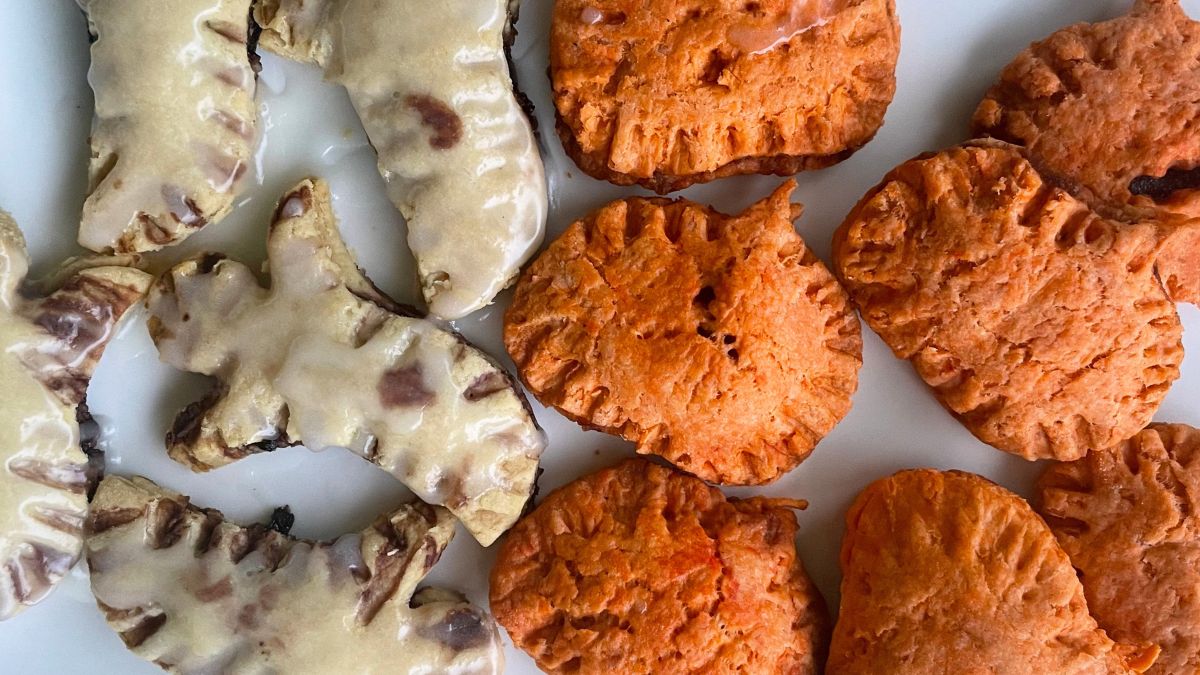

Halloween is one of those holidays you go all in for or go home. And last week I got an amazing idea! Since empanadas are often on the table in my house, they have become a bit ordinary. So, this time, I wanted the same flaky pastries but with a special festive touch. So, here’s the recipe for Halloween empanadas to fit the theme.
I was just testing out some ideas beforehand so I could write them up in time for Halloween. This was my first experimental batch, and it turned out great! Empanadas are as flaky as ever, plus the filling is scrumptious!
What Makes Halloween Empanadas Special?
For the dough, I used my basic recipe as I find it easiest to shape. The pastry is soft enough to roll out perfectly, and it won’t tear unless you overflow it with the filling. I used pretty tiny cookie cutters, so if you have bigger ones, use them instead; empanadas will look neater.
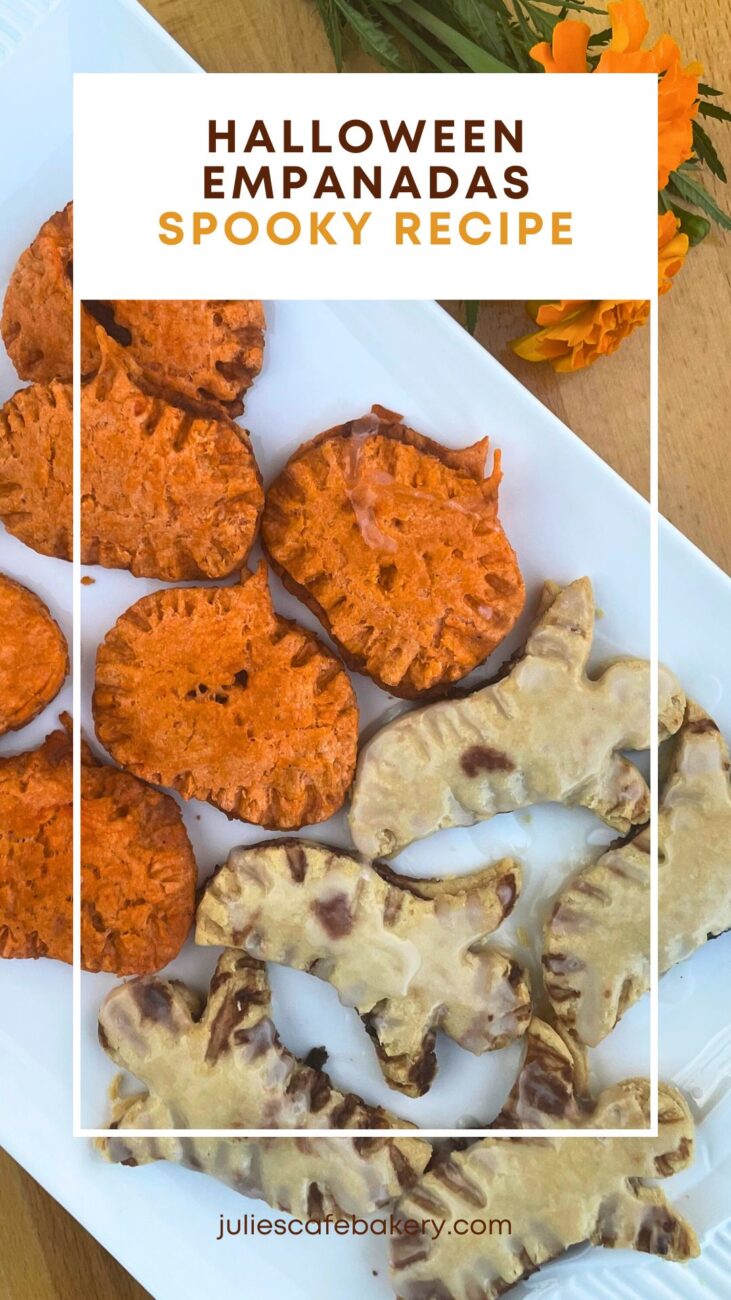
I opted for two sweet fillings – pumpkin puree made from scratch and homemade blueberry jam. The first one is to go with the aesthetics – pumpkin-shaped empanadas filled with puree; and the other one is to create a spooky atmosphere – ghosts with blood dripping. Don’t judge, I’ve been watching too many Halloween movies! ☺
How to Make Halloween Empanadas?
I use only a few ingredients for the dough, as you need no more to achieve the perfect texture. You can choose any filling you want, from sweet to savory, and they will blend impeccably. This is my combo for the occasion!
- Flour – All-purpose flour is the chief due to the fact it rolls out seamlessly. It is responsible for smooth and thin crust.
- Butter – Good-quality butter creates a flaky crust and that melt-in-mouth texture empanadas are known for. Just make sure to use unsalted butter if you’re making sweet ones like me today.
- Egg – I used only one egg for the whole batch, and it’s more than enough to meld all the ingredients together.
- Pumpkin – I had freshly picked pumpkin and made pumpkin puree on my own. But you can save some time and use canned puree. Plus, I needed a homemade one for the next recipe I’m preparing, so I saved it for tomorrow.
- Sugar – Caramelizing the pumpkin in sugar results in an amazing fall dessert, whether you eat it alone or in a pair with something else. I used white sugar this time, but brown is also a superb option!
- Spices – You can suit this one to your preference; still, I’ll tell you my secret blend: cinnamon, nutmeg, and cloves.
- Honey – A drip of honey will connect the flavors and make the pumpkin sparkle!
- Jam – I had blueberry jam in the pantry, so I used that one. You can go for any you prefer.
Let’s visualize the fall season together! ☺
Step 1: Making the Pumpkin Puree
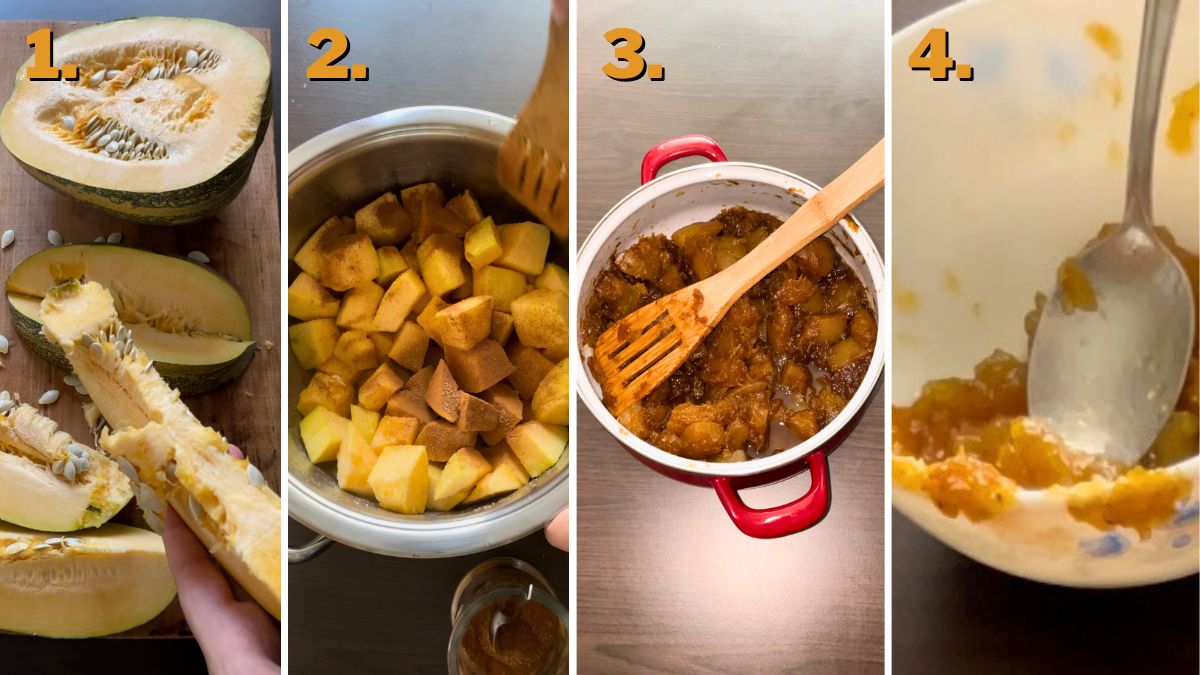
You can simply skip this step and pop a can open, or you can stick with me and make it from scratch. So, take a pumpkin (I had a smaller one), slice it open, cut it in wedges, clean, and peel each. I find this method the fastest one because pumpkins can be hard to handle sometimes.
Cut them into bite-size cubes and place them into a large pot. Sprinkle with a generous amount of sugar to caramelize and splash of water. You can cover them thoroughly and leave them to simmer lightly, or you can make your life harder and add a splash by a splash of water gradually, like me.
I do this because I’m a sucker for the nice, deep orange color of pumpkin that’s preserved only when prepared like this. I can’t really tell you the exact cooking time because it depends on how big your pumpkin is and what type you’re using. It is done when you can press it with a fork, and it mashes, just like a potato.
Mine took about 40 minutes. Now it’s time to add spices: cinnamon, nutmeg, and cloves. Also, stir in some honey. I always recommend doing a taste test and seeing if you want it more sugary, I usually end up adding more.
This time, I saved some pumpkin chunks, but you can use a blender to puree it to perfection. Leave it to the side, and let’s prepare the dough.
Step 2: Preparing the Dough
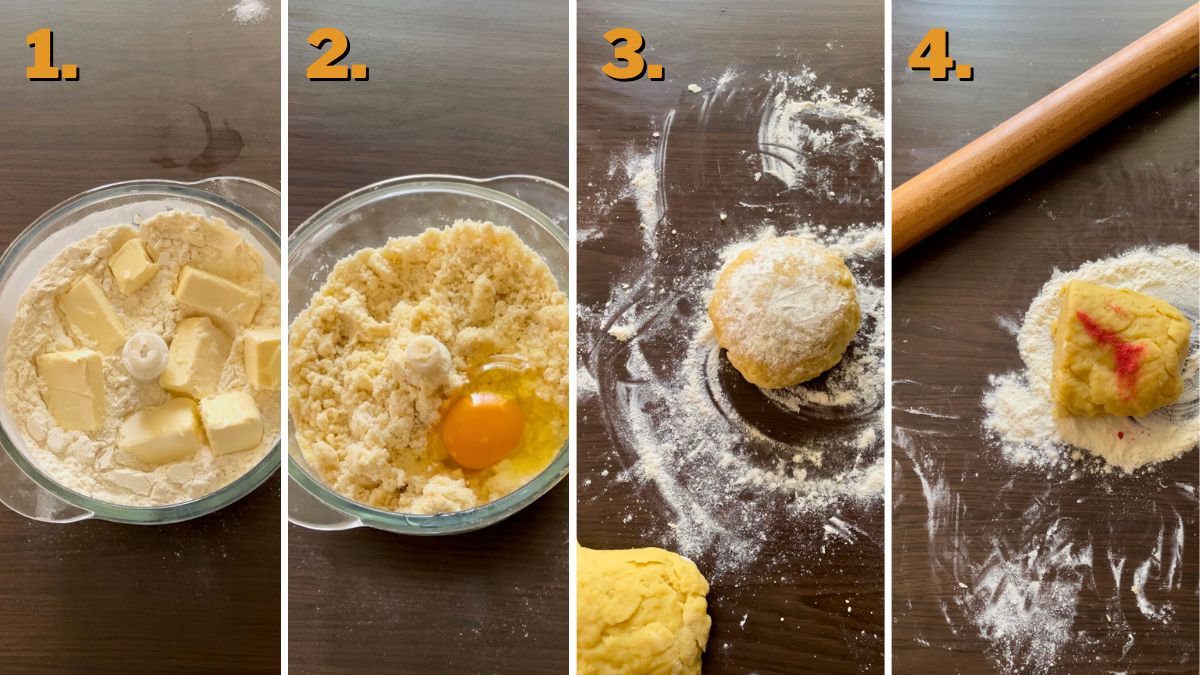
The blender is your best friend now! Add flour and a sprinkle of salt, and pulsate it for a few seconds just to make sure it’s loose. Add butter cubes and pulsate it a few times until you have a crumbly texture.
It’s a moment to add an egg to the dough and pulsate a few times more. It is almost ready now, but you’re going to need a splash of water to assemble the dough into a perfect, soft, and spreadable ball. It should be soft enough to roll out but not tear apart.
Dust the countertop surface with flour and knead the dough a bit. It should be very soft but not sticky, like play-dough. I separated it into two equal pieces and massaged the powdered orange color into one. I wanted a pop of color, and the orange came out like a cherry on top!
Step 3: Shaping the Empanadas
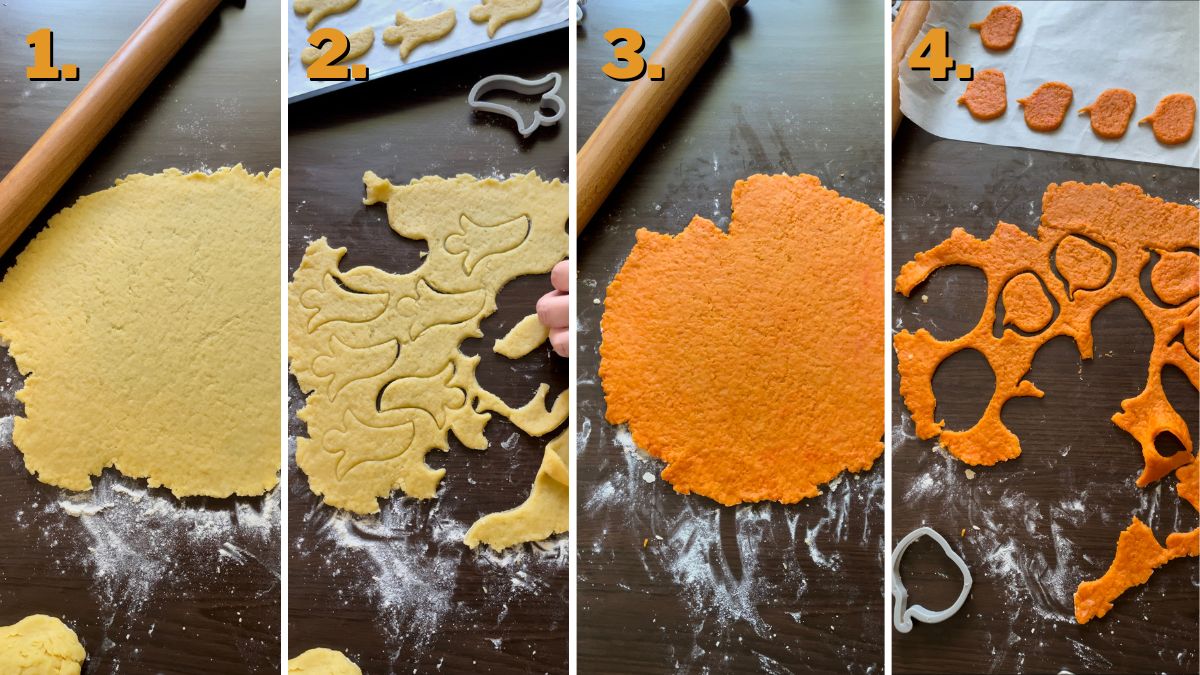
When doing empanada shapes, the easiest thing to do is to roll out the dough balls into thin sheets. I used cookie cutters in the shapes of pumpkin and ghost; you can do whatever you want. Arrange them on the baking paper so they are easier to move around.
Step 4: Filling the Empanadas
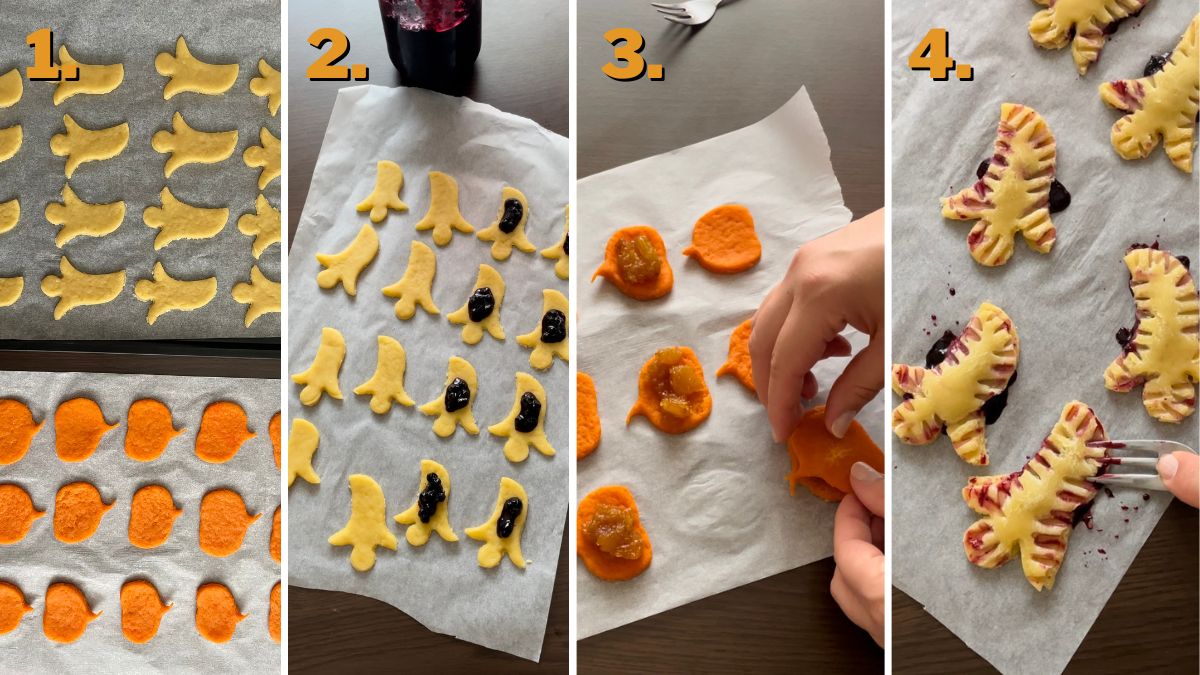
My cookie cutters were tiny, so I had to use just a tad of filling for each empanada. They are party-perfect, though, as you can savor them in two bites! So, put a teaspoon (or more) of pumpkin puree filling on top of pumpkin shapes.
I filled ghosts with blueberry jam, but looking at them now, I think strawberry or raspberry would be more suitable if you’re going for the bloody look. Remember to place the filling on the half of the batch only, as you’ll need another half for folding.
So, cover each piece and secure them with a fork. I tried them out without this step for a more seamless look, but they opened up the moment they went into the oven. I advise you to refrigerate the empanadas straight on the cookie sheet for at least half an hour before baking, as the crust won’t crack that way.
Step 5: Baking
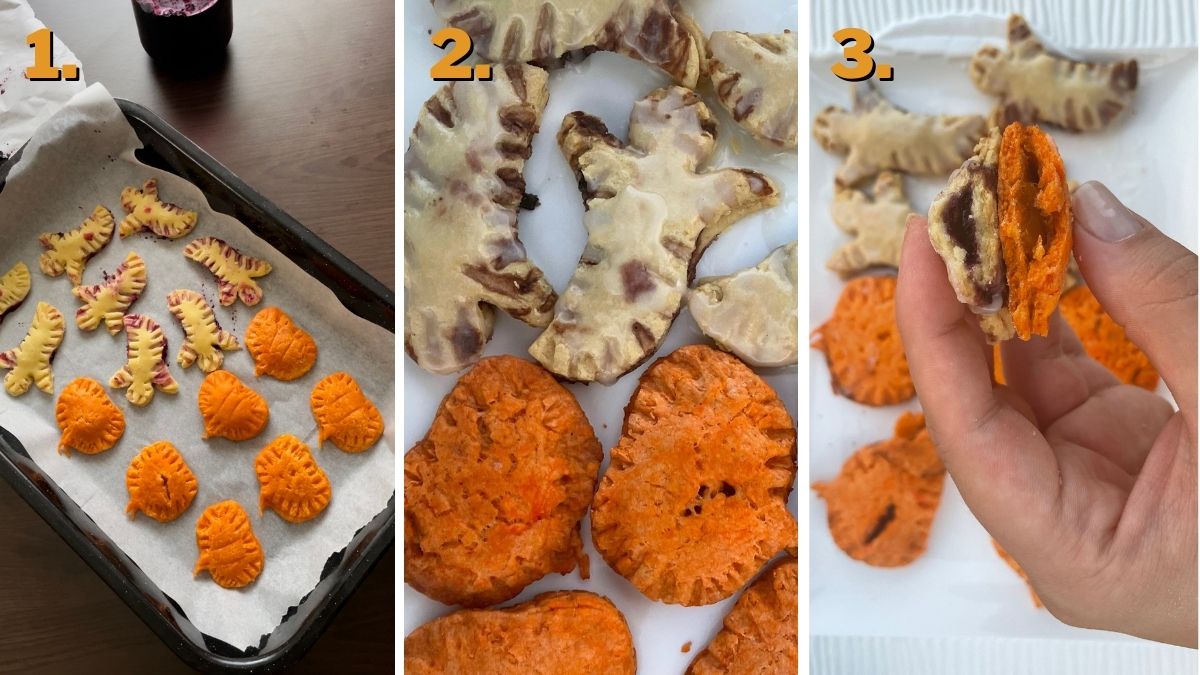
Heat your oven to 380 °F (190 °C) and bake empanadas for about 20 minutes. This depends on how big your empanadas are, though. But you’ll know they are done when the top turns golden.
Take them out of the oven and let them sit at room temperature to chill a bit. You can eat them hot or cold, it’s up to you!
Step 6: Serving
I made a bit of classic icing – powdered sugar and milk to cover the ghost to give them a white shade. It’s a superb addition as it makes empanadas perfectly balanced because the crust is not sugary at all. So, my recommendation is not to skip the icing!
How to Store Halloween Empanadas?
Store these empanadas like you would any other – 3 days in the refrigerator or 3 months in the freezer. I like to store them in airtight containers but covered in paper towels to absorb the dew from the sides. Also, if you’re keeping them in layers, place baking paper or towels in between.
I do the same when freezing them, as well. Also, you can make the dough and the filling in advance, store them for up to 3 days, and bake them quickly. Just for the heads up, these empanadas are much tastier when served cold, so this makes them ideal party treats. I love the crunch!
Do you have your own signature Halloween recipe? I would love to read all about it in the comments below!

Halloween Empanadas
Equipment
- blender
- Cookie cutters
- Baking sheet
Ingredients
Empanada Dough
- 3 cups all-purpose flour
- ¼ tsp salt
- 6 oz butter (unsalted)
- 1 egg
- 2 tbsp water (or more until you reach the right consistency)
- 1 tsp powdered orange food coloring
Pumpkin Puree
- 2 cups pumpkin (cubed)
- 1 cup sugar (or more; to taste)
- 1 tsp cinnamon
- ½ tsp nutmeg
- ½ tsp cloves
- 1 cup water (add gradually)
Blueberry Filling
- ½ cup blueberry jam
Icing
- ½ cup powdered sugar
- 3 tbsp milk
Instructions
Making the Pumpkin Puree
- Slice open the pumpkin, cut it into wedges, clean, and peel each. Cut them into bite-size cubes and place them into a large pot.
- Sprinkle with a generous amount of sugar to caramelize and splash of water. Add water regularly to simmer lightly on the bottom.
- It is done when you can press it with a fork and it mashes, just like a potato.
- Add spices: cinnamon, nutmeg, and cloves. Also, stir in some honey. I always recommend doing a taste test and seeing if you want it more sugary.
- Leave it in the chunks or puree it with a blender.
Preparing the Dough
- Add flour and a sprinkle of salt, and pulsate it for a few seconds, just to make sure it’s loose.
- Add butter cubes and pulsate it a few times, until you have a crumbly texture.
- Add an egg to the dough and pulsate a few times more.
- It is almost ready now, but you’re going to need a splash of water to assemble the dough into a perfect, soft, and spreadable ball. It should be soft enough to roll out but not tear apart.
- Dust the countertop surface with flour and knead the dough a bit. It should be very soft, but not sticky, like play-dough. I separated it into two equal pieces and massaged the powdered orange color into one.
Shaping the Empanadas
- Roll out the dough balls into thin sheets and cut with cookie cutters. Arrange them on the baking paper, so they are easier to move around.
Filling the Empanadas
- Put a teaspoon (or more) of pumpkin puree filling on top of pumpkin shapes. Remember to place the filling on the half of the batch only, as you’ll need another half for folding.
- Cover each piece and secure them with a fork. I advise you to refrigerate the empanadas straight on the cookie sheet for at least half an hour before baking, as the crust won’t crack that way.
Baking
- Heat your oven to 380 °F (190 °C) and bake empanadas for about 20 minutes. This depends on how big your empanadas are, though. But, you’ll know they are done when the top turns golden.
- Take them out of the oven and let them sit at room temperature to chill a bit.
Serving
- Mix powdered sugar and milk into a paste-like consistency and ice the empanadas.
Before diving into the nutritional details, please review our Nutritional Disclaimer page for important context and clarifications.
