Beautiful Cherry Blossom Cupcakes [Recipe]
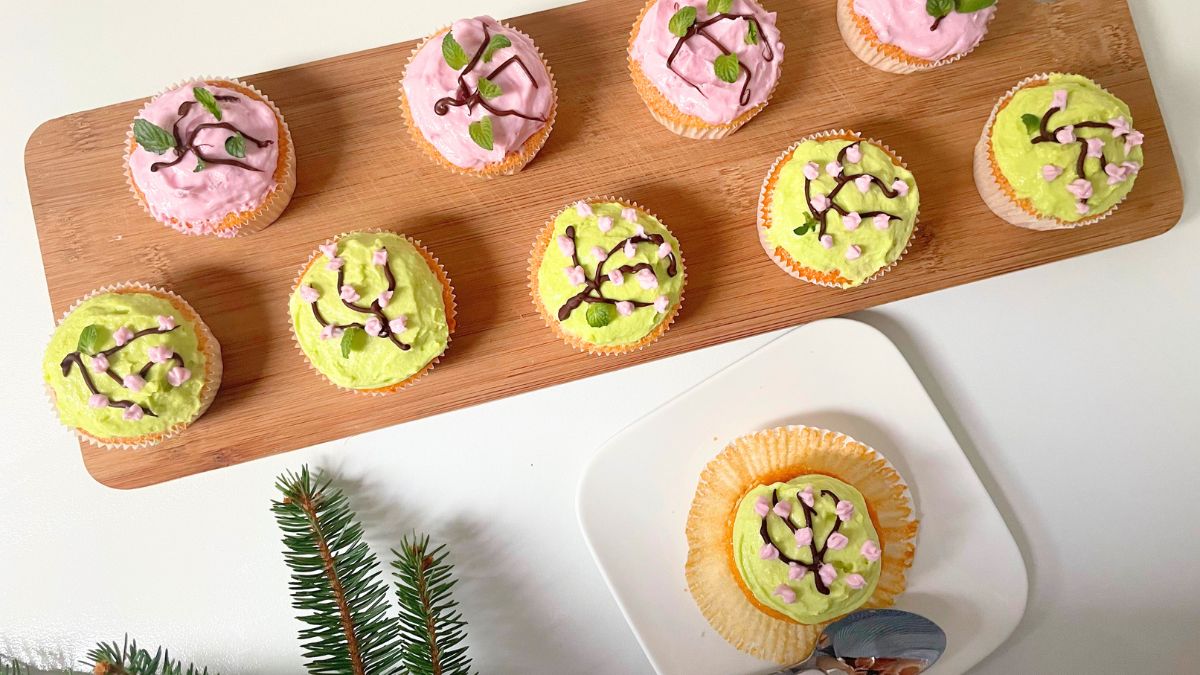

It was a long time ago since I added some color to my desserts. I prefer natural shades, so you will notice most of my cupcakes and cakes have boring white or yellowish frosting. I’m not a fan of unnaturally colored food, but, I’m a sucker for good pastel tones to brighten up a rainy day! That’s exactly how these cupcakes were made. I just kept on adding tiny rose flowers, so it was only logical to name them cherry blossom cupcakes.
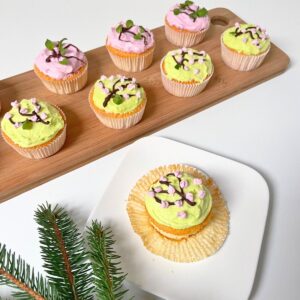
For these cupcakes, I used my most basic recipe that never miss. The cake is super moist, soft, and airy. I always choose them when I want a solid base to experiment with frostings. I’m not an expert in decorating, to be honest, but I gave my best here, as my little guest is a huge lover of pink. I started with light, sage green, added a few chocolate branches, and ended up with cherry-infused blush flowers.
How to make flat top cupcakes?
For me, making flat-top cupcakes is always a challenge, but it’s crucial if you want a fancy, detailed frosting. The first step to achieve that is getting to know your oven. That took me longer than I would like to admit.
So, baking cupcakes at low temperature and gradually is chief, as the high temperature at the start makes them rise abruptly in the middle. So, the ideal temperature for it is 320 °F (160 °C) with a fan or 350 °F (180 °C) without one.
Next is filling your cupcake liners – they shouldn’t be overfilled because they will lose the shape on top. A perfect ratio is one ice cream scoop or 1 + ¼ tablespoons of batter per cupcake, so it’s ⅔ full.
Also, the temperature of the ingredients makes a big difference, so remember to bring eggs and butter at room temperature. And lastly, I pour hot milk into the batter to give it a kick at the very start!
How to make cherry blossom cupcakes?
The recipe is super simple, but there is a tad more work for the frosting. I had a tiny accident, though; my icing didn’t set at all, so I needed to redo it. It took me a while, but it was the butter, I swear. 🙂 This is the ingredient list!
- Flour – All-purpose flour is the finest choice here, as I was aiming for an airy and moist cake.
- Baking powder – Here, you’ll need just a tad of baking powder and it will help the batter to rise moderately and equally.
- Eggs – Room temperature eggs are responsible for the structure, fuller taste, and signature yellow shade of batter,
- Sugar – I used regular white sugar, but you can go with castor or brown, though. For the frosting, powdered sugar is a top-notch.
- Butter – Butter makes the batter super rich and moist, plus gives stability and a silky finish to the frosting.
- Milk – Milk dilutes the batter and makes the cake lighter. Plus, I added hot milk to activate baking powder.
- Almond extract – For years, I was religiously adding vanilla in the batter only, but almond is AMAZING. I find the aroma much nicer, comfier, and very suitable for these cold days. I splashed some in both cake and frosting.
- Oil – Adding a drizzle of oil to the batter along with butter really makes the difference. It makes the sponge unbelievably tender and pillow-soft.
- Heavy cream – I used a splash of heavy cream in the frosting to achieve the right texture for smooth piping.
- Cherry liquor – I added just a splash of cherry liquor in the batter, but you can pass without it, of course.
- Cherries – I used 2 cherries only to add some texture and depth to the pink frosting. I chopped it very finely, almost paste-like and incorporated it into the icing with a spatula.
- Color – This one is totally optional, though. I used a combination of green, blue, and orange to achieve the sage green shade and a tad of red and yellow for the blush. I had powdered food colors, but gel ones would be much better, so use that instead.
Let’s bake!
Step 1: Making the batter
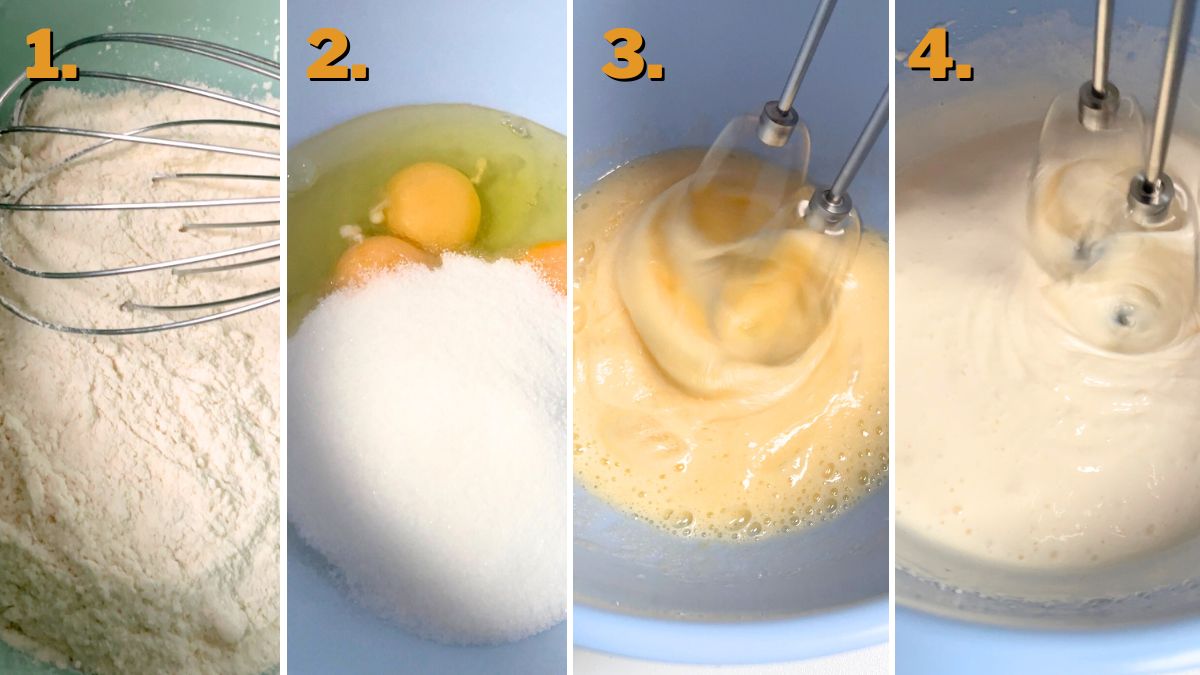
At the very beginning, prepare two mixing bowls and one microwave-safe dish. In the bowl, merry dry ingredients: flour, baking powder, and just a dash of salt. Leave that on the side, and let’s get on mixing.
In the microwave-safe dish, measure butter and milk, and heat it for about a minute and a half. The butter has to be fully melted and the milk steaming hot, but not boiling. Keep that in the microwave, so it stays warm while you’re working on the rest of the ingredients.
In a bigger mixing bowl, combine eggs and sugar, and mix on the highest until the blend is almost white and triple in volume. This will take between 5 and 8 minutes. Now, it’s time to incorporate the dry ingredients mixture, and it’s best to do it in 3 portions.
For the batter to stay airy, you can’t overmix it, so do about 5 seconds of mixing for each section, not a second more. It doesn’t matter if it’s not perfectly combined, it will be later on. Take the bowl with hot milk and butter and pour them into the bowl where the flour was.
In it, pour oil, cherry liquor, and almond extract, combine, and incorporate about a scoop of the egg and flour mixture. Mix energetically which will make the milk foam, but that’s just what you’re aiming for. This will be much easier to integrate into the rest of the ingredients because the volume expands, plus it cools the milk a bit.
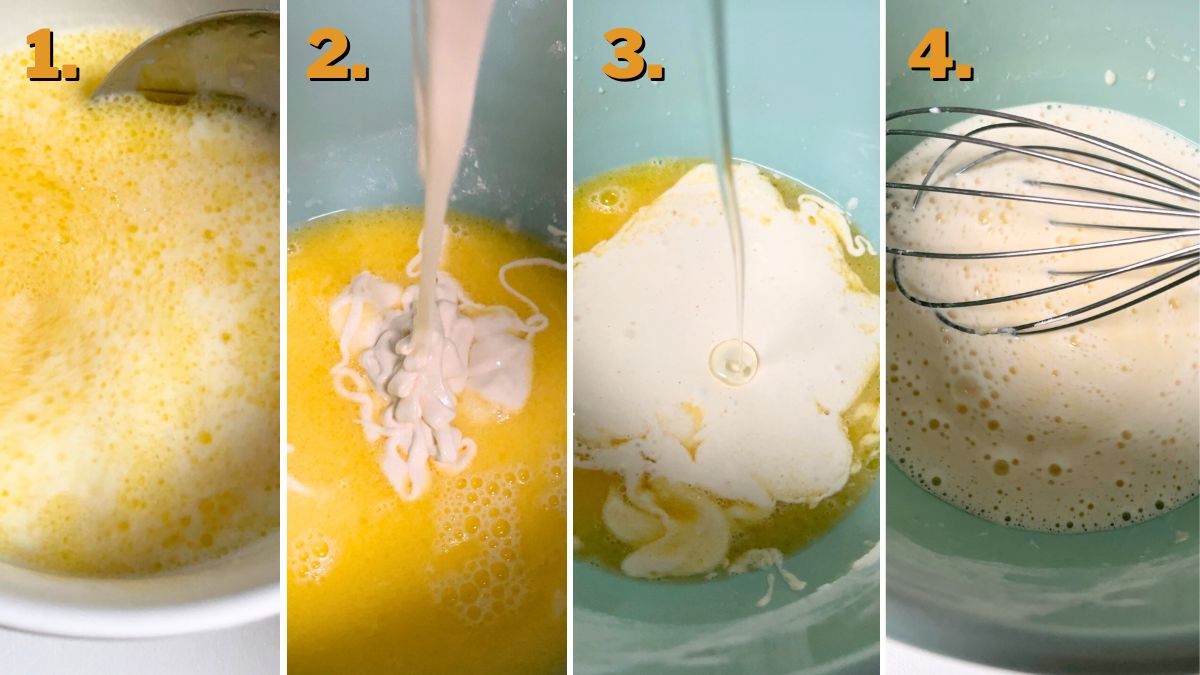
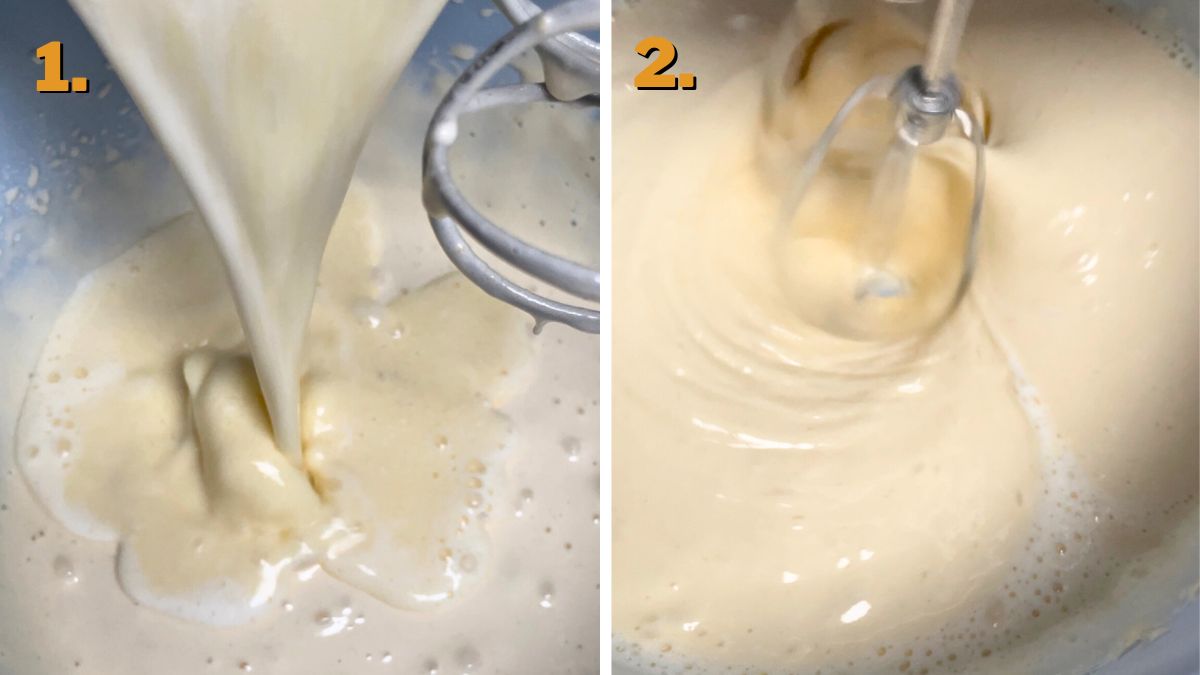
Pour that blend into the egg mix while the mixer is set on low. The batter will meld impeccably in 20 seconds at most. It should be smooth and silky.
Step 2: Baking
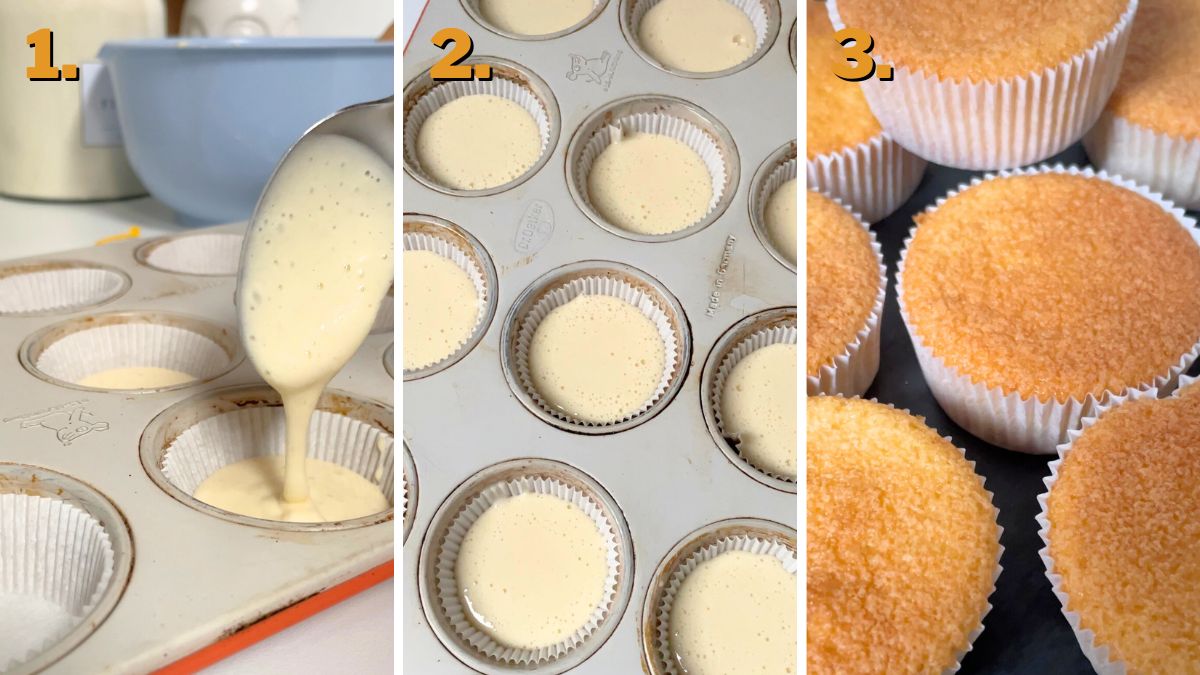
Line the large muffin tin, as you will have 18 cupcakes out of this mix. Pour the batter to ⅔ full, which is about an ice cream scoop or 1 + ¼ tablespoon. That’s the perfect ratio! Bake them at low, 350 °F (180 °C) without or 320 °F (160 °C) with a fan, on the middle rack for 20-22 minutes.
With this, they will be flat on top and golden brown. Check them with a toothpick, just in case. Remove them from the oven, and out of the tin after 2 minutes so they don’t dry out. Leave them to cool completely before frosting.
Step 3: Whipping the frosting
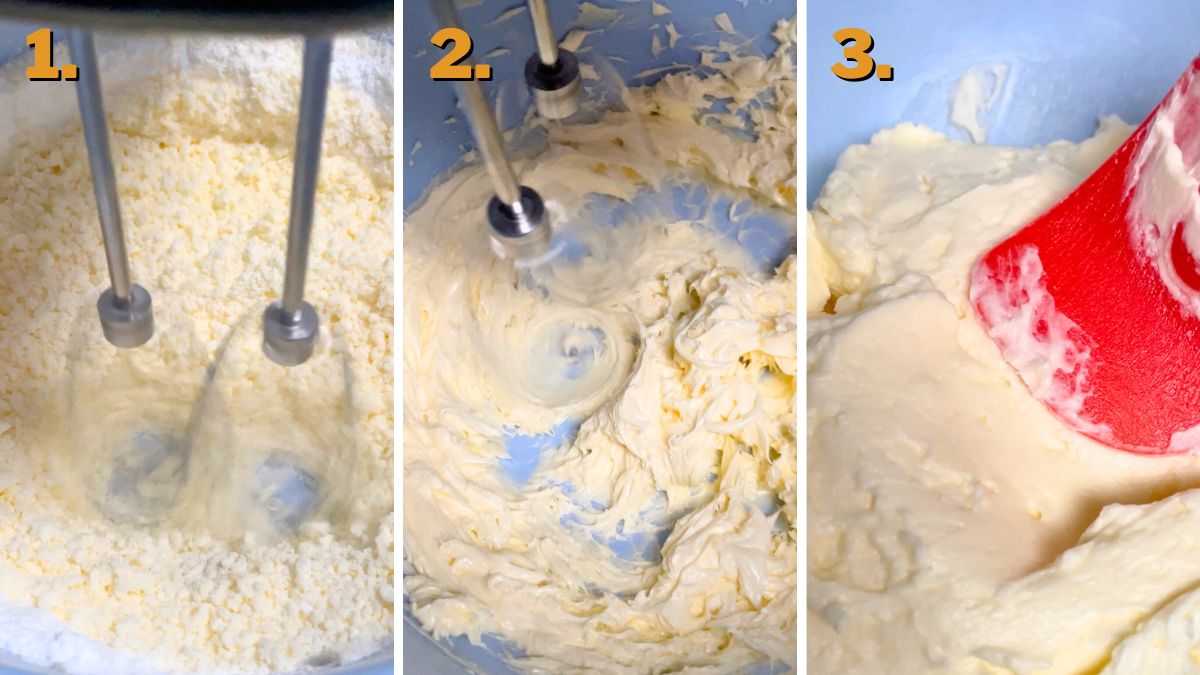
Beat the room-temperature butter on the highest speed until pale and creamy. Now, sift in the sugar in two takes, while mixing on the lowest speed. When all the sugar is slightly incorporated, it will look lumpy, dry, and almost grainy.
That’s okay because you just need to keep mixing at the high speed and it will become smooth again. Drizzle some almond extract (measure by heart) while mixing and add 2 tablespoons of the heavy cream at first, and check the texture.
I ended up using 5 tablespoons of heavy cream for the texture to be creamy and soft enough to pipe, but that can depend on how soft your butter was to start with.
Here, I divided the mixture and made sage green and pink batches. You don’t have to, though. 🙂
For the green one, I added just a pinch of green, orange, and blue, for a sage shade. Start small and add more, as this solely depends on the brand of the colors you’re using.
For the pink one, I added a pinch of red and yellow, and super finely chopped two cherries for the texture.
Step 4: Decorating
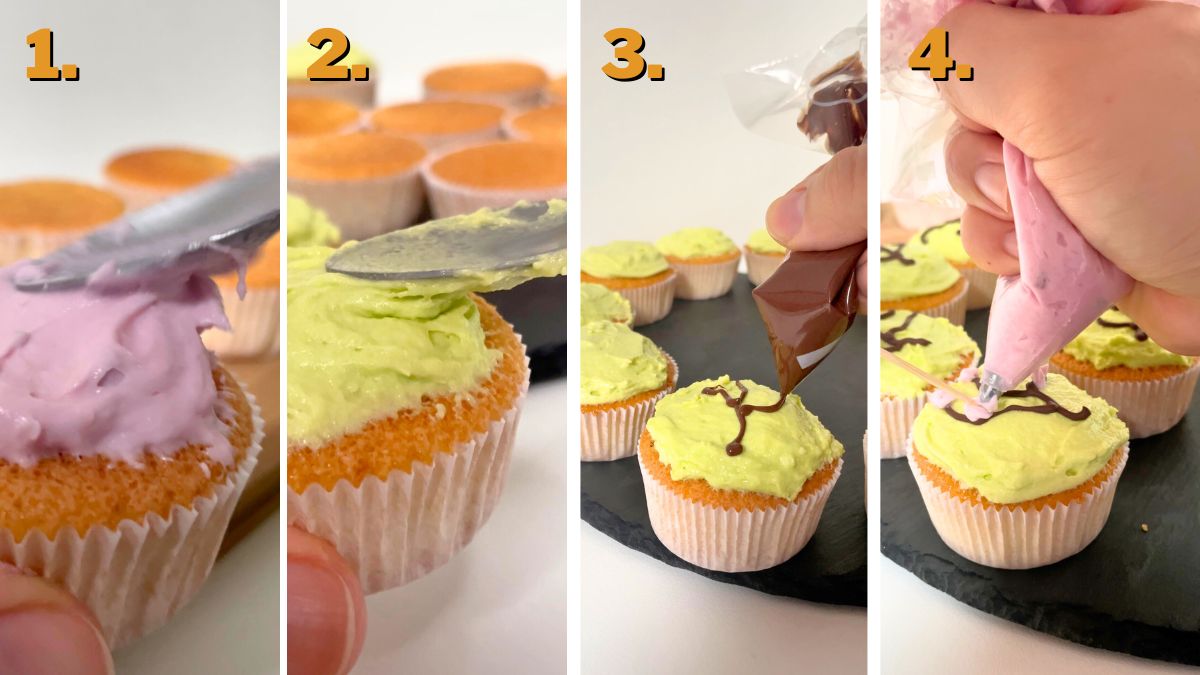
I frosted the cupcakes regularly, like always, left them to sit in the fridge for about half an hour, and got back on decorating. It’s much easier to decorate over the stiff frosting.
I shaped branches with melted chocolate and added pink spots as blossoms. For the branches, I poked a zip-lock bag just a little, so they could be thin, and for the blossoms, I used the tiniest tip I had and a toothpick.
Note: When you pipe the branches, put the cupcakes in the fridge for 5 minutes for them to stiffen.
That’s it! Enjoy!
How to store cherry blossom cupcakes?
These cupcakes will stay perfectly fresh for days! Keep them at room temperature in an airtight container for two days, or 4 days in the fridge. If you have plenty of leftovers, crumble the cupcakes, add some almond butter, and make the cake pops! Coat them in dark chocolate and you’ll be amazed.
By the way, if you like cupcakes, make sure you check out my other cupcake recipes here.
Cherry Blossom Cupcakes
Equipment
- 1 Mixer
- 1 cupcake tin
Ingredients
Cupcakes
- 1 cup all-purpose flour
- 1 ¼ tsp baking powder
- ⅛ tsp salt
- 2 eggs (large)
- ¾ cup sugar
- ¼ cup butter
- 1 ½ tsp oil
- 1 tbsp cherry liquor
- ½ cup milk
- 1 tsp almond extract
Frosting
- 1 cup butter (room temperature)
- 4 cups powdered sugar
- 2-6 tbsp heavy cream
- food dye (optional)
- 2 cherries (finely chopped)
Instructions
Making the Batter
- In the bowl, merry dry ingredients: flour, baking powder, and just a dash of salt. Leave that on the side.
- In the microwave-safe dish, measure butter and milk, and heat it for about a minute and a half. The butter has to be fully melted and the milk steaming hot, but not boiling. Keep that in the microwave, so it stays warm while you’re working on the rest of the ingredients.
- In a bigger mixing bowl, combine eggs and sugar, and mix on the highest until the blend is almost white and triple in volume. This will take between 5 and 8 minutes.
- Incorporate the dry ingredients mixture in 3 portions. Mix each portion for 5 seconds. It doesn’t matter if it’s not perfectly combined, it will be later on.
- Take the bowl with hot milk and butter and pour them into the bowl where the flour was. In it, pour oil, cherry liquor, and almond extract, combine, and incorporate about a scoop of the egg and flour mixture. Mix energetically.
- Pour that blend into the egg mix while the mixer is set on low. The batter will meld impeccably in 20 seconds at most. It should be smooth and silky.
Baking
- Line the large muffin tin and pour the batter to ⅔ full. Bake them at low, 350 °F (180 °C) without or 320 °F (160 °C) with a fan, on the middle rack for 20-22 minutes.
- Check them with a toothpick, just in case. Remove them from the oven, and out of the tin after 2 minutes so they don’t dry out. Leave them to cool completely before frosting.
Whipping the Frosting
- Beat the room-temperature butter on the highest speed until pale and creamy. Sift in the sugar in two takes, while mixing on the lowest speed. When all the sugar is slightly incorporated, it will look lumpy, dry, and almost grainy.
- Keep mixing at the high speed and it will become smooth again. Drizzle some almond extract (measure by heart) while mixing and add 2 tablespoons of the heavy cream at first, and check the texture. Add more until you reach creamy, easy to pipe consistency.
- Optional: Divide the batter into two portions. In one add green, orange, and blue food dye to reach a sage green shade. In the other portion add red and yellow dye and finely chopped cherries. Add color gradually.
Decorating
- Frost cupcakes regularly.
- Optional: Leave them to sit in the fridge for about half an hour, and get back on decorating. Shape branches with melted chocolate and add pink spots as blossoms.
Notes
Before diving into the nutritional details, please review our Nutritional Disclaimer page for important context and clarifications.
