How to Know When Fried Chicken Is Done?

As a delicious and easy meal, protein-dense and satiating fried chicken is popular and probably the most frequently prepared meal. Still, as easy as it is to make, it can just as easily fool you into thinking that it is done while it still needs cooking. Ruined taste isn’t the only problem with underdone fried chicken because it can cause some serious health problems. So, how to know when fried chicken is done?
Tracking the color, keeping an eye on the time, poking the meat, checking the temperature with a thermometer, sampling a small piece, and checking the juices are very efficient ways of knowing whether or not the fried chicken is done.
When it comes to fried chicken, medium rare is not an option. As delicious as fried chicken is, it can be just as dangerous if you eat it before it is completely done. To help you avoid having underdone chicken, in the following paragraphs, I will share some ideas on how to check your fried chicken as well as how to avoid it in the first place.
How Do You Know If Your Fried Chicken Is Cooked?
Underdone fried chicken is not only unpleasant for the teeth and lacking in flavor, but it is also dangerous. There are bacteria that you can ingest, causing serious health issues. Therefore, you must be sure that your fried chicken is done before serving it. [1]
Luckily, frying chicken isn’t rocket science, so there are a few ways to ascertain whether or not your fried chicken needs more cooking. In most cases, the meat itself shows signs, so you can decide whether or not to cook it further just by looking at it.
Nevertheless, sometimes the appearance of fried chicken can fool you, so relying solely on that is not a good idea. In addition to visually inspecting your fried chicken, you are welcome to use some of the methods described below so that you know for sure if your fried chicken needs more cooking.
Track the Color
Tracking the color and looking at the fried chicken are two different things, and tracking the color means actively following the changes on the meat’s surface. It is not enough to pop the chicken in the oil, leave it, and come back a few minutes later.
Frying is an alert process, and you must always be there. Once you’ve placed the chicken in oil, its color will change and become darker. When it reaches a shade between orange and brown, your chicken is likely completely fried.
If the color is between pink and orange, the chicken is still underdone, and if the color is dark brown, you have probably overcooked it.
Keep an Eye on the Time
If you are a newbie in the fried chicken department, you may not be very skilled in tracking the meat’s features, but you surely know to tell the time. Frying chicken is not a long process, but it isn’t done in a blink either.
So, you want to track the time from when you first place the chicken in oil until you take it out. The hot oil is the most important thing for this method to work, so ensure you preheat it before popping the chicken inside.
If you are shallow-frying chicken, you are probably frying chicken breast. If you fry, an entire piece must cook for 6-7 minutes per side. If you fry chicken breast slices, especially thin ones, reduce this period to 4-5 minutes per side.
If you deep fry your chicken, especially if it is coated with crumbs or flour, it takes about 15 minutes for the meat to cook. So, track the time needed for your chicken to cook, and don’t take it out earlier. Still, to make sure, combine this with some of the methods below.
If, after this time, you are still unsure whether or not your chicken needs to fry further, you can always use some of the ideas described here.
Poke the Meat
Just like poking a cake shows you whether or not it needs more baking, poking the chicken will tell you if it needs more frying. Use a fork to poke the chicken, as a toothpick won’t do here.
You can poke a piece of chicken while still in oil or take it out and poke it on a plate. If the fork easily penetrates the meat, without you having to push it too hard, the chicken is done. If, on the other hand, you feel that you need to push the fork inside and the meat is still resilient, it needs more cooking.
Checking the Temperature With a Thermometer
Checking the fried chicken’s temperature with a thermometer is a very viable option to know whether or not it is done. However, this option works best for shallow-fried chicken, so avoid it when deep-frying it.
The thermometer should show the internal temperature of the fried chicken while still in the pan; if you remove it from the pan, the temperature will start to decrease, and the reading won’t be accurate. To place the thermometer in the chicken while deep-frying it, you need to remove it from the oil, and you won’t get a correct result.
The chicken’s temperature should at least be at a safe minimum of 165 °F 73.9 °C, but you can cook it to higher temperatures of 200 °F, i.e., 100 °C, depending on your personal preference. If it is below 165 °F, it still needs cooking, and if the temperature is higher than 200 °F, you need to remove it from the oil, as it will probably burn if you leave it. [2]
I usually cook it until the internal temperature is about 200 °F to make sure it’s cooked thoroughly. The temperature of the oil, in this case, should be at least 350 °F. [3]
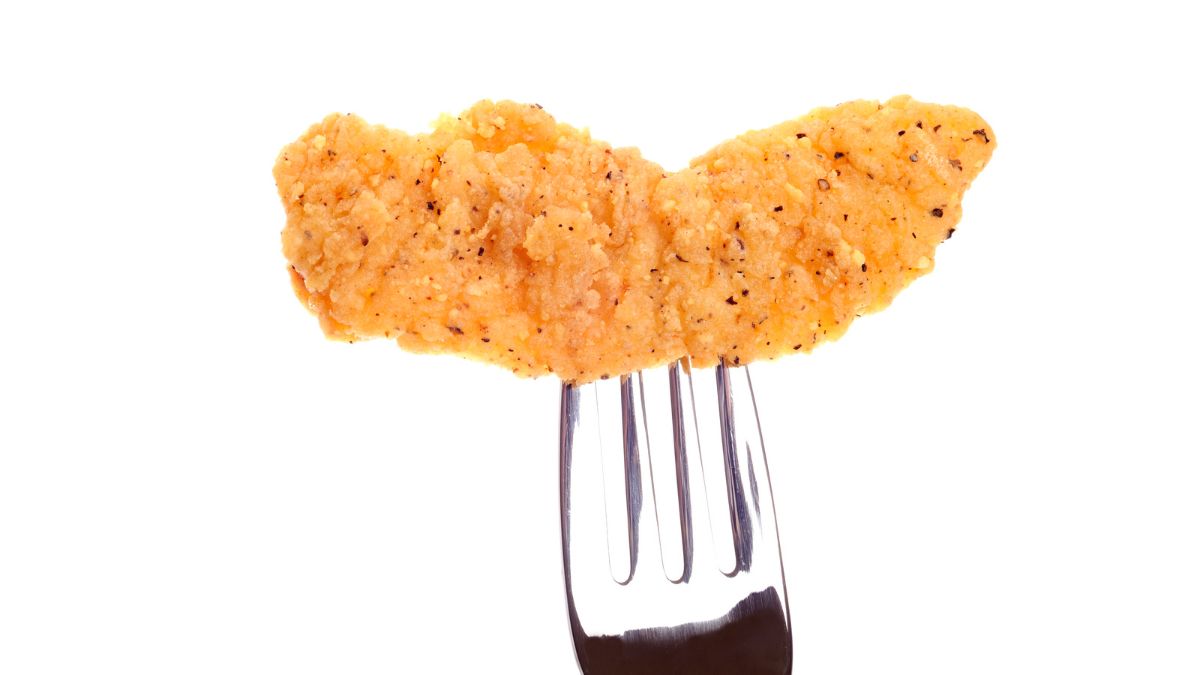
Sample a Small Piece
If you are just learning how to fry chicken, sampling a small piece of meat is the best and more reliable method to check if your chicken is done. Whether you deep or shallow-fry your chicken, cut a small piece and let it cool. Don’t sample the meat while hot, as you may get the wrong idea.
It is done if the chicken is soft and chewable, and if it feels crunchy and unpleasant, it needs more cooking. Determine the length of the additional cooking time by the level of the unpleasantness of the meat.
Check the Juices
When you remove the fried chicken from the oil and put it on a plate, it releases juices. Watch the juices closely, as they will tell you everything you need to know. They should be clear and transparent unless you have some sort of sauce or glaze on the chicken.
The meat is still underdone if the juices are any other shade, be it pinkish, reddish, or yellowish. The more fried the meat is, the more the juices gravitate toward transparency. For example, if the juices are reddish, it means that the meat needs longer cooking than if the juices were pinkish.
The more color the juices have, the longer the additional frying time.
How to Properly Fry Chicken?
To properly fry chicken, the most important thing is the pan, whether deep or shallow. You need a non-sticking pan for shallow frying and a deep enough pan for deep-frying.
Preheat the oil, preferably for at least five minutes, before placing the meat in the pan. If you shallow fry chicken, the best part to fry is the breast or deboned drums or wings. Do not shallow-fry parts with bones, as they will likely be raw in the middle.
Make sure the pan is greasy enough, but don’t overdo it. Depending on your pan, you can add anywhere from a few drops to a few tablespoons of oil, which is why you should use a non-stick pan, as it doesn’t require a lot of oil.
Once the oil is appropriately preheated, carefully place the meat on the pan, allowing for enough space between them. Never squeeze the meat pieces, as you need space to flip them. Once you have placed the meat in the pan, don’t touch them for about five minutes, then carefully flip the pieces.
I usually let them cook for five minutes on the other side, flip them again, and then cook for two more minutes and flip them, allowing them two more minutes on the other side. Once they reach golden-brown color, I like to place them on a paper napkin-covered plate to soak up the excess oil.
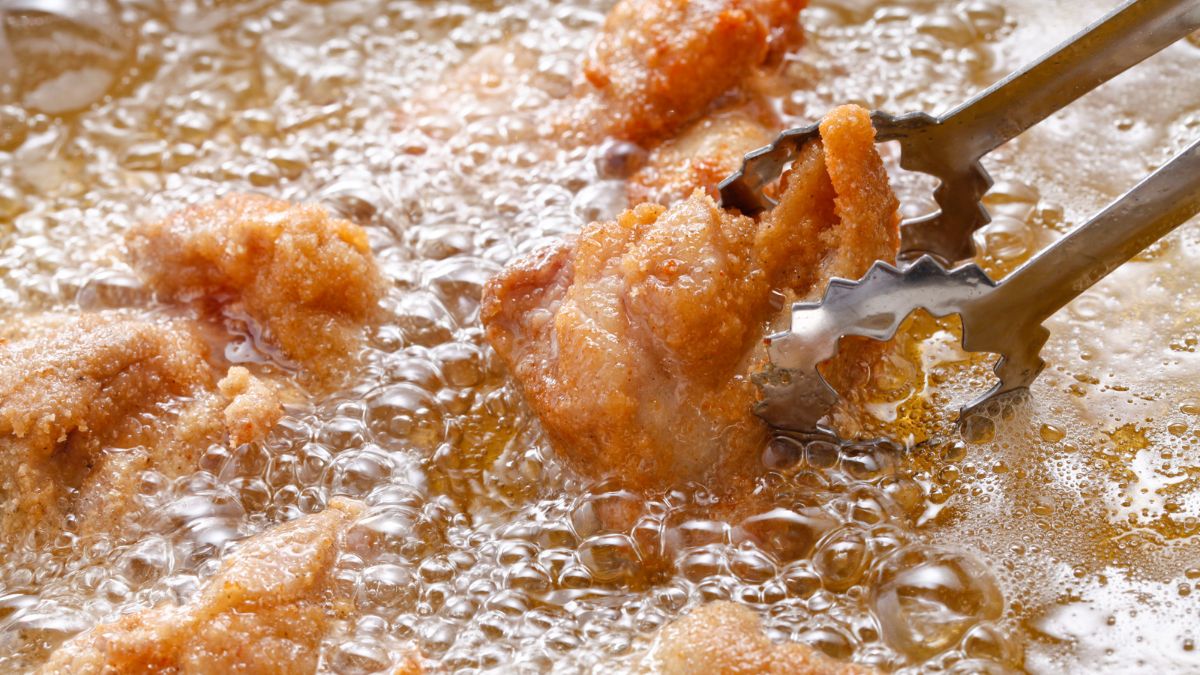
Deep-frying chicken is much simpler than shallow-frying it. Here you can fry any part you want, boned or not. Choose a deep pan and fill it with oil approximately halfway through. Let the oil heat for about five to seven minutes, and test it with a small piece of chicken.
Carefully place the chicken pieces in the oil, preferably in a deep-fry basket, and let them fry for about 15 minutes. From time to time, take one piece and check to see how much longer it needs to fry. If the oil sizzles when you put the chicken inside, it means it is ready.
Once the chicken is done, place the pieces on a paper napkin to soak up the excess oil. Here’s a great example of such a process!
Common Mistakes When Frying Chicken
Even though frying chicken is fairly simple, there is always room for a mistake, especially if you aren’t even aware of it. You may be used to doing things a certain way without even thinking it is wrong.
Below are the most common mistakes with frying chicken and how to avoid them.
Cold Oil
Placing the chicken bits in cold oil is a huge mistake. The oil needs a few minutes to heat up properly before adding the chicken, whether deep or shallow. Adding the chicken to cold oil is an absolute no-no.
The chicken will soak up the fat, creating a protective layer on the chicken and preventing it from frying. Not only will you end up with excessively fatty chicken, but chances are it will remain raw in the middle.
Shallow-Frying Drums/Wings
When it comes to shallow-frying, boned meat is not what you want to fry this way. Chicken breast is best to shallow-fry, but you should debone them first if you want to shallow-fry drums or wings.
Shallow-frying boned meat will likely result in a burnt exterior and raw interior.
Deep-frying Too Thin Pieces
The pieces need to be thicker when deep-frying chicken than when you shallow-fry them. Deep-frying is much more intense since the meat cooks from all sides simultaneously. Therefore deep-frying thinly sliced chicken will result in burnt and overly shrunk meat.
Frying Cold / Frozen Chicken
You shouldn’t fry chicken straight from the fridge or freezer as it has excess liquid. To fry it properly, let the chicken sit at room temperature for half an hour before popping it in hot oil. In the case of frozen chicken, defrost it thoroughly before frying.
Before placing the chicken in oil, pat it dry with a paper towel to ensure that it isn’t overly moist. The cold or frozen chicken will chill the oil, prolonging the time needed for frying, and it will likely result in underdone meat.
Using Too Much Flour
Whenever I fry flour-layered chicken, I make sure not to add too much flour. The excess flour will make the crust soggy if you fry it for the right amount of time or burn if you fry it a little longer.
In each case, the chicken will be either overdone or underdone. To avoid this, add a very thin layer of flour. Cover the chicken pieces in egg wash and roll them gently in flour; if there are too many sticks, just pat them gently to shake the excess flour off.
Overcrowding the Pan
Adding too many chicken bites to the pan will result in a disaster. You won’t have enough space to flip them if you shallow-fry them, and they will stick if you deep-fry them. In each case, they will either be raw in the middle if you remove them early to stop them from sticking or burn if you let them cook until they are done.
How do you fry your chicken? Describe your process in the comments below. Excited to hear from you!