Healthy Tuna Salad Wrap [Simple Lunch Recipe]
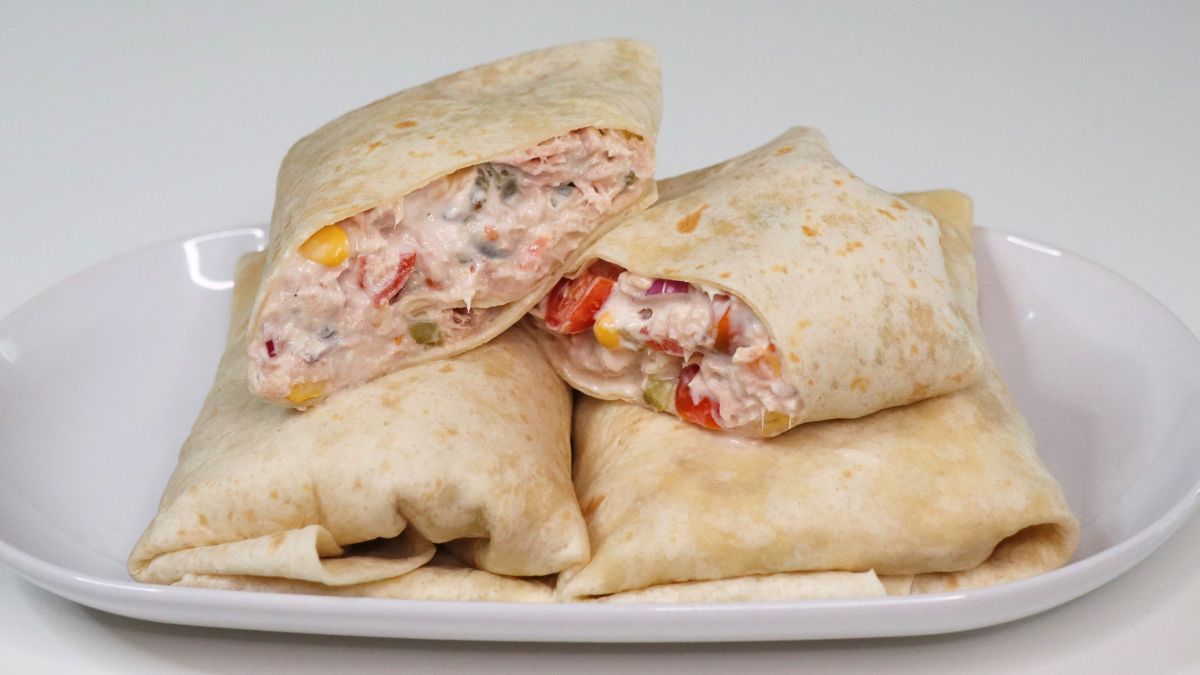

If you’re searching for a great lunch idea that’s both delicious and convenient, this Healthy Tuna Salad Wrap is just perfect. You can eat it on the go, and it’s even more delicious after it stays in the fridge for a few hours, but you can enjoy it immediately too. This tuna salad is so simple to make and quick to prepare. I especially love making it during the summer, but honestly, it’s a treat you can enjoy all year round.
Why Will You Love this Recipe?
- Quick and Easy: This recipe takes only 20 minutes to prepare. No cooking required, so it’s perfect for those busy days when you need a fast meal.
- Healthy and Nutritious: Packed with protein-rich tuna and fresh veggies, it’s a wholesome option that doesn’t compromise on taste.
- Perfect On-the-Go Meal: These wraps are ideal for lunch at work, picnics, or any time you’re on the move. Just wrap them tightly, and they’re easy to eat anywhere.
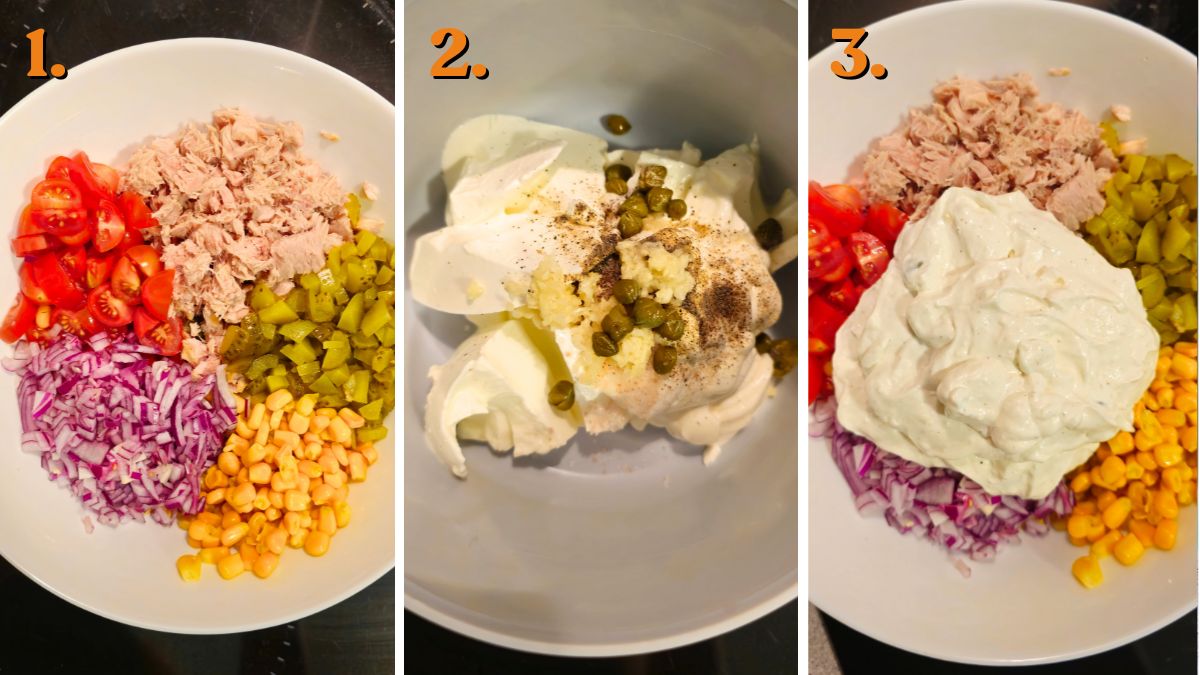
Here are the ingredients you will need to make the most delicious tuna salad wrap:
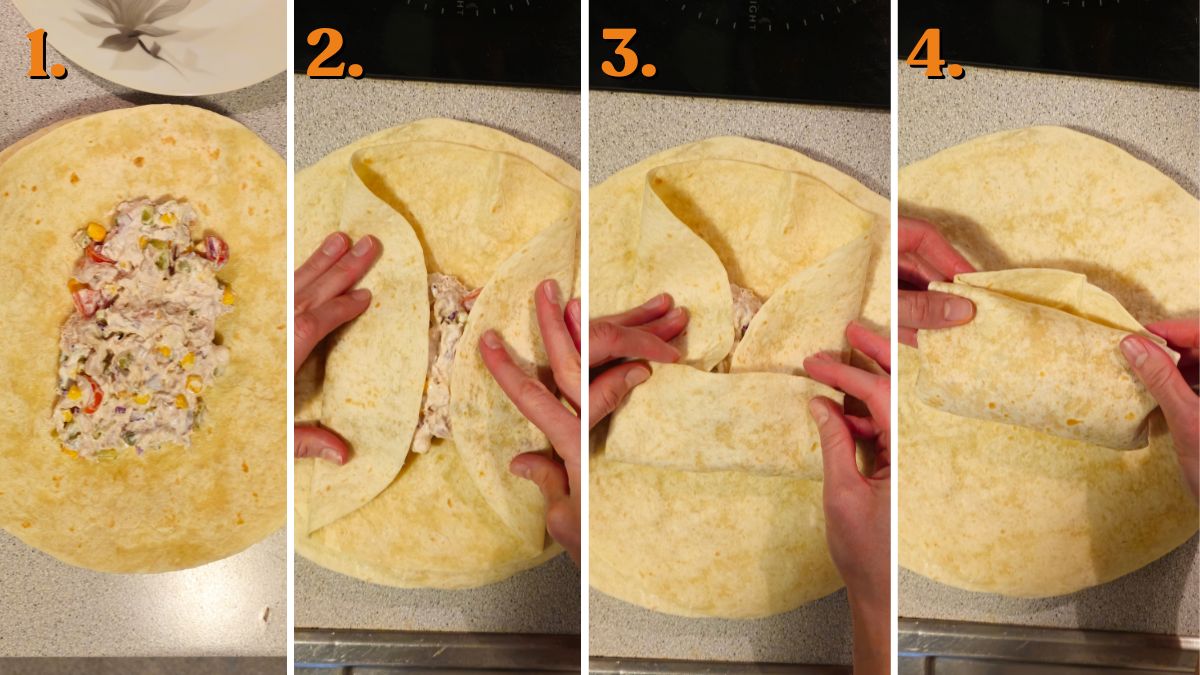
Here’s how to wrap tuna salad wrap so the ingredients stay inside the tortilla:
Recipe Variations
- Add Some Crunch: Throw in some chopped celery or bell peppers for extra texture. It enhances the crunch and adds more nutrients.
- Spice It Up: If you like a kick, add some diced jalapeños or a dash of hot sauce to the tuna mixture. It gives a spicy twist without much effort.
- Herb Infusion: Mix in fresh herbs like dill or parsley. They add a burst of freshness and elevate the overall flavor.
Tools You’ll Need
- Mixing Bowl: For combining the tuna salad ingredients smoothly.
- Knife and Cutting Board: Essential for chopping vegetables and other ingredients.
- Spoon or Spatula: To mix and spread the tuna salad onto the tortillas evenly.
FAQ
Can I freeze it?
It’s not recommended to freeze these wraps, as the fresh veggies may become soggy when thawed. They’re best enjoyed fresh or after being refrigerated for a few hours.
How to store it?
Wrap each assembled tortilla tightly in plastic wrap or foil and store them in the refrigerator. They keep well for up to 2 days.
How long does it last?
When stored properly in the fridge, these tuna salad wraps stay fresh for about 2 days.
What to serve with it?
These wraps are filling on their own, but you can pair them with a side salad, fresh fruit, or some crispy chips.
Is it suitable for every diet?
This recipe contains fish and dairy. For dairy-free options, substitute sour cream and mayonnaise with dairy-free alternatives. It’s not suitable for those with fish allergies.
Can I make it ahead of time?
Absolutely! The flavors meld together and taste even better after a few hours in the fridge, making it perfect for meal prep.
Other Recipes You’ll Love
- Chicken Tortilla Wrap for Lunch
- Chicken Tuna Salad Recipe
- Homemade Tuna Helper
- Simple Best Smash Burger Tacos
- Air Fryer Chicken Fajitas
- Viral Chicken Tortilla
- Breakfast Tortilla Wrap with Eggs, Ham and Cheese
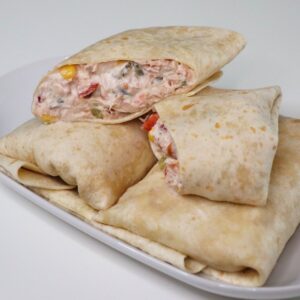
Healthy Tuna Salad Wrap
Equipment
- 1 mixing bowl
- 1 Sharp Knife
- 1 Cutting Board
Ingredients
Main Ingredients:
- 2 large cans tuna drained
- 3.5 ounces corn kernels
- 1/2 red onion
- 3.9 ounces cherry tomatoes
- 3 pickles about 2 ounces
- 4 large tortillas see notes
For the Sauce:
- 6.3 ounces sour cream
- 3 tablespoons mayonnaise
- 1 teaspoon capers
- 1 clove garlic
- 1/3 teaspoon salt
- Pinch of pepper
Instructions
Prepare the Tuna Salad:
- Drain the tuna cans thoroughly.
- Finely chop the red onion.
- Quarter the cherry tomatoes.
- Dice the pickles into small pieces.
- In a mixing bowl, combine the tuna, corn, red onion, cherry tomatoes, and pickles.
Make the Sauce:
- In a separate bowl, mix together the sour cream, mayonnaise, capers, minced garlic clove, salt, and pepper until well combined.
Combine Everything:
- Add the sauce to the tuna mixture and stir until all ingredients are evenly coated.
Assemble the Wraps:
- Warm each tortilla briefly in the microwave or on a hot, dry skillet to make them more pliable.
- Place about 3 tablespoons of the tuna salad mixture in the center of each tortilla.
- Fold the top and bottom edges over the filling, then roll the tortilla tightly from one side.
- Repeat with the remaining tortillas until all the filling is used.
