Gingerbread Cookies Valentine’s Edition [Recipe]


Gingerbread cookies aren’t reserved just for Christmas. It’s still cold outside and I’m really not ready to give up the spice-mix aroma yet. I just modified my favorite gingerbread cookie recipe a bit, to suit Valentine’s mood better.
These cookies are crispy, flaky, and overflowing with spices. I adore them because there is an infinite number of shape variations, so you can make them fit any occasion. With a splash of color, they go from pastels to neon shades. Here’s my take on Valentine’s Day gingers!
What Makes Gingerbread Cookies Valentine’s Edition Special?
I didn’t want my cookies to be too dark, so I exchanged cocoa with white chocolate powder. They still kept their deep flavor, though. White chocolate blends well with warm spices. I used a spice mix for gingerbread, as it has a perfect ratio for my taste.
I cut mine in heart shapes and added some coloring in icing to suit Valentine’s theme. Also, I like to thin them out as the crispiness is my fav part. They are the cutest little treats to serve!

How to Make Gingerbread Cookies Valentine’s Edition?
Both dough and icing are really simple to make. You don’t actually need much of the skill, just a steady hand. Ingredients are simple and you can find them in any store. This is the shopping list for the most aromatic cookies ever!
- Flour – All-purpose and cake flour are both superb options. I use all-purpose as I like them a bit flakier.
- Butter – Butter adds up to the aroma and light texture, plus binds up all the ingredients.
- Sugar – I use powdered sugar because it secures a smooth texture and blends nicely. You won’t go wrong with white or brown sugar, as well.
- Baking powder – Baking powder gives to the overall elasticity of the dough. You won’t use large quantities, so your cookies won’t puff, but they will be light, though.
- Baking soda – Soda works similarly to baking powder, but it also secures cookies to evenly brown.
- Eggs – Eggs bind the ingredients and add structure and flavor.
- Milk – Milk makes silky-textured icing.
- Spice mix – You can make your own spice mix by combining cinnamon, ginger, coriander, nutmeg, aniseeds, cardamom, pepper, and clove. Or simply, add any you fancy.
- Powdered white chocolate – It adds up to the flavor and works nicely with spiciness. You can substitute it with cocoa, white choco cappuccino powder, or any other chocolate-based powder.
Prepare the ingredients, roll up your sleeves, and let’s get to work!
Step 1: Making the dough
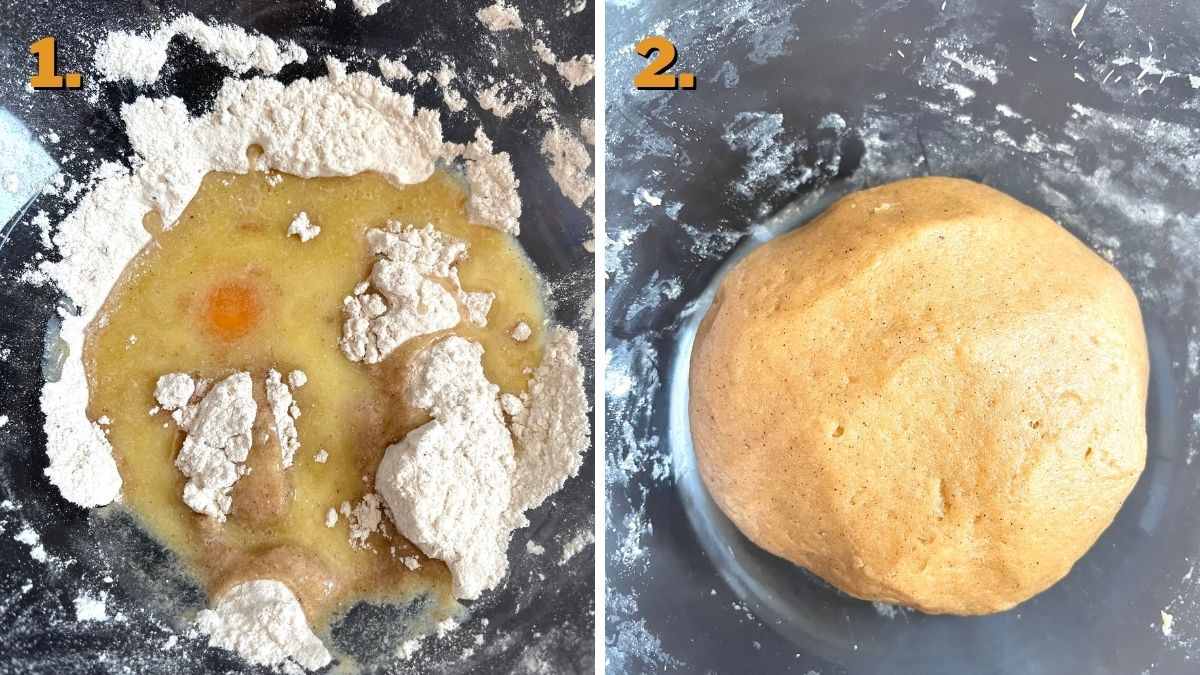
In a large bowl, combine dry ingredients: flour, powdered sugar, spices, white chocolate powder, a pinch of salt, baking powder, and soda. Add them all by sifting, as the dough will be flakier. Melt the butter and add it along with eggs.
You can use either your hands or a mixer with dough attachments. I use a mixer first, then finish with kneading as I like to feel the texture. You are going for soft, elastic, non-sticky dough. Something like play-doh, but stretchier.
Pack up the ball of dough in plastic wrap, and leave it in the fridge for about an hour. It’s important because it will be easier to spread out.
Step 2: Spreading Out
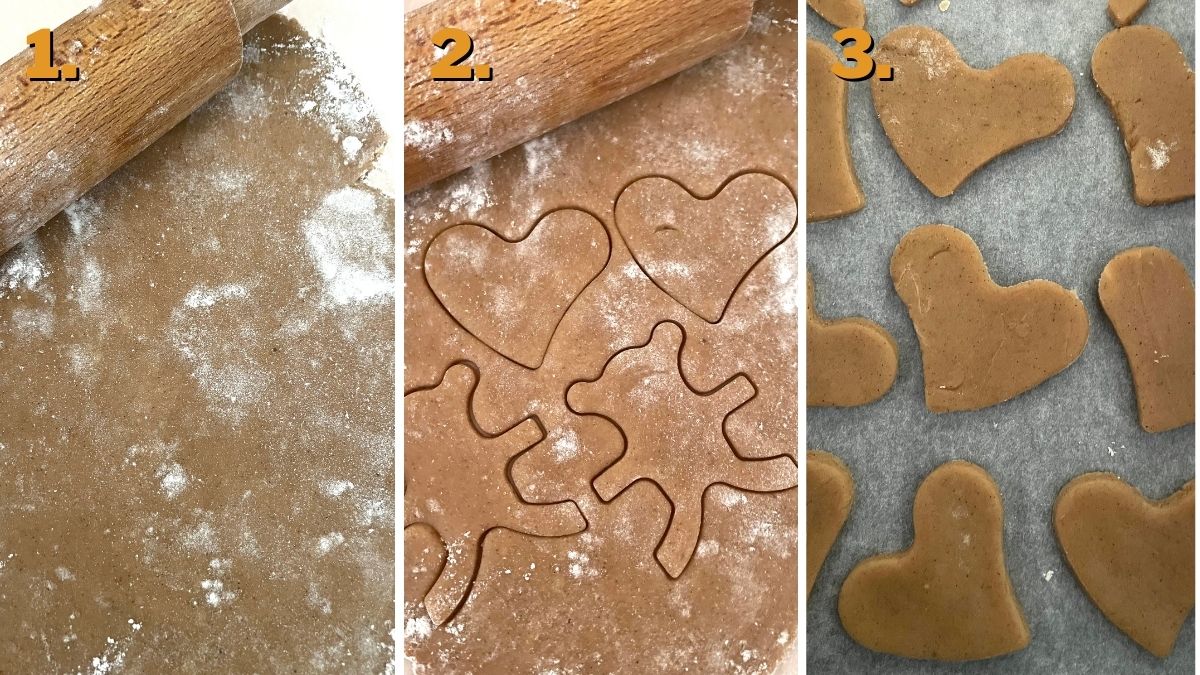
Spread out the dough directly on the baking paper that you previously lightly dusted with flour. Roll it out to half a centimeter-thick sheet. Now, take the molds and press them into the dough.
If you want your cookies to be softer, leave them ticker, about one centimeter. Transfer them to the baking tray carefully and arrange them leaving a bit of space in between them. They are oven-ready at the same moment.
Step 3: Baking
Oven-bake your cookies at 360 ° F (180 °C) for 10-15 minutes. Baking time depends on the thickness and crispiness. If you want them extra crispy, wait for them to brown on the edges.
Leave them to cool out on the rack for about 10 minutes, and you’re ready for the next step.
Step 4: Making Royal Icing
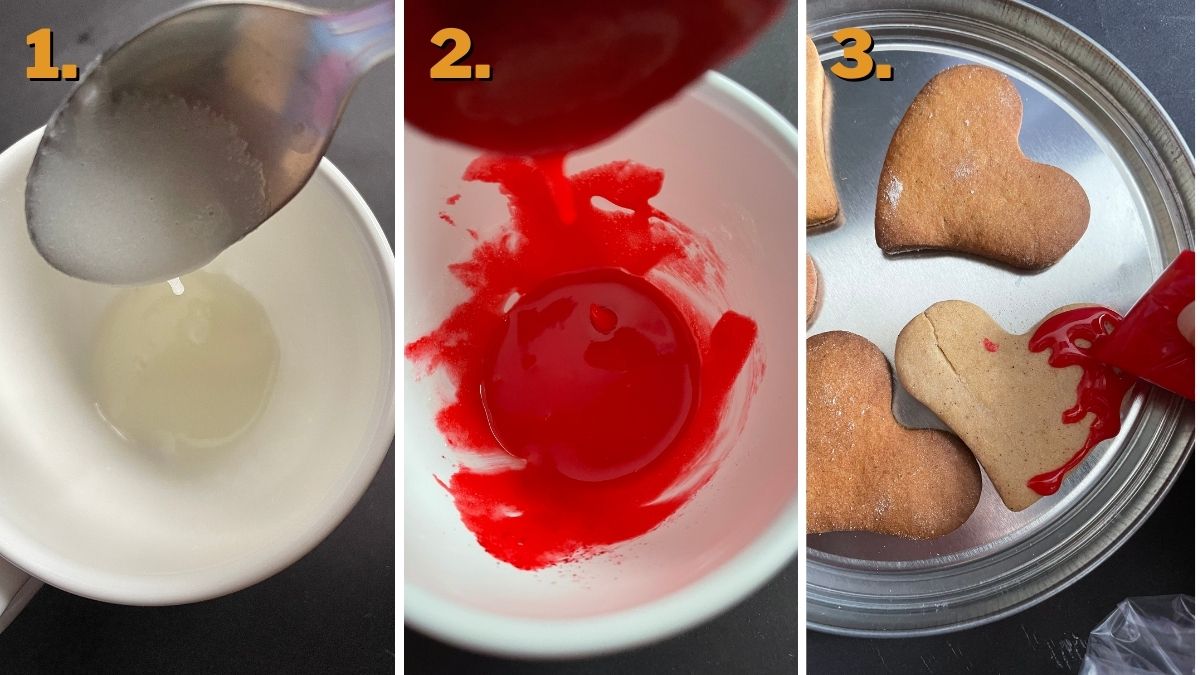
While the cookies rest, make two-ingredient royal icing. Simply mix powdered sugar and milk, plus food coloring optionally. The blend should be silky, shiny, and drip from the spoon, but keep its shape for a moment.
Test it by trickling it on one cookie, if it’s too runny to overflow, add some more sugar. On the other note, if it’s too thick it leaves bumps behind, add a droplet of milk. Move your mixture to the icing bag and you’re ready for decorating.
Tip: If you don’t have an icing bag, use a zip-lock or freezer bag, just cut the tip a bit with scissors. It will work just as fine!
Step 5: Decorating
Make a frame around the top of your gingerbread cookie, and fill it with the rest of the icing. You can also make two different thickness-icing bags, and use the thicker one only for framing to prevent it from dripping. It will stay as smooth and glazy as ever!
Don’t touch the iced cookies for about 5-10 minutes until the glaze hardens.

How to Store Gingerbread Cookies Valentine’s Edition?
Always keep your cookies in a dry place as the humidity will undoubtedly mess with their texture. They can stay at room temperature, as well, just don’t place one on top of the other, so your icing leaves intact. If you’re keeping them in the fridge, you can place parchment paper in between.
Always store them in airtight containers, jars, or tins. That way they will remain fresh for the longest period. They are good and delish to consume for up to three weeks. You can also freeze the dough for three months.
This is a larger batch, so you can easily split the ingredients in half and make less.

Gingerbread Cookies Valentine’s Edition
Equipment
- 1 Rolling Pin
- 1 Baking tray
- 1 Baking sheet
- 1 Cookie cutter
Ingredients
Dough
- 2 ¾ cups all-purpose flour (350 grams)
- ⅗ cup powdered sugar (80 grams)
- ½ tsp baking soda
- ½ tsp baking powder
- a pinch of salt
- 2 eggs
- 1 ½ tbsp honey
- ¼ cup softened butter (100 grams) + 3 tbsps
- 4 tsp spice mix
- 2 tbsp white chocolate powder
Icing
- 1 ¼ cups icing sugar (200 grams)
- 4 tsp milk
- a pinch of food coloring
Instructions
Making the dough
- In a large bowl, combine dry ingredients: flour, powdered sugar, spices, white chocolate powder, a pinch of salt, baking powder, and soda. Add them all by sifting, as the dough will be flakier.
- Melt the butter and add it to the dry ingredients along with the eggs.
- You can use either your hands or a mixer with dough attachments. You are going for soft, elastic, non-sticky dough.
- Pack up the ball of dough in plastic wrap, and leave it in the fridge for about an hour. It’s important because it will be easier to spread out.
Spreading Out
- Preheat the oven to 360° F (180°).
- Spread out the dough directly on the baking paper that you previously lightly dusted with flour. Roll it out to half a centimeter-thick sheet.
- Now, take the molds and press them into the dough.
- If you want your cookies to be softer, leave them ticker, about one centimeter. Transfer them to the baking tray carefully and arrange them leaving a bit of space in between them. They are oven-ready at the same moment.
Baking
- Oven-bake your cookies at 360° F (180°) for 10-15 minutes. Baking time depends on the thickness and crispiness. If you want them extra crispy, wait for them to brown on the edges.
- Leave them to cool out on the rack for about 10 minutes, and you’re ready for the next step.
Making Royal Icing
- While the cookies rest, make two-ingredient royal icing. Simply mix powdered sugar and milk, plus food coloring optionally. The blend should be silky, shiny, and drip from the spoon, but keep its shape for a moment.
- Test it by trickling it on one cookie, if it’s too runny to overflow, add some more sugar. On the other note, if it’s too thick it leaves bumps behind, add a droplet of milk. Move your mixture to the icing bag and you’re ready for decorating.
Decorating
- Make a frame around the top of your gingerbread cookie, and fill it with the rest of the icing. You can also make two different thickness-icing bags, and use the thicker one only for framing to prevent it from dripping. It will stay as smooth and glazy as ever!
- Don’t touch the iced cookies for about 5-10 minutes until the glaze hardens.
