Chocolate Cake with Orange Frosting [Recipe]
![Chocolate Cake with Orange Frosting [Recipe]](https://juliescafebakery.com/wp-content/uploads/Chocolate-Cake-with-Orange-Frosting-Recipe.jpg)

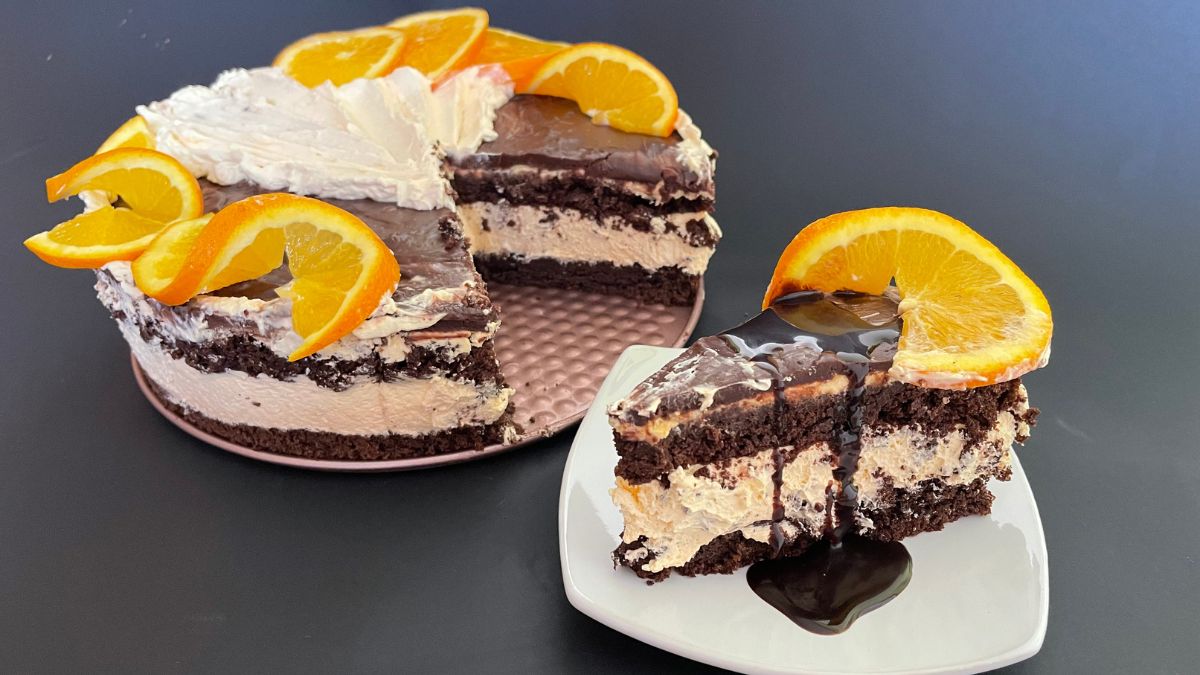
This is one of those cakes you make for birthdays and special occasions. Here is one of my favorite taste combos – earthy cocoa and citrusy orange. It also looks sensational – simple but effective.
I absolutely love moist cakes that are rich and full of flavor, and this is one of those. For me, the cake is not a cake without chocolate, so I always enhance its flavor with little tricks. Orange season is coming to an end, and here is the confection to show them off in style.
What Makes This Chocolate Cake with Orange Frosting Special?
I just took my ultimate choco-cake recipe and added orange cream. I love to use both cocoa and semi-sweet chocolate in the cake, as the flavor is much richer that way. The secret to tasteful cake is layering. I’m not talking about cake layers but ingredients layers.
I add orange in different shapes and forms, from extract to grated peel. I use five: fresh orange juice, orange cream, orange sugar, grated peel, and orange extract. Don’t be afraid it will be too much; they are perfectly balanced to have fresh and citrusy frosting.
Note that I made the chocolate cake from scratch. If you are in hurry, you can use Betty Crocker Choco Fudge Cake Mix.

How to Make This Chocolate Cake with Orange Frosting?
Everything here is revolving around succulent oranges and high-quality chocolate. These two pair flawlessly, enhancing each other’s tastes. Here is what you need for this show-stopping cake.
- Flour – Cake or all-purpose flour are both good options.
- Sugar – I always use granulated sugar in the batter because I like to beat it well along with egg yolks.
- Cocoa – Use unsweetened, high-quality cocoa for the best taste. Its bitterness blends nicely with sugary layers.
- Chocolate – Semi-sweet dark chocolate is my go-to type. It isn’t as sweet as regular chocolate, but still not too bitter to overpower the taste along with cocoa.
- Eggs – Eggs add up to a richer and buttery taste, plus connect all the ingredients together.
- Milk – I use high-fat milk for a fuller taste. You can use only water, though, but this way the cake will have a more melt-in-mouth texture.
- Water – I use boiling water to activate cocoa relish. That way you’ll draw out the chocolaty, fudgy taste.
- Butter – I use butter because it gives the best aroma and rich texture. You can go with oil, as well.
- Baking powder – Baking powder is there to help the cake to raise. It’s a must because the cake will be lighter and easily layered.
- Baking soda – Along with powder, baking soda works as a leavening substance, as well.
- Salt – Just a pinch of salt will enhance the chocolate flavor.
- Heavy whipping cream – I use slightly sweetened heavy whipping cream and build the flavor with spices.
- Orange juice – Fresh orange juice gives the best relish, just be careful to strain the pulp. If that’s not an option, store-bought juice will work, too.
- Orange zest – A pinch of grated peel will skyrocket citrusy flavors.
- Orange sugar – It’s rather subtle but it gives a nice base.
- Orange extract – Oil-based extract won’t do much to change the taste, but aroma. It will also give a nice silky texture to the cream.
- Powdered sugar – I use confectioners sugar in the cream because it’s easier to blend and leaves no crystals.
- Vanilla pudding powder – Pudding powder is an excellent aromatic substitute for cornstarch or flour to dense up the cream.
Now that you have all the ingredients, let’s bake!
Step 1: Making the Batter
The first step is bringing all the ingredients to room temperature. Now, divide whites from egg yolks, then mix whites with a pinch of salt till frosty. Leave them on the side, and let’s move to the next task.
Mix yolks with granulated sugar till smooth and add softened butter and chocolate. Pour boiling water over the cocoa to activate the taste. Add it along with lukewarm milk and mix a bit.
Combine dry ingredients: flour, baking powder, and baking soda in one large bowl. Sift it in spoon by spoon while mixing on low speed. After you added all the flour, the batter should be as dense as the batter for American pancakes.
The last step is to slowly fold egg whites into the batter. Use a silicone spatula and gently combine them together.
![Chocolate Cake with Orange Frosting [Recipe]](https://juliescafebakery.com/wp-content/uploads/Chocolate-Cake-with-Orange-Frosting-Recipe-3.jpg)
Step 2: Baking
I covered my baking pan with parchment paper, but you don’t have to. It leaves uneven edges, so if you mind that simply grease the pan with oil or butter and dust it with flour. Use middle-sized cake mold.
Bake your cake for about 50 minutes at 300 °F (150 °C). If the toothpick doesn’t come out clean, leave it more. You can increase the heat to 350 °F (180 °C) tops at the end. Be careful not to over-bake it, though.
The cake will double its height, and if it splits in the middle, don’t worry, you’ll cover it with frosting anyway.
![Chocolate Cake with Orange Frosting [Recipe]](https://juliescafebakery.com/wp-content/uploads/Chocolate-Cake-with-Orange-Frosting-Recipe-4.jpg)
Step 3: Making Orange Cream
Juice fresh oranges and bring them to a boil. Add sugar and vanilla pudding powder and stir vigorously to avoid lumps. When it’s dense enough, remove it from the stove.
This will take 3 minutes max, just don’t cook it at the highest temperature, but medium. Put plastic wrap directly on it and leave it to cool.
Step 4: Making the Whipping Orange Frosting
Beat whipping cream till semi-stiffed. Mix chilled orange cream to soften it, and combine these two.
Now add some powdered sugar, orange sugar, orange food coloring, orange extract, and grated orange zest.
Mix it on low until combined. The blend will be thick, so you’ll need to add fresh orange juice. That will loosen up the consistency and give the cream a final aroma.
When it comes to food coloring, you can skip that, as it doesn’t change the flavor or anything except for color. I added just a dash because I wanted a pastel shade of orange.
![Chocolate Cake with Orange Frosting [Recipe]](https://juliescafebakery.com/wp-content/uploads/Chocolate-Cake-with-Orange-Frosting-Recipe-5.jpg)
Step 5: Assembling the Cake
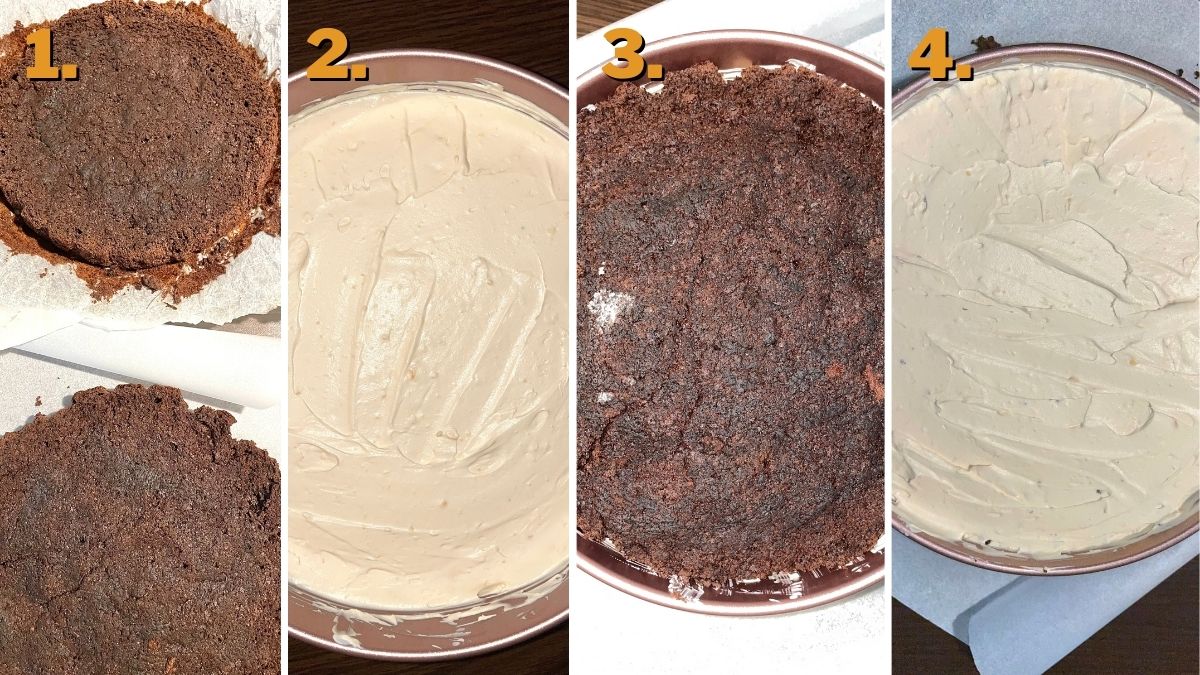
Take the chilled cake and cut it in half horizontally, so you’ll have two thinner cakes. The cake will be slightly crumbly, rather fudgy, and fluffiness-less. I wanted it that way.
If you see it’s too dry on the cross-section, just pour orange juice over it and wait for it to absorb it. Put back the first cake in the cake pan and coat it generously with orange whipped cream. I like to leave that layer about 2 fingers thick, that’s about 3/5 of cream.
Cover it with the other cake and smear the rest of the cream. I like to save some of that cream for garnishing, so keep that in mind.

Step 6: Making the Chocolate ganache
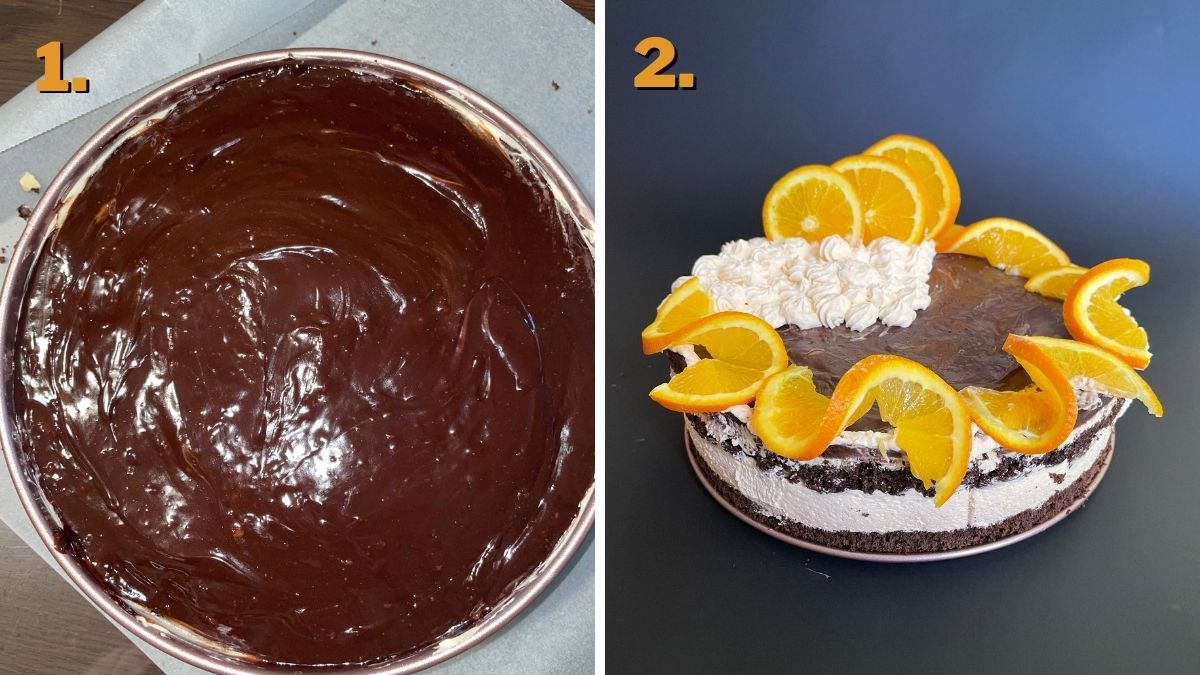
I make the top coat by melting semi-sweet chocolate in heavy cream. It will be runny, so you’ll need to pour it over the cake right from the stove. Just smash the cake pan lightly on the table for it to evenly dispose of.
Toss it in the fridge to cool, for at least 4 hours, best overnight. The longer it rests, the moister and easier to cut will be.
Step 7: Decorating
Remove the cake from the pan carefully, but be careful to unstick the chocolate from the edges, as it tends to crack in the middle if not. Use saved orange cream to garnish it and add fresh or dried orange slices.
Cut the BIG piece and enjoy!

How to Store Chocolate Cake with Orange Frosting?
Choco cake will be good to eat for about a week. Of course, it’s a must to store it in the fridge. You can cover it with plastic or aluminum foil to keep it moist, but the best option is an airtight container.
![Chocolate Cake with Orange Frosting [Recipe]](https://juliescafebakery.com/wp-content/uploads/Chocolate-Cake-with-Orange-Frosting-Recipe-1-300x300.jpg)
Chocolate Cake with Orange Frosting
Equipment
- 1 Cake pan
- 1 Parchment paper
- 1 Mixer
Ingredients
Cake
- 3 M-sized eggs
- ½ cups cocoa (50 grams)
- 7 tbsp softened butter (100 grams)
- 4 oz semi-sweet chocolate (100 grams)
- 1 cup granulated sugar (200 grams)
- 1 cup flour (160 grams)
- 3 tsp baking powder (12 grams) That’s one pack of baking powder.
- 1 tsp baking soda
- a pinch of salt
- ½ cup milk (100 milliliters)
- ⅓ cup boiling water (100 milliliters)
Orange frosting
- 3 oranges (juice only) (300 milliliters)
- 3 tbsp vanilla pudding powder (cook and serve type)
- 3 tbsp granulated sugar
Whipping cream
- 2 ⅛ cups heavy whipping cream (500 milliters) That’s one tetra pak.
- 1 tsp vanilla extract
- 2 ½ tsp orange sugar (10 grams. That’s one pack.
- ½ cup powdered sugar (50 grams)
- 1 orange juiced ((100 milliliters)
- 1 tsp orange peel grated
Chocolate ganache
- 8 oz semi-sweetened chocolate (200 grams)
- ½ cup heavy cream (100 milliliters)
Instructions
Making the Batter
- Melt the chocolate and leave it to cool.
- Bring all the ingredients to room temperature. Divide whites from egg yolks.
- Whip whites with a pinch of salt till frosty. Leave them on the side.
- In a separate bowl, mix yolks with granulated sugar till smooth, then add softened butter and melted (but cooled) chocolate. Pour boiling water over the cocoa to activate the taste. Add it along with lukewarm milk and mix a bit.
- Combine dry ingredients: flour, baking powder, and baking soda in one large bowl. Sift it spoon by spoon into the chocolate mixture while mixing on low speed. The batter should be as dense as the batter for American pancakes.
- The last step is to slowly fold egg whites into the batter. Use a silicone spatula and gently combine them together. Don't mix it!
Baking
- Cover your cake pan with parchment paper. Since it leaves uneven edges, you can also simply grease the pan with oil or butter and dust it with flour. Use a middle-sized cake mold.
- Bake your cake for about 50 minutes at 300 °F (150 °C). If the toothpick doesn’t come out clean, leave it more. You can increase the heat to 350 °F (180 °C) 5 minutes before done. Be careful not to over-bake it, though.
- The cake will double its height, and if it splits in the middle, don’t worry, you’ll cover it with frosting anyway.
Making Orange Cream
- Juice fresh oranges and bring them to a boil. Add sugar and vanilla pudding powder (cook and serve type) and stir vigorously to avoid lumps. When it’s dense enough, remove it from the stove.
- This will take 3 minutes max, just don’t cook it at the highest temperature, but medium. Put plastic wrap directly on it and leave it to cool.
Making the Whipping Orange Frosting
- Beat whipping cream till semi-stiffed.
- Whip chilled orange cream to soften it, and then combine these two.
- Now add some powdered sugar, orange sugar, orange food coloring, orange extract, and grated orange zest.
- Mix it on low until combined. The blend will be thick, so you’ll need to add fresh orange juice. That will loosen up the consistency and give the cream a final aroma.
- When it comes to food coloring, you can skip that, as it doesn’t change the flavor or anything except for color. I added just a dash because I wanted a pastel shade of orange.
Assembling the Cake
- Take the chilled cake and cut it in half horizontally, so you’ll have two thinner cakes. The cake will be slightly crumbly, rather fudgy, and fluffiness-less.
- If you see it’s too dry on the cross-section, just pour orange juice over it and wait for it to absorb it. Put back the first cake in the cake pan and coat it generously with orange whipped cream. I like to leave that layer about 2 fingers thick, that's about ⅗ of cream.
- Cover it with the other cake and smear the rest of the cream. I like to save some of that cream for garnishing, so keep that in mind.
Making the Chocolate ganache
- I make the top coat by melting semi-sweet chocolate in heavy cream. It will be runny, so you’ll need to pour it over the cake right from the stove. Just smash the cake pan lightly on the table for it to evenly dispose of. Make sure that the cake is back in the cake pan so the ganache won't run all over the place.
- Toss it in the fridge to cool, for at least 5 hours, best overnight. The longer it rests, the moister and easier to cut will be.
Decorating
- Remove the cake from the pan carefully, but be careful to unstick the chocolate from the edges, as it tends to crack in the middle if not. Use saved orange cream to garnish it and add fresh or dried orange slices.
- Cut the BIG piece and enjoy!
