No Bake Berry Cheesecake Recipe [aka Fruits of the Forest Cheesecake]
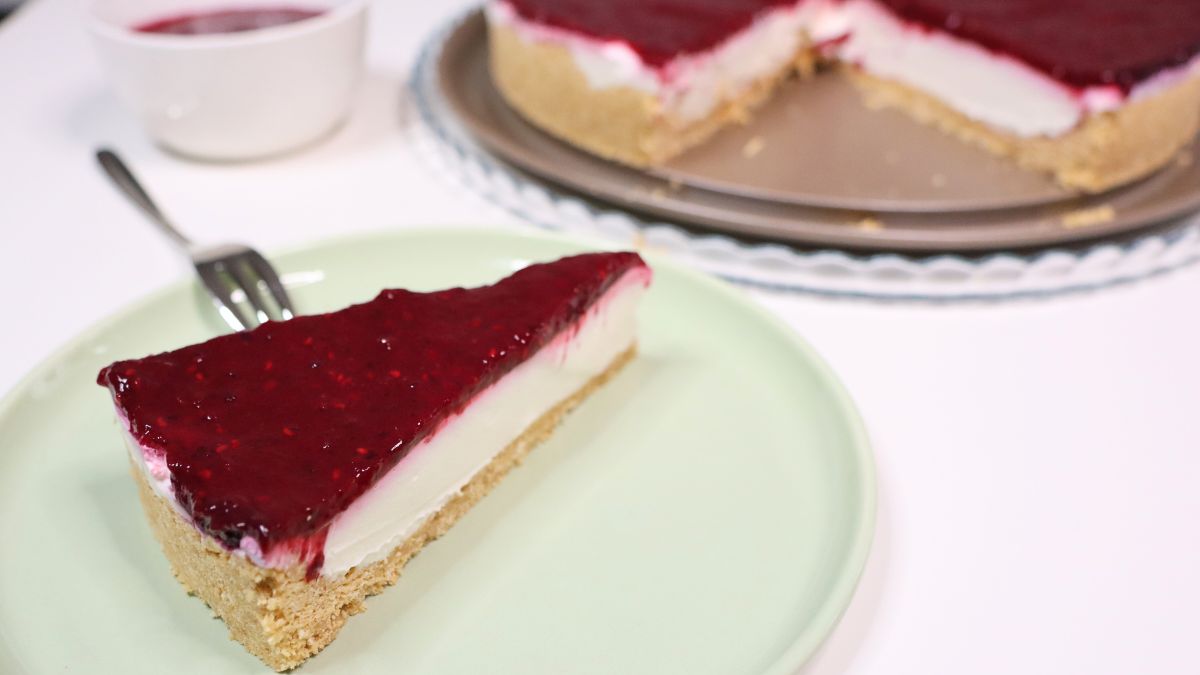

I love this dessert for its fresh, creamy taste that feels light, even after a rich meal. This No-Bake Berry Cheesecake, or as some people call it, Fruits of the Forest Cheesecake, is the perfect sweet treat that’s easy to make and full of flavor. You get a buttery biscuit base, a rich mascarpone filling, and a sweet, tangy berry topping that ties everything together. It’s one of those desserts that impresses everyone without needing to turn on the oven!
Why Will You Love this Recipe?
- No Baking Required: If you’re like me and prefer to keep things simple, you’ll appreciate that this cheesecake doesn’t need any oven time. Just mix, chill, and enjoy—perfect for warmer days when you don’t want to heat up the kitchen.
- A Great Make-Ahead Dessert: You can prepare this cheesecake the day before, and it actually tastes better after a few hours in the fridge. This makes it a stress-free option for gatherings or busy days.
- Versatile and Easy to Customize: You can easily swap out the mixed berries for whatever fruit is in season. Think strawberries, raspberries, or even peaches—this recipe is flexible enough to work with all sorts of toppings.
Recipe Variations
- Try Different Biscuits: While I usually go for crushed graham crackers or digestive biscuits, you could experiment with other types, like Oreos or gingersnaps, for an extra flavor kick.
- Switch Up the Fruit Topping: If you’re not in the mood for berries, you can use fresh peaches, mango, or even a citrus topping for a summery twist.
- Make It a Chocolate Dream: For a richer, more indulgent cheesecake, add some melted chocolate to the cream mixture. You’ll end up with a delicious chocolate version of this no-bake dessert.
Tools You’ll Need
- 9-Inch Round Cake Pan: To easily release the cheesecake once it’s set, you’ll want a pan with a removable bottom. It makes serving so much simpler.
- Immersion Blender: To make a creamy fruit topping.
- An Electric Mixer: To whip up the cheesecake filling, an electric mixer will help you get that smooth, creamy texture in just a few minutes.
- A Rubber Spatula: This will help you spread the cheesecake filling evenly over the base and make sure none of that delicious cream goes to waste.
FAQ
Can I freeze it?
Yes, you can freeze this cheesecake! Just let it set in the fridge first, then wrap it tightly in plastic wrap before freezing. It can last up to 3 months. Thaw it in the fridge overnight before serving.
How long will it last in the fridge?
Stored properly in an airtight container, this cheesecake can last in the fridge for up to 4 days. The longer it chills, the more the flavors meld together, making it even better the next day!
What can I serve with it?
This cheesecake pairs wonderfully with fresh whipped cream, or you could serve it alongside some extra fresh fruit for a light, refreshing contrast.
Is it suitable for every diet?
While it’s naturally gluten-free if you use gluten-free biscuits, this cheesecake is not dairy-free. However, you can easily swap out the mascarpone and cream for plant-based alternatives to make it suitable for a dairy-free diet.
How do I store it?
Keep the cheesecake in the fridge in an airtight container or cover it with plastic wrap. If you’re making it ahead of time, it’s best to wait to add the berry topping until just before serving, so the base doesn’t get soggy.
Other Recipes You’ll Love
- Orange Cheesecake Recipe
- No Bake Pistachio Cheesecake
- Mini Blueberry Cheesecake Tarts
- Strawberry Crunch Cheesecake Tacos
- White Cake with Cheesecake Filling
- Strawberry Crunch Cheesecake Bites
- Philadelphia Eggnog Cheesecake with Gingersnap Crust
- Pumpkin Cheesecake Bars with Shortbread Crust
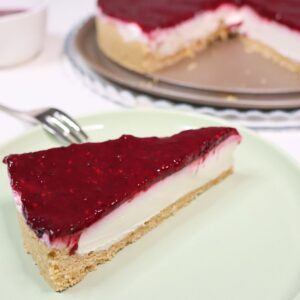
No Bake Berry Cheesecake
Equipment
- 1 9-inch cake pan
- 1 stand mixer
- 1 medium-sized pot
- 1 immersion blender
- 1 set of measuring spoons and cups
- 1 Spatula
Ingredients
For the Base:
- ½ cup softened butter
- 2 cups crushed biscuits like graham crackers
For the Cheesecake Cream:
- 18 ounces mascarpone cheese
- 1 ¾ cups heavy cream
- 2 teaspoons vanilla extract
- ½ cup powdered sugar
For the Berry Topping:
- ½ cup water
- 10 ½ ounces frozen mixed berries
- ⅓ cup water
- 2 tablespoons cornstarch
- 2 tablespoons sugar
Instructions
Prepare the Berry Topping:
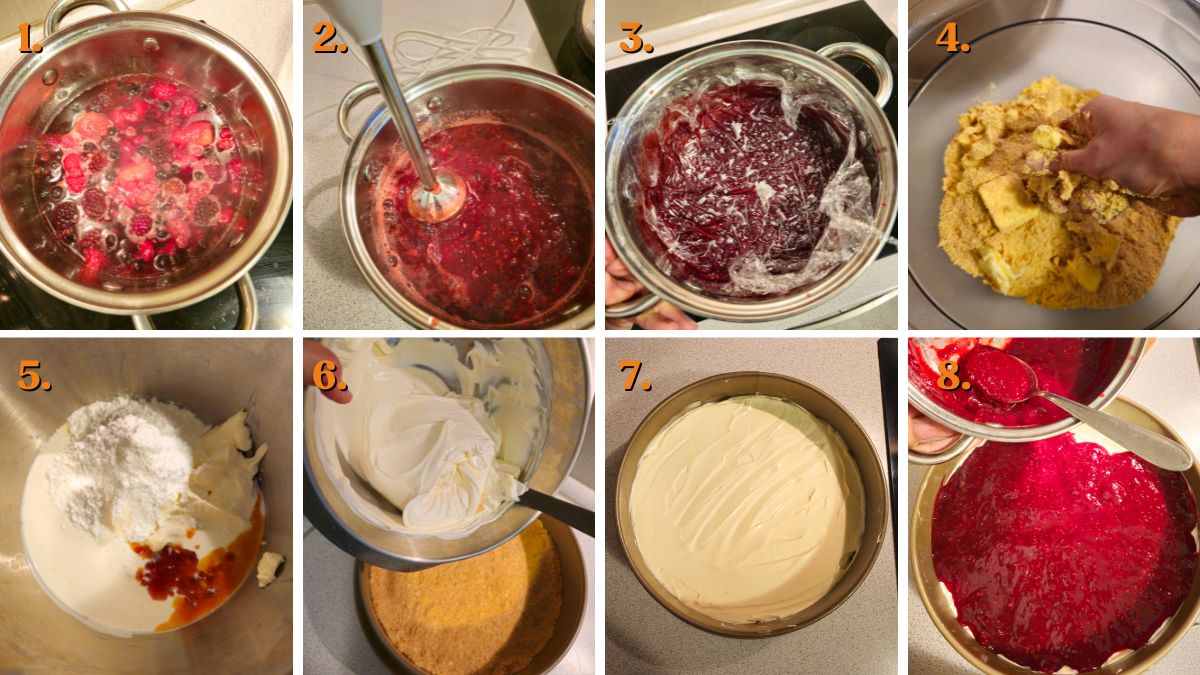
- Start with the berry topping so it has time to cool before adding to the cheesecake. Place the frozen berries and ½ cup of water in a pot and heat over medium until the berries are fully thawed, stirring occasionally.
- Once thawed, remove the pot from the heat and blend the berries with an immersion blender until smooth. Return the pot to the heat, stir in the sugar, and dissolve the cornstarch in ⅓ cup water. Pour the cornstarch mixture into the pot and cook for a few minutes until thickened, similar to hot pudding.
- Cover the berry topping with plastic wrap to prevent a skin from forming on top, and let it cool for about an hour.
Prepare the Base:
- Crush the biscuits into fine crumbs if not using pre-crushed ones. Add the softened butter and mix by hand until well combined. The mixture should resemble wet sand.
- Press the mixture into the bottom of a springform pan, making sure to press it firmly against the base and slightly up the sides. Use your hands or the bottom of a glass to compact the base. Place it in the fridge to chill while you prepare the cream.
Prepare the Cheesecake Cream:
- In a mixing bowl, combine the mascarpone cheese, heavy cream, vanilla extract, and powdered sugar. Beat on high speed for about 3 minutes until the mixture is smooth and has a stable texture.
Assemble the Cheesecake:
- Spread the cheesecake cream evenly over the biscuit base, smoothing the top.
- Take the cooled berry topping and spoon it gently over the cream layer, a little at a time. Don’t pour it all at once; go slowly and layer it evenly. If the topping seems too much, feel free to save some for another use.
- Place the cheesecake in the fridge to set for at least 4 hours. Once set, slice each piece with a clean knife and enjoy!
